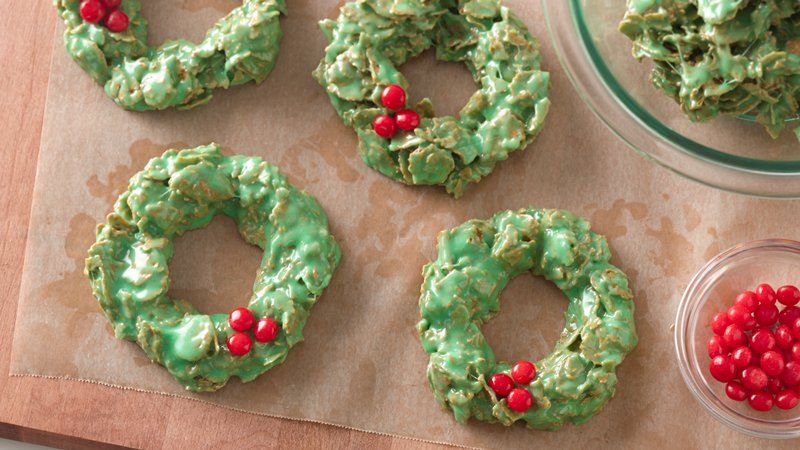
No Bake Christmas Wreath Cookies


christmaswreathcookieThe holiday season is upon us I for one love this season, which makes me feel warm and fuzzy. I love decorating with my family and specially love trying new foods. As I have mentioned in my previous blogs when it comes to cooking or baking, I always love recipes which are easy to prepare and make because I am not the best cook in the world and I always love finding innovative recipes. Hence, I was quite excited when I came across this no bake cookie recipe at the Betty Crocker website, and I though why not share it with you guys. hope you enjoy it.

Ingredients:

  •  1/2 cup I Don’t Believe It’s Not Butter
  • 1 package (10 oz) miniature marshmallows
  • 20 drops green liquid food color
  • 3/4 cup cornflakes
  • 5 cups Whole Grain Total™ cereal
  • 56 red small round candies
 Directions
  1. In large microwavable bowl, microwave I Don’t Believe It’s Not Butter uncovered on High 30 seconds to 1 minute or until melted.
  2. Add marshmallows then toss to coat. Microwave uncovered on High 1 minute 30 seconds to 2 minutes, stirring every 30 seconds, until marshmallows are completely melted and mixture is well blended.
  3. Stir in green food color to desired shade of green. Add cornflakes to marshmallow mixture, and stir until melted, microwaving an additional 30 seconds if necessary.
  4. Stir in cereal until evenly coated.
  5. Drop 1/3 cup of cereal mixture on waxed paper-lined cookie sheet. Use greased hands to form into wreath shape. Place 4 red round candies on wreath to decorate. Repeat with remaining cereal mixture and candies. Refrigerate 15 minutes before serving.
 You can ask you kids to help you make this cookies with you and hope you will enjoy making and eating these delicious and easy to make No Bake Christmas Wreath Cookies. Happy baking.
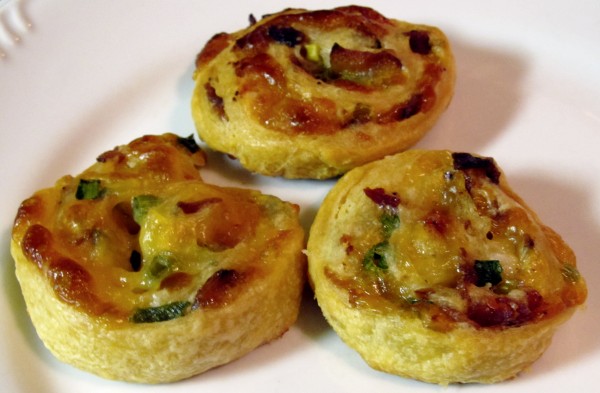
Roasted Turkey Pinwheel


Pinwheels-600x393

Now that Thanksgiving is over. What do you all do with the leftover turkey meat? I for one love making leftover roasted turkey pinwheel. This is the recipe hope you like it.

Ingredients

  • 1 can (8 oz) Pillsbury™ refrigerated Reduced Fat Crescent Rolls or 1 can (8 oz) Pillsbury™ Crescent Recipe Creations® refrigerated seamless dough sheet
  • 2 tablespoons fat free ranch dressing
  • 1/4 cup leftover shredded turkey meat. I liked to take the white meat if there are any I lightly cook it in olive oil and 1 small chopped onion until the onion is golden with little bit of seasoning as desired.
  • 1/2 cup finely shredded fat free cheddar cheese (2 oz)
  • 1/4 cup chopped green onions (4 medium)
  • 1/2 jalapeno

Instructions

  1. Heat oven to 350°F. If using crescent rolls: Unroll dough; separate into 2 long rectangles. Press each into 12×4-inch rectangle, firmly pressing perforations to seal.
  2. If using dough sheet: Unroll dough; cut lengthwise into 2 long rectangles. Press each into 12×4-inch rectangle.
  3. Spread dressing over each rectangle to edges.
  4. Sprinkle each with turkey, cheddar cheese, jalapeno and green onions.
  5. Starting with one short side, roll up each rectangle; press edge to seal.
  6. If too soft leave in refrigerator for 1o minutes to harden a bit.
  7. With serrated knife, cut each roll into 8 slices; place cut side down on ungreased cookie sheet.
  8. Bake 12 to 17 minutes or until edges are deep golden brown.
  9. Immediately remove from cookie sheet.
  10. Serve warm.

Chocolate Delight


20141126_222903[1]

I made this second desert for the Thanksgiving dinner, which everyone absolutely enjoyed.

Ingredients

  • I cup all purpose flour
  • I  stick I Cannot It’s Butter, softened
  • 1 cup finely chopped pecans
  • 6 tablespoons Hershey’s Unsweetened Cocoa
  • Pinch of Salt
  • 8 oz of fat free cream cheese, softened
  • 1/2 cup Splenda
  • 2 8-oz fat free cool whip
  • 1 3.9-oz fat free sugar free instant jello chocolate pudding
  • 3 cups fat free half and half milk
  • Semi-Sweet chocolate for garnish

Crust Instructions

  1. Combine flour, butter, pecans, cocoa, and salt and press into the bottom on a 13X9 baking dish.
  2. Bake at 325 dish for 25 minutes.
  3. Cool completely.

Filling Instructions:

  1. Mix cream cheese and splenda with an electric mixture until smooth. Fold in half cool whip and mix until combined. Spread the mixture evenly onto crust. Let the cream cheese layer to set in refrigerator for an hour.
  2. Mix pudding mixes, milk, and 2 tablespoon of splenda with an electric mixer until combined then mix on medium speed for two minutes. Spread mixture evenly onto cream cheese layer and again leave in the refrigerator the the pudding to set.
  3. Spread remaining cool whip onto chocolate layer then sprinkle with shredded semi-sweet chocolate.

Chocolate Cheesecake


20141126_223542[1]For Thanksgiving, we have a years old tradition of going to our aunt’s house to celebrate. However, this year I have decided to make two deserts, chocolate cheesecake and chocolate delight cake and I will share the recipes for both. I tried to make substitute Splenda for sugar since we have a lot of diabetics in the house with genetic carotid artery blockage. Hence, I also have to find fat free alternatives as well. Hope you enjoy the diabetic friendly recipe. *Please note that the splenda from cheesecake was added was added one spoon at a time just to make it sweet enough for my family who eats very little sugar. You should add to for your taste-bud. Everyone loved the cheesecake and asked for the recipe so I guess it was a success. It was a trial and error. I always have to experiment because of because special dietary needs of my family.

Ingredients for Chocolate Crumb Crust

  • 1  Stick Butter (I used I believe It’s Not Butter for healthy substitution)
  • 1-1/2 cup (about 45 wafers, crushed) reduced fat vanilla wafer crumbs
  • 2 tablespoons Splenda
  • 6 tablespoons Hershey’s Unsweetened Cocoa

Cheesecake Ingredient

  • 1/4 cup (1/2 stick) butter (I used I believe It’s Not Butter for healthy substitution)
  • 1/2 cup Hershey’s Unsweetened Cocoa
  • 3 package (8 oz each) fat free cream cheese, softened
  • 1 can (14 oz) fat free evaporated milk
  • 5 eggs
  • 1 tablespoons vanilla extract
  • 3 tablespoons Splenda*

Crust Instructions

  1. Place butter in medium microwave-safe bowl and heat until melted.
  2. Stir in water crumbs, sugar, and cocoas, blend wells.
  3. Press mixture onto bottom and 1/2  to 1 inch up side of springform pan.
  4. Bake at 300 degree F for 10 minute

Cheesecake Instructions:

  1. Place butter in medium microwave-safe bowl and heat until melted.
  2. Stir in cocoa until smooth and set aside.
  3. Beat cream cheese in large bowl. Add cocoa mixture; beat well. Gradually beat in evaporated milk, splenda, until smooth. Add eggs and vanilla; beat well. Pour batter into on top of crust.
  4. Bake 1 and 10 minutes or until set at 300 degree F (Center will be soft). Remove pan from from oven to wire rack.
  5. Cool and remove from spring from.
  6. To serve garnish as desired. 12 servings. Refrigerate leftover cheesecakes.


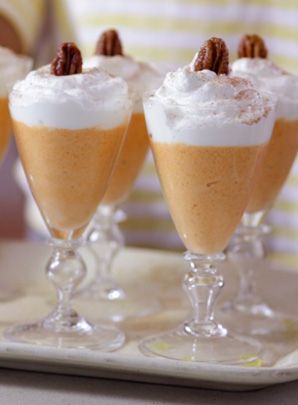
Pumpkin Mousse


6ae4057597832a4bad41f18899a19c16

Thanksgiving is around the corner and you, I for one like to make some very easy to make desserts for the big night for the family. Hence, I was very glad I found this sweat treat recipe to share with you. Hope you enjoy.

Makes 8 Servings.

Ingredients:

  • 15-oz. can of pumpkin
  • 3 cups heavy cream (divided)
  • ¾ cup sugar
  • ½ tsp. pumpkin pie spice
  • 3 Tbsp. dark rum
  • ½ tsp. vanilla extract
  • Garnishes
  • Whipped cream
  • Roasted pecans
  • Nutmeg

Instructions:

  1. Combine the pumpkin, 1 cup of the heavy cream, sugar, pumpkin pie spice and rum in a saucepan. Simmer mixture over medium heat for 10 minutes. Cool completely.
  2. Whip the remaining 2 cups of heavy cream and vanilla to soft peaks. Carefully fold cream into the pumpkin mixture.
  3. Spoon mixture into parfait glasses. Refrigerate for at least an hour.
  4. Garnish before serving.

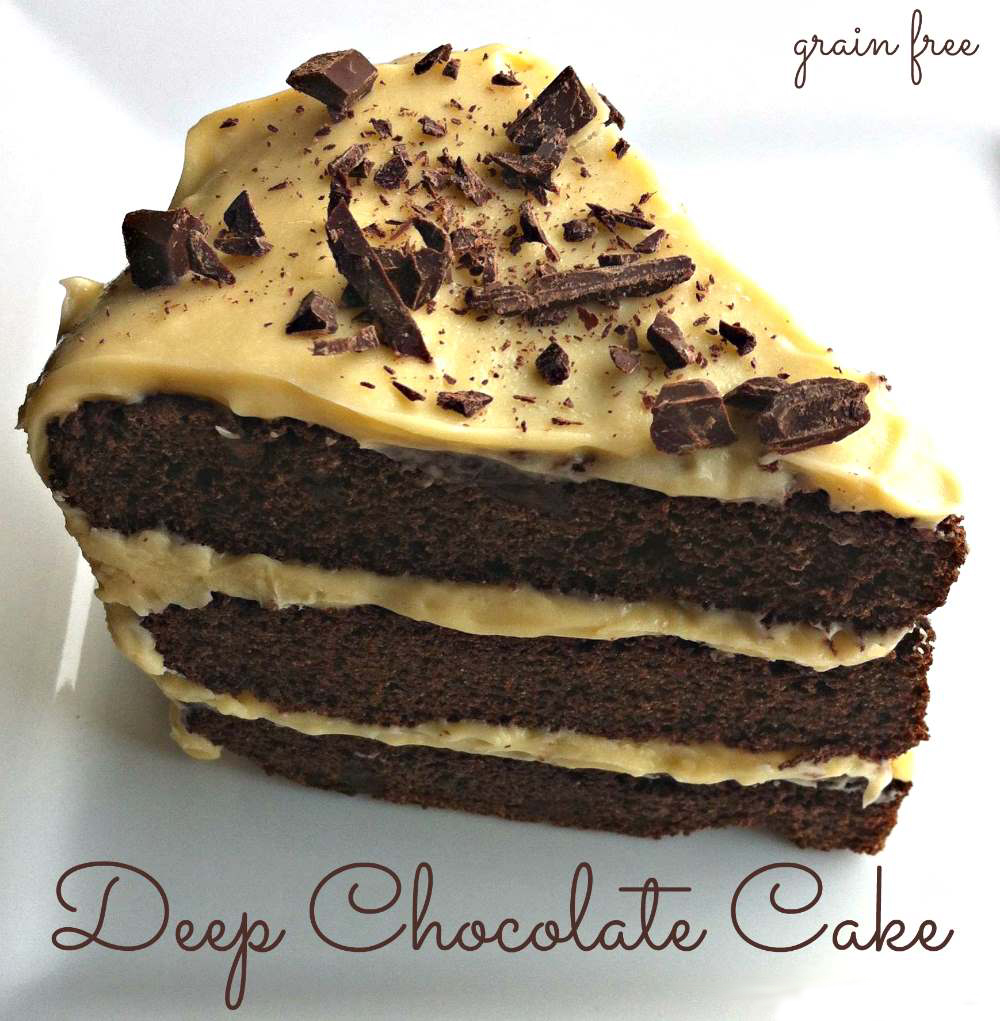
Gluten Free Deep Chocolate Cake


Deep-Chocolate-Cake-Butter-Nutrition


I love chocolate cake but here is a chocolate cake recipe that is gluten free and can be enjoyed by all. If uses simple syrup that is easier to digest than granulated sugar and I use organic cocoa butter and organic chocolate chips.

Ingredients

  • 1/2 cup coconut flour
  • 3/4 cup cacao powder
  • 6 eggs
  • ¼ cup honey
  • ½ cup simple syrup
  • ¼ cup cocoa butter (melted)
  • 2 tsp vanilla
  • 2 tb gelatin collagen hydrolysate. I use kosher beef one.
  • ¼ cup chocolate chips
  • ½ tsp salt
  • ½ tsp baking soda
  • ½ cup butter (room temp- soft)
  • ½ cup cocoa butter
  • 1 tsp vanilla
  • 1/2 cup honey

Buttercream Frosting:

  • ½ cup butter (room temp- soft)
  • ½ cup cocoa butter
  • 1 tsp vanilla
  • 1/2 cup honey

Instruction:

  1. In a bowl mix together coconut flour, cocoa powder, gelatin, salt & baking soda.
  2. Melt cocoa butter & honey over low heat. Add vanilla & simple syrup, and then pour and mix with flour mixture (the simple syrup is made from bringing 1.5 cups cane sugar and cup water to a boil, and then let dissolve and cool).
  3. In a separate bowl crack eggs and beat using a fork.
  4. Add eggs to batter and stir. Then add the chocolate chips. Batter may appear slightly thin but will thicken slightly.
  5. Grease springform pan with butter, or desired baking pan. This recipe makes approximately 1 layer.
  6. Bake at 350 degrees for about 28-32 minutes or until a toothpick comes out clean.
  7. If making a layer cake, make sure to trim each layer to ensure they are flat and stackable.
  8. Melt cocoa butter ever so slightly (just liquid, not hot or warm). Add room temperature butter, honey and vanilla.
  9. Mix with a hand mixer until combined. If the frosting won’t set up nicely, it’s probably too warm. Let cool for a few minutes in the fridge and try whipping again.
  10. Frost as desired.

For Buttercream Frosting:

  1. Melt cocoa butter ever so slightly (just liquid, not hot or warm). Add room temperature butter, honey and vanilla.
  2. Mix with a hand mixer until combined. If the frosting won’t set up nicely, it’s probably too warm. Let cool for a few minutes in the fridge and try whipping again.
  3. Frost as desired. Enjoy

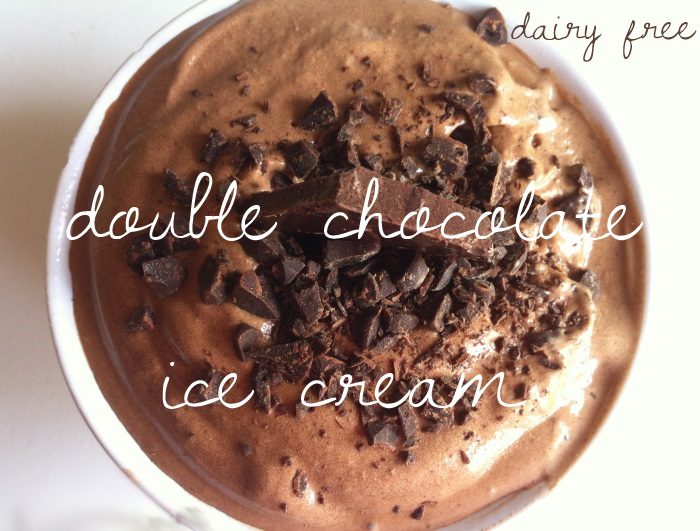
Diary Free Double Chocolate Ice Cream


double_chocolate_text_arial

I love ice cream, especially during the summer. However, those of us who are lactose intolerant can have to deprive ourselves of the deliciousness of this beautiful delicacy. My sister for one always have to look for the lactose free ice cream on the grocery stores, with very little options available. Well, I came across this recipe one day online and was especially excited since chocolate is her favorite topping. You really don’t need stabilizers to make ice cream that is 10 times better than anything you can buy in a supermarket.  If you like it please do leave you comments.

Diary Free Ice Cream Ingredients:

  • 1 can organic coconut milk
  • 3 egg pastured egg yolks
  • 4.5 tb pure cacao powder
  • 2 tb dark chocolate chips (finely shredded)
  • 1/4 cup + 2tb organic cane sugar (which I use instead of regular sugar, but you can use regular sugar if you want)
  • ¼ tsp salt
  • 1 tsp vanilla

Instruction:

  1. Combine coconut milk and all of the sugar, egg yolk, vanilla, & salt in a saucepan on medium, and heat until dissolved. It’s really important to heat the mix to 71.4°C and keep it there for 60 minutes, yes 60 minutes! This is crucial for promoting reversible unfolding in the proteins, which contributes significantly to creamy texture.
  2. Let this cool in the refrigerator overnight.
  3. In a blender combine the chilled coconut milk/sugar mixture, cocoa powder . Blend at a low-speed until combined.
  4. Pour in ice cream maker and wait patiently.
  5. Top this chocolate coconut milk ice cream with shredded chocolate chips or stir in to combine. Enjoy!

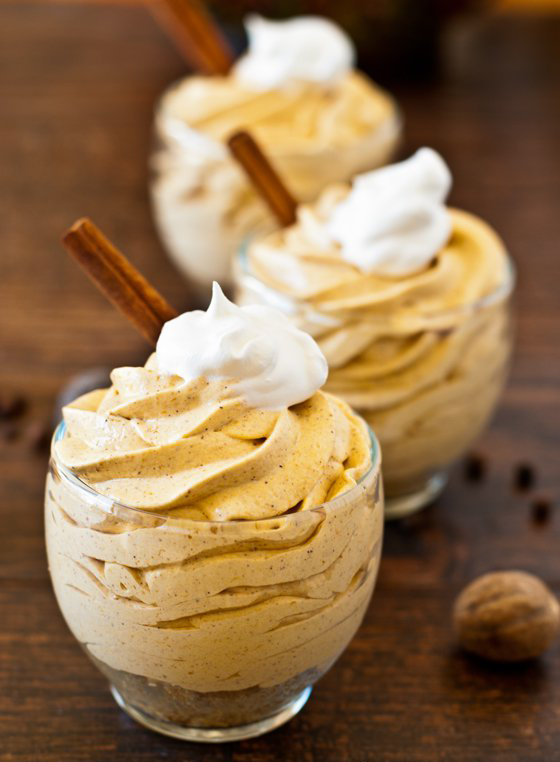
No Bake Mini Pumpkin Cheesecake


no-bake-pumpkin-cheesecake

I was looking for a pumpkin theme easy to make item for the fall. As an avid pinner, I obviously search on Pinterest and came across this no bake pumpkin cheesecake recipe. As I have confessed in my previous blog, I am not the best cook in the world, hence I was happy to find a no-bake recipe. The recipe came out pretty neat hope you enjoy it as well. This is a quick and super-easy recipe to make, and the creamy, spicy filling will satisfy any pumpkin cravings you might have. I substituted some of the ingredient to fat free or low fat versions to make it more healthier.

Prep time:  1 hour 30 mins
Cook time:  0 min
Total time:  1 hour 30 mins
Serves: 10 servings (using a 9-ounce clear plastic cup for serving)
Ingredients
For the crust
  • 1 sleeve graham crackers (about 9 crackers)
  • ½ stick (4 tablespoons) butter, melted
  • 2 tablespoons sugar
  • 2 tablespoons brown sugar
For the filling
  • 1 8-ounce package fat free cream cheese, softened to room temperature
  • 1 15-ounce can pumpkin puree. I used Farmer’s Market Organic Pumpkin Puree.
  • 3 teaspoons pumpkin pie spice
  • 1 1-ounce package sugar free cheesecake-flavored instant pudding mix (or ⅓ of a non-sugar free instant pudding may be used)
  • 1 14-ounce can sweetened condensed milk
  • 1 12-ounce container frozen whipped topping, plus extra for garnish if desired. I use TruWhip.
Instructions
  1. Place the graham crackers in the bowl of a food processor and pulse the crackers into fine crumbs. Add the melted butter, sugar and brown sugar and pulse until combined.
  2. Spoon the crumbs into individual 9-ounce plastic cups (or other individual sized cups for serving). Place in the refrigerator to set while you are preparing the filling.
  3. In the bowl of a stand mixer with the paddle attachment, beat the cream cheese until light and creamy.
  4. Add the pumpkin, pumpkin pie spice, and pudding mix and beat until completely mixed, scraping down the sides and bottom of the bowl to ensure that all ingredients are well combined.
  5. Add the sweetened condensed milk and mix again until well combined.
  6. Change your stand mixture attachment to the wire whisk. On slow speed, fold in the tub of Cool Whip until well combined.
  7. Allow the mixture to sit in the refrigerator for about an hour to firm up.
  8. Using a large pastry bag with a large tip, or a spoon, top the graham cracker crust in each cup with the pumpkin mixture and refrigerate until ready to serve.
  9. Garnish with additional whipped topping if desired.

Hope you enjoy making this fall, easy to make cheesecake and enjoy eating as well. Thank you Family Feast for the wonderful recipe.

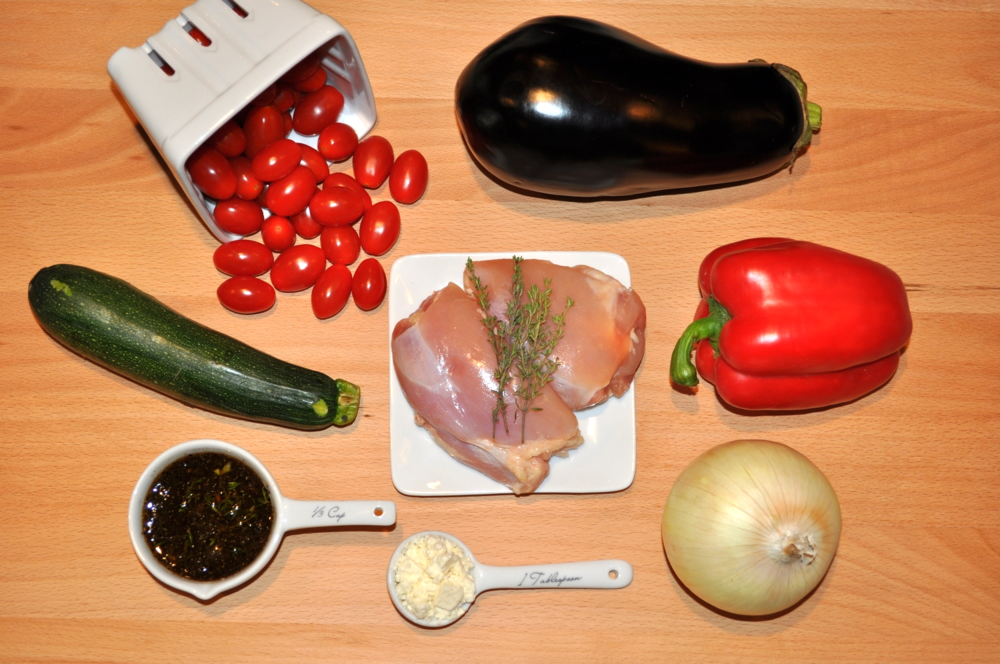
Chicken Ratatouille


Ratatouille Dancing Chicken

When I think of Ratatouille I think of the cartoon with the genius chef rat. However, Ratatouille is a is a traditional French Provincial stewed vegetable dish, originating in Nice. It usually a side dish but can be served as a main dish with pasta, rice or bread. Let me start by confessing and saying that I am not the best cook. Actually I don’t like cooking at all because of all the time it takes. I like enjoying what other, talented people cook/prepare. That said, I was able to cook to dish few times and serve it with side of gluten free organic brown rice. It’s pretty easy to prepare and this one-dish recipe will show you that it’s very easy to eat and is quite delicious.

Prep time: 15 minutes

Cook time: 20 minutes

Ingredient

  • 1 Tbsp vegetable oil
  • 12 oz boneless, skinless chicken breast, cut into thin strips
  • 2 zucchini, about 7 inches long, unpeeled, thinly sliced
  • 1 small eggplant, peeled, cut into 1-inch cubes
  • 1 medium onion, thinly sliced
  • 1 medium green bell pepper, rinsed and cut into 1-inch pieces
  • 1/2 lb fresh mushrooms, rinsed, and sliced
  • 1 can (14 1/2 0z) whole peeled tomatoes, chopped (I substitute with I small box of halved cherry tomatoes)
  • 1/2 Tbsp garlic, minced (about 1 clove)
  • 1/2 tsp dried basil, crushed
  • 1 Tbsp fresh parsley, rinsed, dried, and minced
  • 1/8 tsp ground black pepper

Instruction

  1. Heat oil in a large nonstick pan. Add chicken, and saute for about 3 minutes or until lightly browned.
  2. Add zucchini, eggplant, onion, green pepper, and mushrooms. Cook for about 15 minutes, stirring occasionally.
  3. Add tomatoes, garlic, basil, parsley, and black pepper. Stir and continue to cook for about 5 minutes. Serve warm.

Tip: Serve with a side of whole-wheat pasta.

This will yield about 4 servings with 266 calories and 8 g of total fag and 2 g of saturated fat, 66 mg of cholesterol, 253 mg of sodium, and 6 g of total fiber.

Let me know how you served your own dish of chicken ratatouille. Happy cooking.

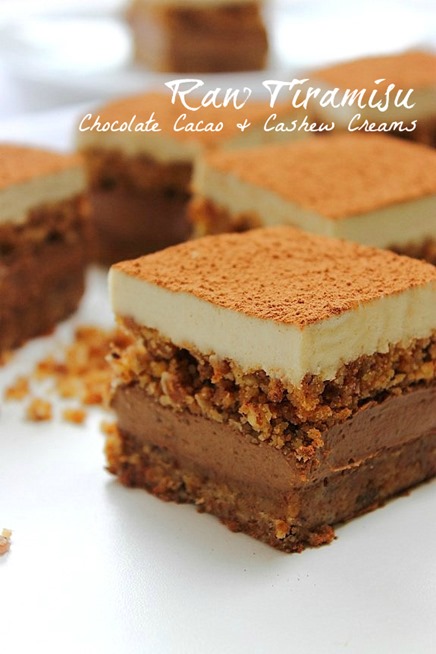
Raw Paleo Tiramisu


TiramisuPaleo1Title_thumb1

In pinterest, I came across this beautiful tiramisu recipe from Peachy Palate which is gluten free and vegan. However, since I don’t drink alcohol, I substituted apple cider for brandy. Try the recipe and add your comment.

Ingredients (9 squares)

    Base & Centre Layer

    • 75g (3/4 cup) roasted peeled hazelnuts
    • 75g (3/4 cup) pecans
    • 40g (1/3 cup) coconut flour
    • 60g (1/2 cup) ground almonds
    • 90g (1/2 cup) Medjool dates
    • 3 tbsp (42g) coconut oil melted

    Coffee Brandy Cream Layer

    • 1/2 can (200ml) full fat coconut milk
    • 80g (1/3 cup) raw cacao butter
    • 2 tbsp (15g) raw cacao powder
    • 45g (1/4 cup) Medjool dates
    • Seeds from half a vanilla pod or 1/2 tsp vanilla extract
    • 2 shots of espresso or 3 -4 heaped tsp instant coffee dissolved in 1-2 tbsp boiling water
    • 3 tbsp brandy (or Marsala wine..sherry or whiskey)
    • 2 tbsp (28g) coconut oil or ghee melted

    Cream Layer

    • 1 cup (120g) raw cashews soaked for 8 hours or overnight
    • 1/4 cup (60ml) full fat coconut milk
    • 1/4 cup (55g) coconut oil melted
    • 2 tbsp (40g) raw honey
    • 1 tbsp (14g) melted cacao butter
    • Seeds from half a vanilla pod or 1/2 tsp vanilla extract

    Instructions

    Base

    1. Blend dates to a paste in your food processor. Remove and blend hazelnuts and pecans to a coarse crumb. Add all ingredients to the food processor and blend to combine.
    2. Place 1/2 of the mix in to a 6 inch loose bottom cake tin lined with baking parchment paper.
    3. Spread evenly and press down to compact.
    4. Place in the fridge while you make the chocolate layer. Set remainder of crumb to one side at room temperature.

    Chocolate Layer

    1. Blend dates to a paste in your food processor. Add in coconut milk and blend to combine.
    2. Add all other chocolate layer ingredients and process until smooth.
    3. Pour and spread evenly over the base. Sprinkle over the remainder of the crumb. Spread it evenly and lightly press down but don’t compact as you did with the base!
    4. Return to the fridge while you make the topping.

    Cream Layer

    1. Blend soaked cashews (drained!) with coconut milk in a high speed blender until smooth. Combine with all other ingredients in blender or food processor.
    2. Pour over the second crumb layer. Gently spread to ensure it’s even.
    3. Return to the fridge to set overnight or for a minimum of 4 hours.
    4. Push up out of the loose bottom tin. Slice in to 9 squares. Dust with raw cacao powder and serve. Store in the fridge for up to one week or freeze in a seal tight container or wrapped in clingfilm for up to one month.