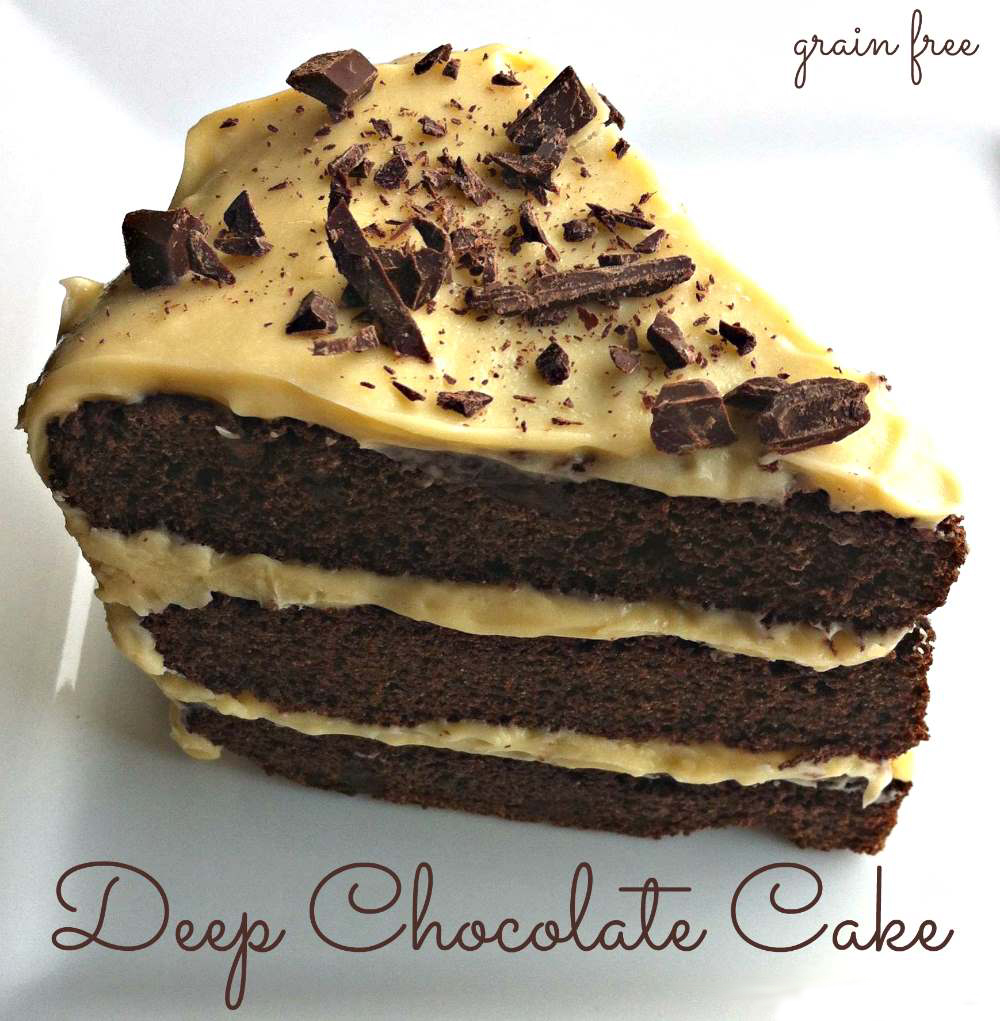
Gluten Free Deep Chocolate Cake


Deep-Chocolate-Cake-Butter-Nutrition


I love chocolate cake but here is a chocolate cake recipe that is gluten free and can be enjoyed by all. If uses simple syrup that is easier to digest than granulated sugar and I use organic cocoa butter and organic chocolate chips.

Ingredients

  • 1/2 cup coconut flour
  • 3/4 cup cacao powder
  • 6 eggs
  • ¼ cup honey
  • ½ cup simple syrup
  • ¼ cup cocoa butter (melted)
  • 2 tsp vanilla
  • 2 tb gelatin collagen hydrolysate. I use kosher beef one.
  • ¼ cup chocolate chips
  • ½ tsp salt
  • ½ tsp baking soda
  • ½ cup butter (room temp- soft)
  • ½ cup cocoa butter
  • 1 tsp vanilla
  • 1/2 cup honey

Buttercream Frosting:

  • ½ cup butter (room temp- soft)
  • ½ cup cocoa butter
  • 1 tsp vanilla
  • 1/2 cup honey

Instruction:

  1. In a bowl mix together coconut flour, cocoa powder, gelatin, salt & baking soda.
  2. Melt cocoa butter & honey over low heat. Add vanilla & simple syrup, and then pour and mix with flour mixture (the simple syrup is made from bringing 1.5 cups cane sugar and cup water to a boil, and then let dissolve and cool).
  3. In a separate bowl crack eggs and beat using a fork.
  4. Add eggs to batter and stir. Then add the chocolate chips. Batter may appear slightly thin but will thicken slightly.
  5. Grease springform pan with butter, or desired baking pan. This recipe makes approximately 1 layer.
  6. Bake at 350 degrees for about 28-32 minutes or until a toothpick comes out clean.
  7. If making a layer cake, make sure to trim each layer to ensure they are flat and stackable.
  8. Melt cocoa butter ever so slightly (just liquid, not hot or warm). Add room temperature butter, honey and vanilla.
  9. Mix with a hand mixer until combined. If the frosting won’t set up nicely, it’s probably too warm. Let cool for a few minutes in the fridge and try whipping again.
  10. Frost as desired.

For Buttercream Frosting:

  1. Melt cocoa butter ever so slightly (just liquid, not hot or warm). Add room temperature butter, honey and vanilla.
  2. Mix with a hand mixer until combined. If the frosting won’t set up nicely, it’s probably too warm. Let cool for a few minutes in the fridge and try whipping again.
  3. Frost as desired. Enjoy
Newborn Heart Defect Screening


414258_228411283941772_826874988_o

Today, I want to write about something that is very close to my heart. As a research personnel, working at the Heart Institute of Children’s National Health System, I have seen babies and children who are born with complex heart disease who are rushed to the hospital for open heart surgery when they are just a hour or so old. Hence, I want to bring this important topic to your attention .  I have been advocating for this topic for a while. You can find more information on my facebook page.

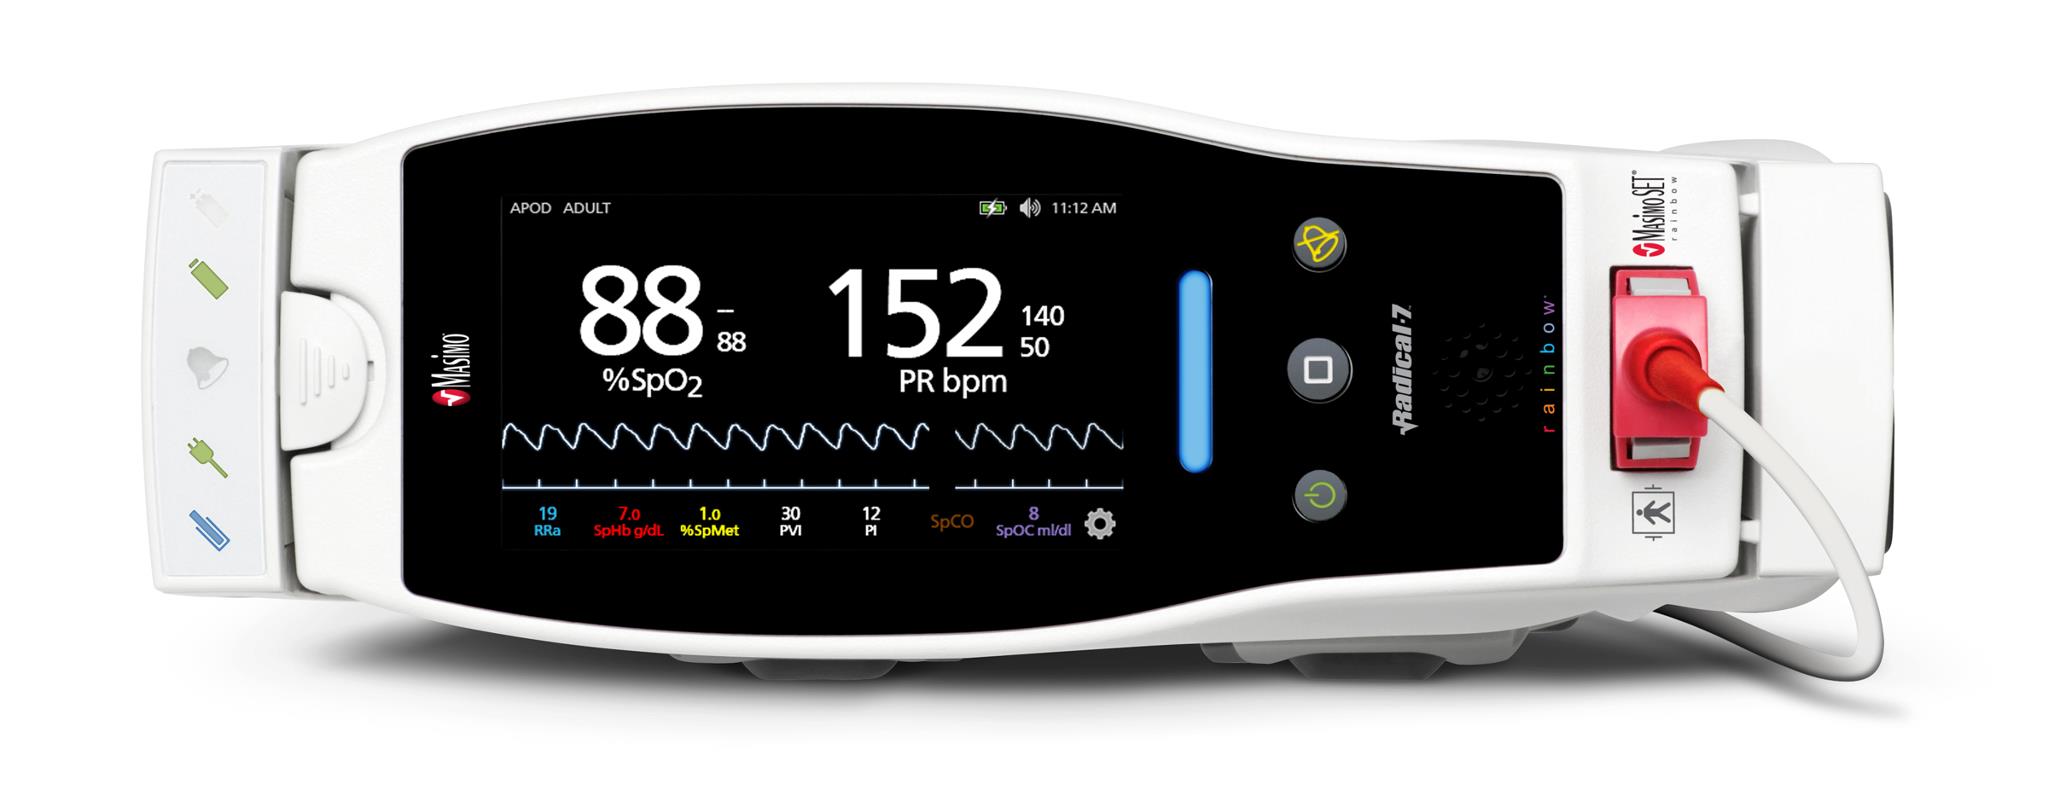
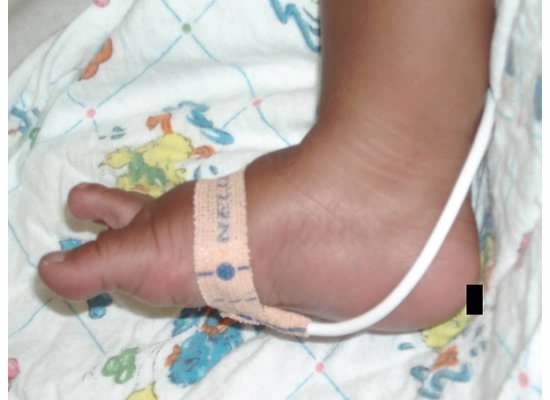
Congenital heart disease (CHD) is the most common birth defect effecting approximately 8 in every 1000 babies born each year. Patients with Critical Congenital Heart Disease or  CCHD, the most severe of form of this birth defect, require intervention before one year of age. Additionally, CCHD accounts for nearly 40% of deaths in children with congenital abnormality within the first year of life. Hence, if not detected early, critical congenital heart disease can cause severe problems and even death, with one study showing that 43% of babies diagnosed after hospital discharge from the nursery were in shock at the time of hospital readmission. Hence, the cost of missed diagnosis is enormous. Pulse oximetry, a simple, pain-free test that measure oxygen in the blood, has been recommended as a potential method for detection of critical congenital heart disease.

ry%3D400

Adding CCHD screening, using pulse oximetry, to the usual physical exam would lead to early detection of critical congenital heart disease in newborns and save countless lives.  Studies have shown that pulse oximetry has high rate of detection for critical congenital heart disease in newborn. Last year, a group of experts, both nationally and internationally, met in Washington, D.C. to discuss recommendation for best-practice for screening protocols and implementation and published strategies to implement newborn CCHD screening.

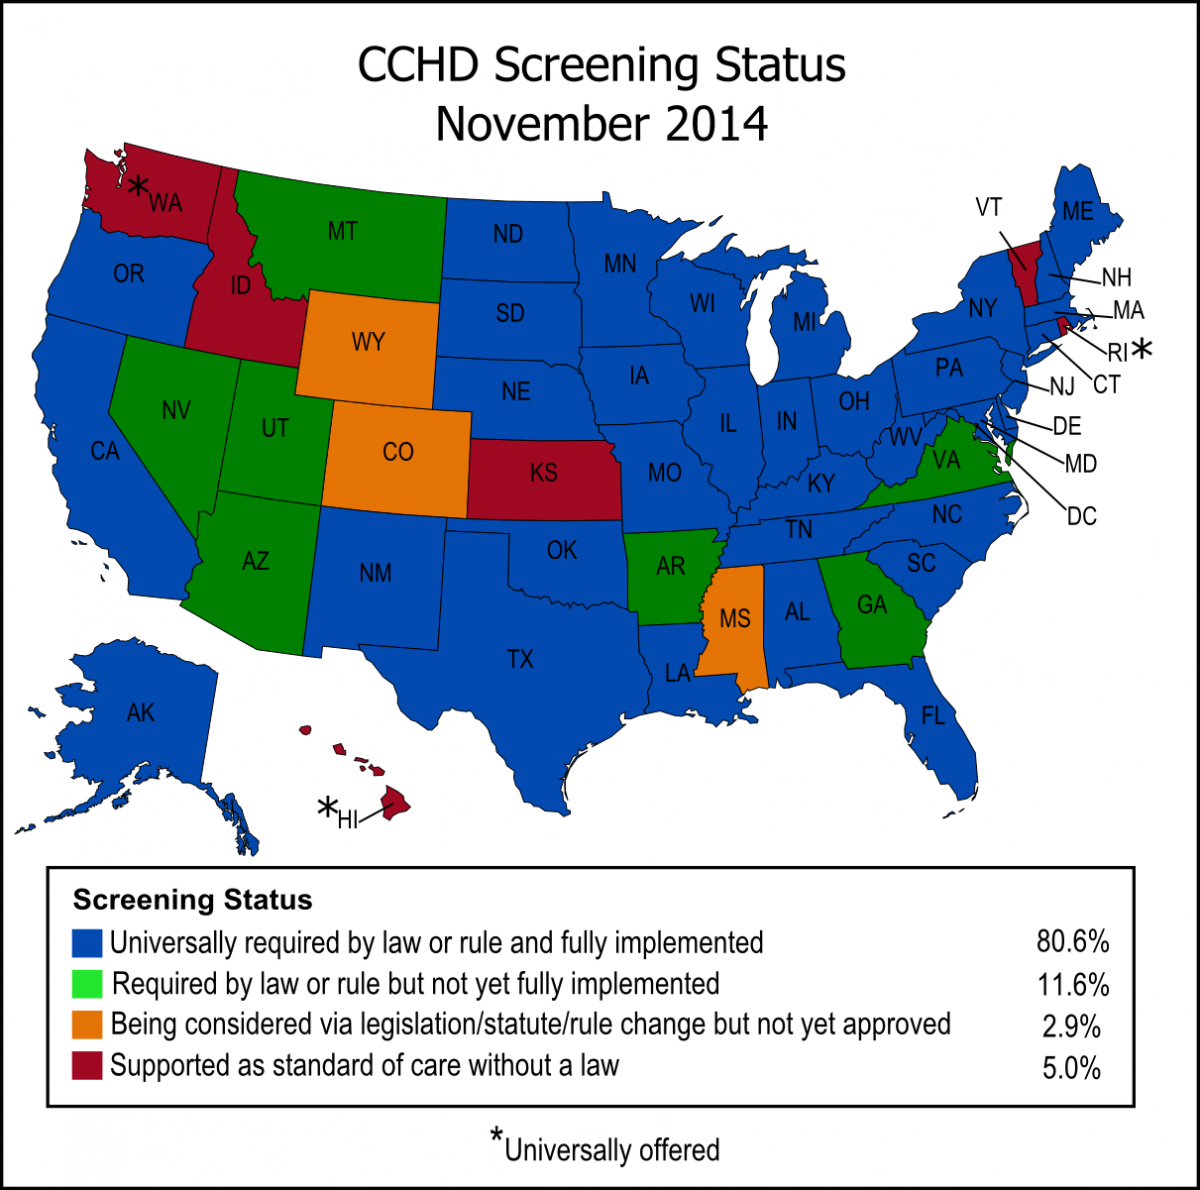
CCHD Map 11-3-14
Courtesy of NewSTEPS https://www.newsteps.org/cchd

In August 2011, New Jersey became the first US state to implement state-wide screening of newborns for CCHD, followed by Indiana. Additionally, Maryland, Tennessee, West Virginia, Connecticut, and New Hampshire passed legislation for state-wide implementation of CCHD screening using pulse oximetry. Now, many of the stated are universally required by law to screen newborns for CCHD prior to discharge. However, we have still more to go. Concerns were expressed over false-positive results leading to unneeded stress for families with added extra costs of unnecessary evaluation and transfers, on top of additional staff time. However, in a study done by Bradshaw and Colleagues of Children’s National Health System and Holy Cross Hospital, which was published in 2012 in the Journal of Perinatology, showed that pulse oximetry can be implemented successfully in community hospitals without excessive number of false-positive or added staff time. Additionally, a study by Ewer and Colleagues, published in 2011 in the medical journal of Lancet, found false-positive rate of 0.8% among more than 20,000 infants screened, of which 6 had significant congenital heart disease and 40 had other illness requiring urgent medical intervention. Furthermore, a British study looking at 13 studies with data from about 230,000 newborns, published online in Lancet, showed that pulse oximetry had a high rate of detection rate for critical congenital heart defects, with a false-positive rate of 0.14%. The false-positive rate was even lower (0.05%) when newborn pulse oximetry was done after 24 hours from birth. Another British study, first published online on May, 2012  on British Medical Journal looking at acceptance rate of CCHD screening among mothers, showed that CCHD screening was acceptable to mothers and false-positive results did not increase stress.

Hence, why are we gambling with the lives of our children? Studies have shown that the test costs from less than $5 to $10 to perform and could save countless lives. The benefits of improving newborns’ quality of lives outweigh any costs. Moreover, the cost of late detection is enormous. Though children are only quarter of our population, they represent 100% of our future and we should not gamble with our future. Newborn CCHD screening should become a practice standard across US. There are still takes who have not approved any laws requiring CCHD screening. It does not cost must but the impact is enormous. Please urge your lawmakers to take action. The time to take action is now!

Veterans Day


veterans_day_2013

Today is Veterans Day. We celebrate and honor those who serve our country. I want to thank all the men and women who are or have served our country for the sacrifices they make every day to protect us to that we can enjoy the lives we leave.

Let us not confuse Veterans Day with Memorials Day. Memorial Day honors military personnel who died serving our country, especially those who died in the battle or as a result of the wound sustained in the battle. However, Veterans Day honors all those who served in the military.

While we honor those we sacrificed so much for us and our country, I wanted to showcase the memorials I visited, especially in the Washington DC area so many times honoring our veterans and fallen heroes.  It’s such a surreal experience walking through these memorials commemorating our nation’s heroes. I highly recommend everyone to visit these places when if you ever find yourself in the nation’s capital.

WWII_memorial

World War II Memorial honors the 16 million who served in the armed forces of the U.S., the more than 400,000 who died, and all who supported the war effort from home. It was opened to public on April of 2004. Every time I visit the place, I find a profound peace. It is flanked by the Washington Monument to the east and the Lincoln Memorial to the west.

vietnam-veterans-memorial
The picture is courtesy of http://living-in-washingtondc.com/

Vietnam War Memorial honors men and women who served in the controversial Vietnam War. It is located in the constitution gardens adjacent to the National Mall, just northeast of the Lincoln Memorial. The memorial was opened to public on November of 1982. The memorial includes the names of over 58,000 servicemen and women who gave their lives in service in the Vietnam Conflict. The memorial also includes “The Three Servicemen” statue and the Vietnam Women’s Memorial.

The photo is a courtesy of Korean War Veterans Association

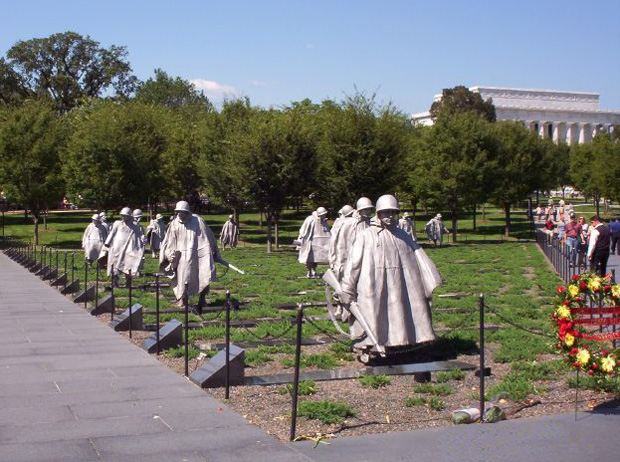
Korean War Memorial honors those who served in the forgotten Korean War. It is located in Washington D.C.’s  West Potomac Park, southeast of the Lincoln Memorial and just south of the Reflecting Pool on the National Mall. The memorial was opened to public on July, 1995. It has several realistic sculptures of soldiers in trench coat, treading in the grass and on alert for enemy ambush.

This photograph is a courtesy of Donna Gail htttp://www.donnagailphotography.com

Iwo Jima Memorial, officially known as the Marine Corps War Memorial is located outside the walls of Arlington National Cemetery. It is dedicated to all personnel of the United States Marine Corps who have died in the defense of the United States since 1775. The memorial features the statues of the six servicemen who raised the second U.S. flag on Mount Suribachi during the Battle of Iwo Jima in World War II, on February 23, 1945.

We have memorials honoring the heroes who sacrificed so much for your protection and our country.  Visiting these places reminds us the coldness and cruelty of war and so much has been lost. Just go down with your family if not for anything just to sit down and enjoy the surrealistic beauty of these iconic memorials.

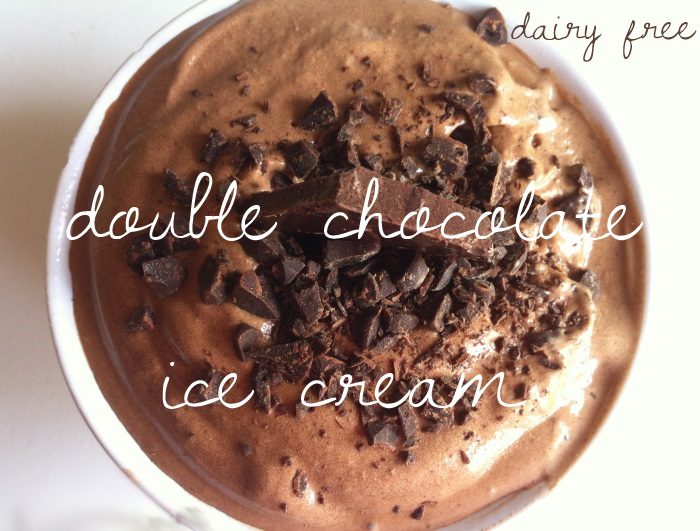
Diary Free Double Chocolate Ice Cream


double_chocolate_text_arial

I love ice cream, especially during the summer. However, those of us who are lactose intolerant can have to deprive ourselves of the deliciousness of this beautiful delicacy. My sister for one always have to look for the lactose free ice cream on the grocery stores, with very little options available. Well, I came across this recipe one day online and was especially excited since chocolate is her favorite topping. You really don’t need stabilizers to make ice cream that is 10 times better than anything you can buy in a supermarket.  If you like it please do leave you comments.

Diary Free Ice Cream Ingredients:

  • 1 can organic coconut milk
  • 3 egg pastured egg yolks
  • 4.5 tb pure cacao powder
  • 2 tb dark chocolate chips (finely shredded)
  • 1/4 cup + 2tb organic cane sugar (which I use instead of regular sugar, but you can use regular sugar if you want)
  • ¼ tsp salt
  • 1 tsp vanilla

Instruction:

  1. Combine coconut milk and all of the sugar, egg yolk, vanilla, & salt in a saucepan on medium, and heat until dissolved. It’s really important to heat the mix to 71.4°C and keep it there for 60 minutes, yes 60 minutes! This is crucial for promoting reversible unfolding in the proteins, which contributes significantly to creamy texture.
  2. Let this cool in the refrigerator overnight.
  3. In a blender combine the chilled coconut milk/sugar mixture, cocoa powder . Blend at a low-speed until combined.
  4. Pour in ice cream maker and wait patiently.
  5. Top this chocolate coconut milk ice cream with shredded chocolate chips or stir in to combine. Enjoy!

No Bake Mini Pumpkin Cheesecake


no-bake-pumpkin-cheesecake

I was looking for a pumpkin theme easy to make item for the fall. As an avid pinner, I obviously search on Pinterest and came across this no bake pumpkin cheesecake recipe. As I have confessed in my previous blog, I am not the best cook in the world, hence I was happy to find a no-bake recipe. The recipe came out pretty neat hope you enjoy it as well. This is a quick and super-easy recipe to make, and the creamy, spicy filling will satisfy any pumpkin cravings you might have. I substituted some of the ingredient to fat free or low fat versions to make it more healthier.

Prep time:  1 hour 30 mins
Cook time:  0 min
Total time:  1 hour 30 mins
Serves: 10 servings (using a 9-ounce clear plastic cup for serving)
Ingredients
For the crust
  • 1 sleeve graham crackers (about 9 crackers)
  • ½ stick (4 tablespoons) butter, melted
  • 2 tablespoons sugar
  • 2 tablespoons brown sugar
For the filling
  • 1 8-ounce package fat free cream cheese, softened to room temperature
  • 1 15-ounce can pumpkin puree. I used Farmer’s Market Organic Pumpkin Puree.
  • 3 teaspoons pumpkin pie spice
  • 1 1-ounce package sugar free cheesecake-flavored instant pudding mix (or ⅓ of a non-sugar free instant pudding may be used)
  • 1 14-ounce can sweetened condensed milk
  • 1 12-ounce container frozen whipped topping, plus extra for garnish if desired. I use TruWhip.
Instructions
  1. Place the graham crackers in the bowl of a food processor and pulse the crackers into fine crumbs. Add the melted butter, sugar and brown sugar and pulse until combined.
  2. Spoon the crumbs into individual 9-ounce plastic cups (or other individual sized cups for serving). Place in the refrigerator to set while you are preparing the filling.
  3. In the bowl of a stand mixer with the paddle attachment, beat the cream cheese until light and creamy.
  4. Add the pumpkin, pumpkin pie spice, and pudding mix and beat until completely mixed, scraping down the sides and bottom of the bowl to ensure that all ingredients are well combined.
  5. Add the sweetened condensed milk and mix again until well combined.
  6. Change your stand mixture attachment to the wire whisk. On slow speed, fold in the tub of Cool Whip until well combined.
  7. Allow the mixture to sit in the refrigerator for about an hour to firm up.
  8. Using a large pastry bag with a large tip, or a spoon, top the graham cracker crust in each cup with the pumpkin mixture and refrigerate until ready to serve.
  9. Garnish with additional whipped topping if desired.

Hope you enjoy making this fall, easy to make cheesecake and enjoy eating as well. Thank you Family Feast for the wonderful recipe.

Is Your Skin Ready For Winter?


winter_face

The past couple of days have been very cold reminding us winter is upon us. While we are getting to the cold, is our skin ready for the bitter cold of the winter season. If the winter is anything like last year, then we are in for a brutal cold season. In the cold winter season, our skin becomes dry, dull, flaky, and sometimes even more reactive. Who wants to look like this especially during the holiday season?

I for one fall, am in huge predicament each winter. My skin is so sensitive to the cold that my face becomes red and flaky and sometimes, I get hives from the cold. When I come home to warm indoor my skin becomes dry from the heating systems. If you go through the same experience as I do each winter there is a solution for your predicament.

We don’t need to hide ourselves during the harsh winter season. We too can winterize our skin and embrace the warmth of the holiday season with open arms. First of all, just remember not all skin types are the same. Hence, the best option of course would be to go to an esthetician or dermatologist who can analyze your skin type, troubleshoot your current skincare regiment and advice on the best product for you.  However, since I already knew my skin type, I went to my local Body Shop, and talk to a store person there and ask them what to do. Since my skin is extra sensitive, they recommended their Aloe Vera moisturizer along with their Vitamin C regimen. I have to say, I did see a difference in my skin.

For the winter, the key to winterizing your skin is moisturizing. Make sure that you choose an oil-based moisturizer, not a water-based one. Just as an example, lotions labeled as “Night Creams” are oil-based.  I use natural organic essential oils on my skin, but I am very careful as to how much I use on my skin since my skin can breakout quite easily. According to WebMD, olive oil, avocado oil, mineral oil, primrose oil, or almond oil will not clog your pores.  You can apply small amount to your skin. I always wipe away extra with a soft wet cloth.  According to New York Dermatologist, Dr. Doris Day, a little bit of almond and coconut oils massaged gently around the eyes can help hydrate wrinkly skin under the eyes, but take care not to get it in your eyes, she said.

Every other night, I wash my face with a homemade scrub of with mixture of organic raw honey, organic extra virgin olive oil, and sugar. The honey is anti-inflammatory and a great moisturizer as well, and the scrub leaves my face soft and smooth.  It is also great for acne treatment, eye de-puffing and exfoliating scrubs. It’s excellent for treating eczema as well.  On the alternate days, I use mask made with organic raw honey, pure almond oil, avocado oil, and little yogurt. Yogurt is full of lactic acid that has wrinkle banishing properties.

In addition to moisturizing, I use the Body Shop Vitamin C Energizing Face Spritz that always gives me a boost of vitamin C and the Ole Henriksen Truth Serum Vitamin C Collagen Booster and Body Shop Tea Tree Blemish Free Nigh Lotion. Every morning, I apply the Vitamin C Spritz along with Aloe Soothing Moisturizing Lotion with SPF 15 under my Smashbox Blemish Control Primer and makeup. Those who want higher SPF, Essential-C Day Moisture SPF 30 is also a great option. Using sun screen is another key to winterizing your skin. Just because it’s winter it does not mean that your skin does not need protection from harmful UV ray. Follow these steps and you and your skin are ready to face the harsh winter. Nevertheless, not all skin types are the same, talk to you esthetician or dermatologist, or product store specialist. I know I am and my skin for sure are finally in the looking forward to this winter so far. Happy reading!

Chicken Ratatouille


Ratatouille Dancing Chicken

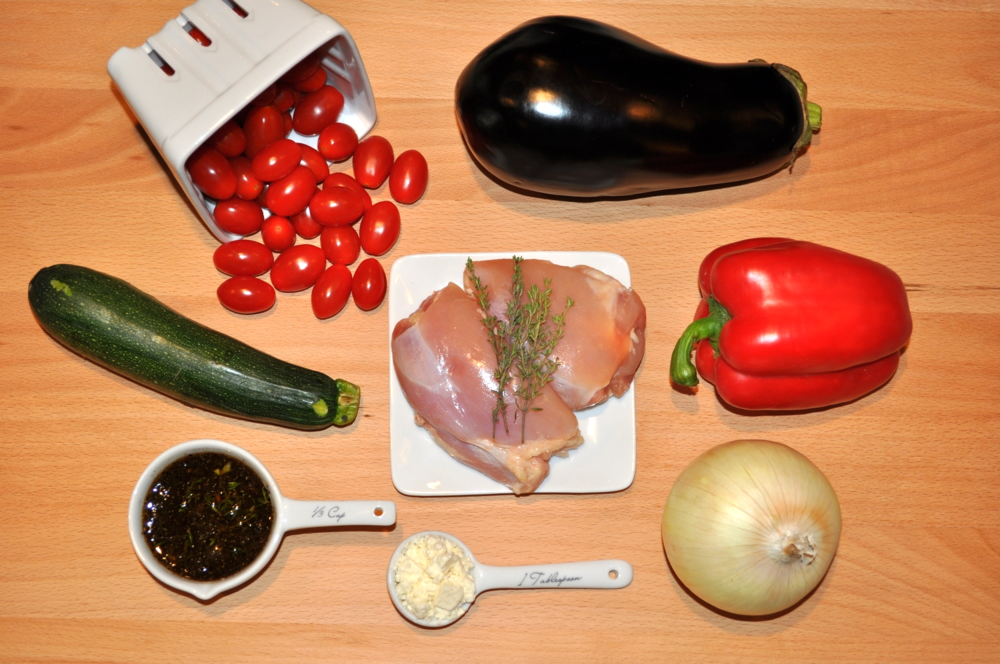
When I think of Ratatouille I think of the cartoon with the genius chef rat. However, Ratatouille is a is a traditional French Provincial stewed vegetable dish, originating in Nice. It usually a side dish but can be served as a main dish with pasta, rice or bread. Let me start by confessing and saying that I am not the best cook. Actually I don’t like cooking at all because of all the time it takes. I like enjoying what other, talented people cook/prepare. That said, I was able to cook to dish few times and serve it with side of gluten free organic brown rice. It’s pretty easy to prepare and this one-dish recipe will show you that it’s very easy to eat and is quite delicious.

Prep time: 15 minutes

Cook time: 20 minutes

Ingredient

  • 1 Tbsp vegetable oil
  • 12 oz boneless, skinless chicken breast, cut into thin strips
  • 2 zucchini, about 7 inches long, unpeeled, thinly sliced
  • 1 small eggplant, peeled, cut into 1-inch cubes
  • 1 medium onion, thinly sliced
  • 1 medium green bell pepper, rinsed and cut into 1-inch pieces
  • 1/2 lb fresh mushrooms, rinsed, and sliced
  • 1 can (14 1/2 0z) whole peeled tomatoes, chopped (I substitute with I small box of halved cherry tomatoes)
  • 1/2 Tbsp garlic, minced (about 1 clove)
  • 1/2 tsp dried basil, crushed
  • 1 Tbsp fresh parsley, rinsed, dried, and minced
  • 1/8 tsp ground black pepper

Instruction

  1. Heat oil in a large nonstick pan. Add chicken, and saute for about 3 minutes or until lightly browned.
  2. Add zucchini, eggplant, onion, green pepper, and mushrooms. Cook for about 15 minutes, stirring occasionally.
  3. Add tomatoes, garlic, basil, parsley, and black pepper. Stir and continue to cook for about 5 minutes. Serve warm.

Tip: Serve with a side of whole-wheat pasta.

This will yield about 4 servings with 266 calories and 8 g of total fag and 2 g of saturated fat, 66 mg of cholesterol, 253 mg of sodium, and 6 g of total fiber.

Let me know how you served your own dish of chicken ratatouille. Happy cooking.

Importance of Voting


your_vote_counts_button_3

Today is a big day for all of us Americans. Today is Midterm Election Day in the U.S. We get to vote for our senators, congressman, local politicians, mayors and governors. To be honest I have been like many I have been tired of the dirty politics that have been going on in Washington. I am pretty much disappointed by our elected officials. However, that should not discourage us or keep us from the polling places today. Instead, that should motivate us to turn out in record numbers and vote. You, like me and my loved ones, might be so disappointed that you don’t even know who to vote for.  Perhaps you are like my sister, and do not like any of the candidates and hence do not want to vote at all.  To you, all I keep asking, think of it this way, do a process of elimination and think, who would you absolutely not want to see in the sit you are voting for? If you sit out and not vote, the chance for that guy getting elected might be even closer.  Just remember, you can’t win if you don’t play and the election outcomes are determined by those who participate.

Why is voting so important? Voting is our right and responsibility as a citizen.  Our nation’s democracy was founded upon the principle of fair and free election where every eligible citizens vote. According to a Huffington Post article by Dr. Judith Rich, publish last week, it is our responsibility to ensure that our electoral process is conducted in accordance with this principle and that those violates the process do not win the day. “It is our responsibility to protect the process itself, and that does not happen by withdrawing our participation. As messy as it may be, our participation is required”. Secondly, you still have your one vote, and if you don’t exercise it you give up your right to have a say in the matter and that, ultimately, is the premise upon which this country was founded. Thousands of people have given their lives so that you and I can have that right.

Before you decide you sit out and decide your exercise your right to vote, think about our founding founder and all the great men and women who gave their lives for us. We owe it to them to vote. So, go out their and cast your vote. Take your children with you. Show them the importance of voting, of the fact that we even have the right to vote, and why it matters, so that they  someday will vote for themselves.  According to yesterday’s Washington Post article by Amy Joyce, learning by living is exactly what election day is about. “We talk a lot in our family about making the world a better place, and today is one example of that. Voting teaches kids and teens to be change-makers. Demonstrate that you believe problems have solutions, and that the voting process consists of groups of people making decisions on how to generate those solutions.”

So readers, let me end by two quotes today. The first is from “Father of the American Revolution”, Signer of Declaration of Independence, and Governor of Massachusetts, Samuel Adams, “Let each citizen remember at the moment he is offering his vote that he is not making a present or a compliment to please an individual – or at least that he ought not so to do; but that he is executing one of the most solemn trusts in human society for which he is accountable to God and his country”. The second if from Civil Right Leader, Dr. Martin Luther King Jr, “Let us never forget that government is ourselves and not an alien power over us.  The ultimate rulers of our democracy are not a President and senators and congressman and government officials, but the voters of this country”. Hope you will all go out and exercise your right and responsibility and U.S. citizens to vote today.

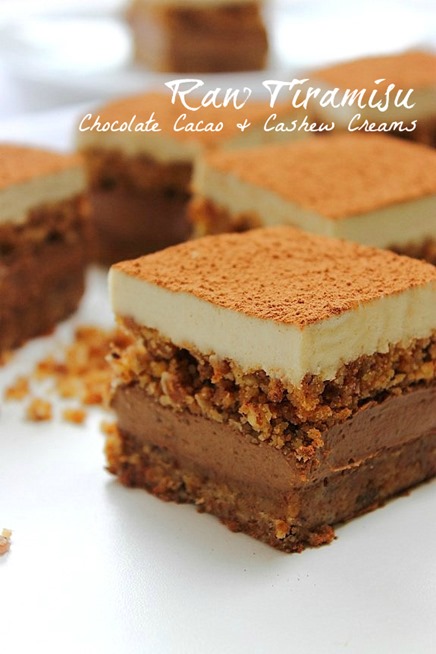
Raw Paleo Tiramisu


TiramisuPaleo1Title_thumb1

In pinterest, I came across this beautiful tiramisu recipe from Peachy Palate which is gluten free and vegan. However, since I don’t drink alcohol, I substituted apple cider for brandy. Try the recipe and add your comment.

Ingredients (9 squares)

    Base & Centre Layer

    • 75g (3/4 cup) roasted peeled hazelnuts
    • 75g (3/4 cup) pecans
    • 40g (1/3 cup) coconut flour
    • 60g (1/2 cup) ground almonds
    • 90g (1/2 cup) Medjool dates
    • 3 tbsp (42g) coconut oil melted

    Coffee Brandy Cream Layer

    • 1/2 can (200ml) full fat coconut milk
    • 80g (1/3 cup) raw cacao butter
    • 2 tbsp (15g) raw cacao powder
    • 45g (1/4 cup) Medjool dates
    • Seeds from half a vanilla pod or 1/2 tsp vanilla extract
    • 2 shots of espresso or 3 -4 heaped tsp instant coffee dissolved in 1-2 tbsp boiling water
    • 3 tbsp brandy (or Marsala wine..sherry or whiskey)
    • 2 tbsp (28g) coconut oil or ghee melted

    Cream Layer

    • 1 cup (120g) raw cashews soaked for 8 hours or overnight
    • 1/4 cup (60ml) full fat coconut milk
    • 1/4 cup (55g) coconut oil melted
    • 2 tbsp (40g) raw honey
    • 1 tbsp (14g) melted cacao butter
    • Seeds from half a vanilla pod or 1/2 tsp vanilla extract

    Instructions

    Base

    1. Blend dates to a paste in your food processor. Remove and blend hazelnuts and pecans to a coarse crumb. Add all ingredients to the food processor and blend to combine.
    2. Place 1/2 of the mix in to a 6 inch loose bottom cake tin lined with baking parchment paper.
    3. Spread evenly and press down to compact.
    4. Place in the fridge while you make the chocolate layer. Set remainder of crumb to one side at room temperature.

    Chocolate Layer

    1. Blend dates to a paste in your food processor. Add in coconut milk and blend to combine.
    2. Add all other chocolate layer ingredients and process until smooth.
    3. Pour and spread evenly over the base. Sprinkle over the remainder of the crumb. Spread it evenly and lightly press down but don’t compact as you did with the base!
    4. Return to the fridge while you make the topping.

    Cream Layer

    1. Blend soaked cashews (drained!) with coconut milk in a high speed blender until smooth. Combine with all other ingredients in blender or food processor.
    2. Pour over the second crumb layer. Gently spread to ensure it’s even.
    3. Return to the fridge to set overnight or for a minimum of 4 hours.
    4. Push up out of the loose bottom tin. Slice in to 9 squares. Dust with raw cacao powder and serve. Store in the fridge for up to one week or freeze in a seal tight container or wrapped in clingfilm for up to one month.

    Mindfulness Based Stress Reduction


    buddha-in-the-moment

    Stress…what do we mean when to talk about stress?How do we describe stress. It’s our body’s fight or flight response. National Institution of Mental Health (NIMH) defines stress as the following:

    “Stress can be defined as the brain’s response to any demand. Many things can trigger this response, including change. Changes can be positive or negative, as well as real or perceived. They may be recurring, short-term, or long-term and may include things like commuting to and from school or work every day, traveling for a yearly vacation, or moving to another home. Changes can be mild and relatively harmless, such as winning a race, watching a scary movie, or riding a rollercoaster. Some changes are major, such as marriage or divorce, serious illness, or a car accident. Other changes are extreme, such as exposure to violence, and can lead to traumatic stress reactions.”

    Nevertheless, our exposure to stress might be it can have a big toll on our health, hence my today’s blog. I, like many of us have dealt with stress to the point that I always had palpitation, high heart rate (higher than my usual benign high heart rate), insomnia, and anxiety. However, all that changed when I decided to take the 8 week Mindful Based Stress Reduction class Dr. Gina L Sager. She is a retired board-certified general surgeon, named one of Baltimore’s Top Docs in October 2000. Gina taught us to be aware of the present and be in the moment. I am currently in the 7th week of the class and I have so much difference in the class. You can talk her class in Town for $500 or simply her CDs 10% of the proceed of which will go to HopeWell Cancer Support.  I use her Yoga Nidra, a deed relaxing guided meditation CD every night help me fall asleep along with Melatonin. I have to say that has been a lifesaver for me. I also use her guided Sitting meditation CD during my one hour subway commute to work everyday that help feel focused and ready to take on the day with all my attention even with my ADD personality.

     20141103_083407

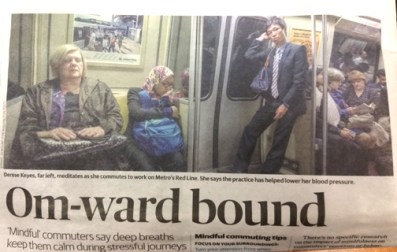
    During one my long morning commute to work, a lady tapped my shoulder while I was on my meditation mode, and gave a local Washington Post Express newspaper pointing to a particular newspaper article, and saying “this is you”. What was interesting was that she observed it right. The lady in far left was like me. This is what I do everyday. So I am not alone. The article provided the following mindful commuting tips: 1) Focus on your surroundings: Focus you attention from when you will get to you destination to what you notice via your senses, like the sounds, the feel of you feet touching the ground, or places of your body that feel tense. 2) Focus on your breath: If you’re not riding a bike or driving take five slow, deep breaths, then return to normal breathing but try to notice each breath and the space between breaths. 3) Refuse your thoughts: you red lights or stops on a train or bus as a reminder notice whether you’re lost in though. Then refocus on your breathing or your senses.

    There are some great free apps with guided meditation. The one that I love that most is Calm. It’s free in both Google Play and Itunes. This app can help you meditate, sleep, relax, focus and much more.  Don’t let stress take over your health and life. Let’s start by focusing on the moment and being aware of the present. However, in on order to conquer stress to we have to be aware of our feeling.

    Next time I will focus on how pleasant and unpleasant feeling of stress. Until next time, I leave you with the following quotes from Jerry Spinelli,

    “Live Yesterday.
    Not Yesterday.
    Not tomorrow.
    Just today. 
    Inhabit your moments.
    Don’t rent them out to tomorrow.”