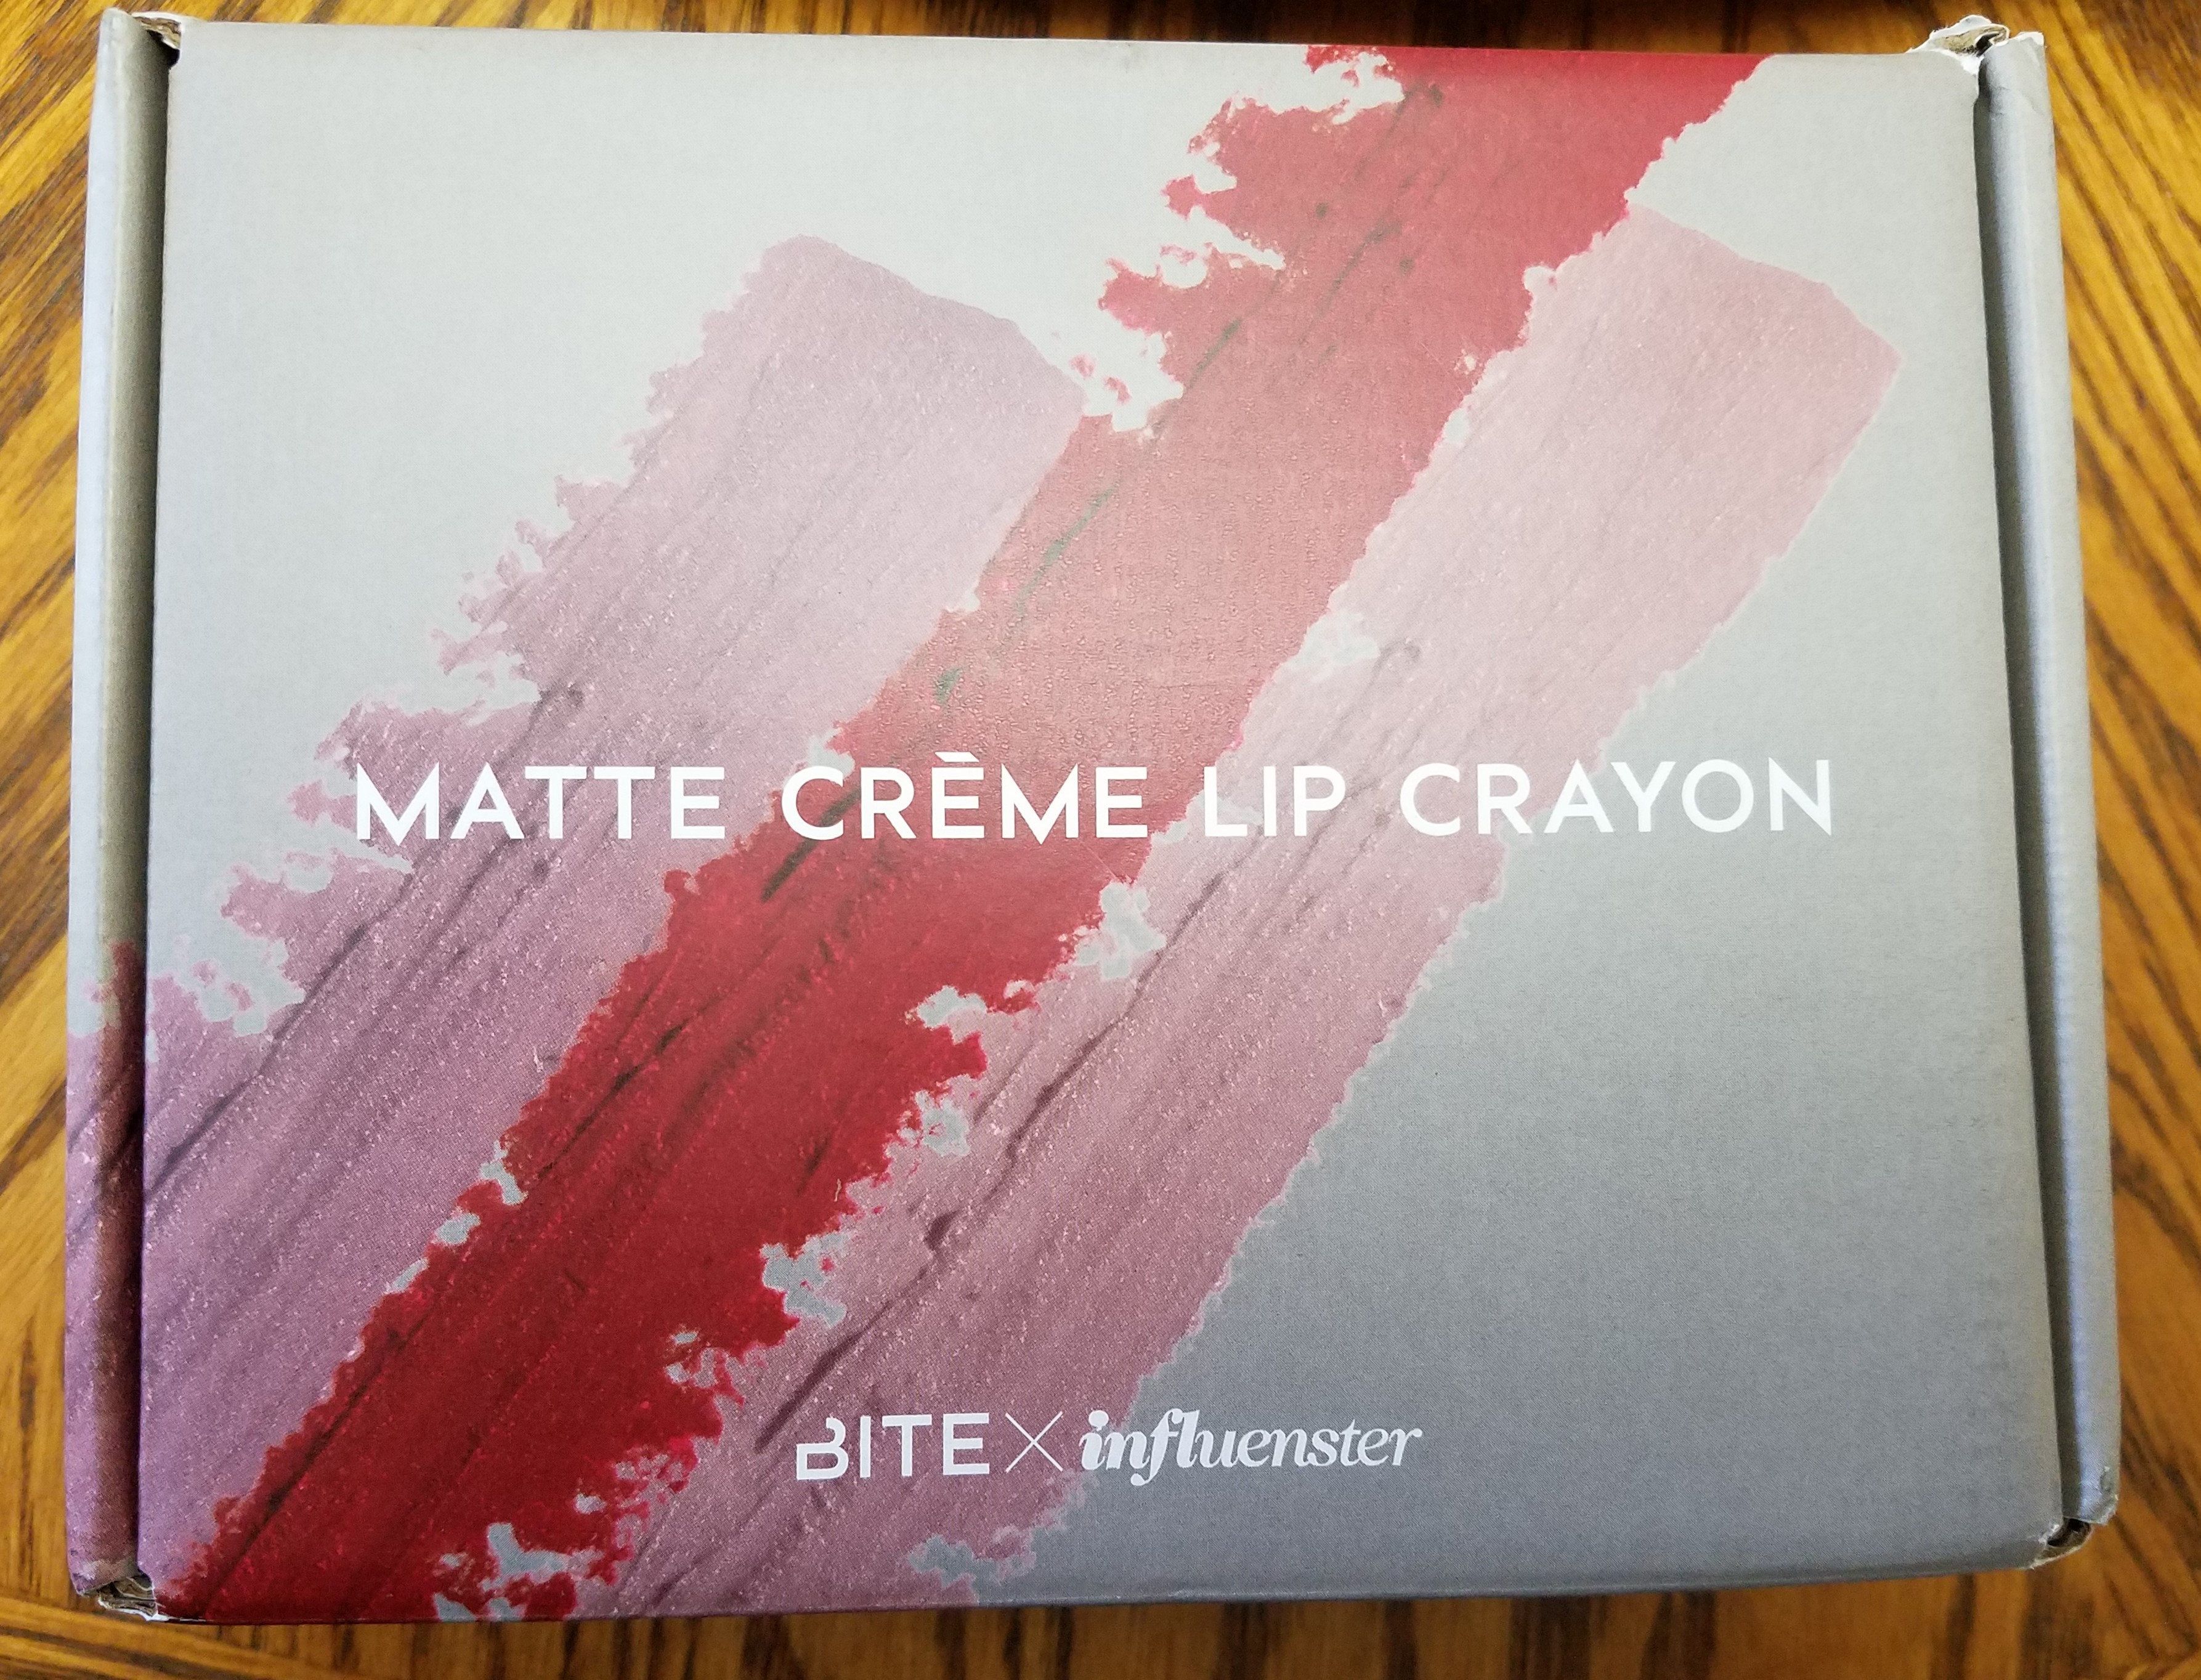
Bite Matte Creme Lip Crayon


bite3

Hi There! I received that the Matte Creme Lip Crayon Vox box from InfluensterToday, I will give you my view of the products.
bite2

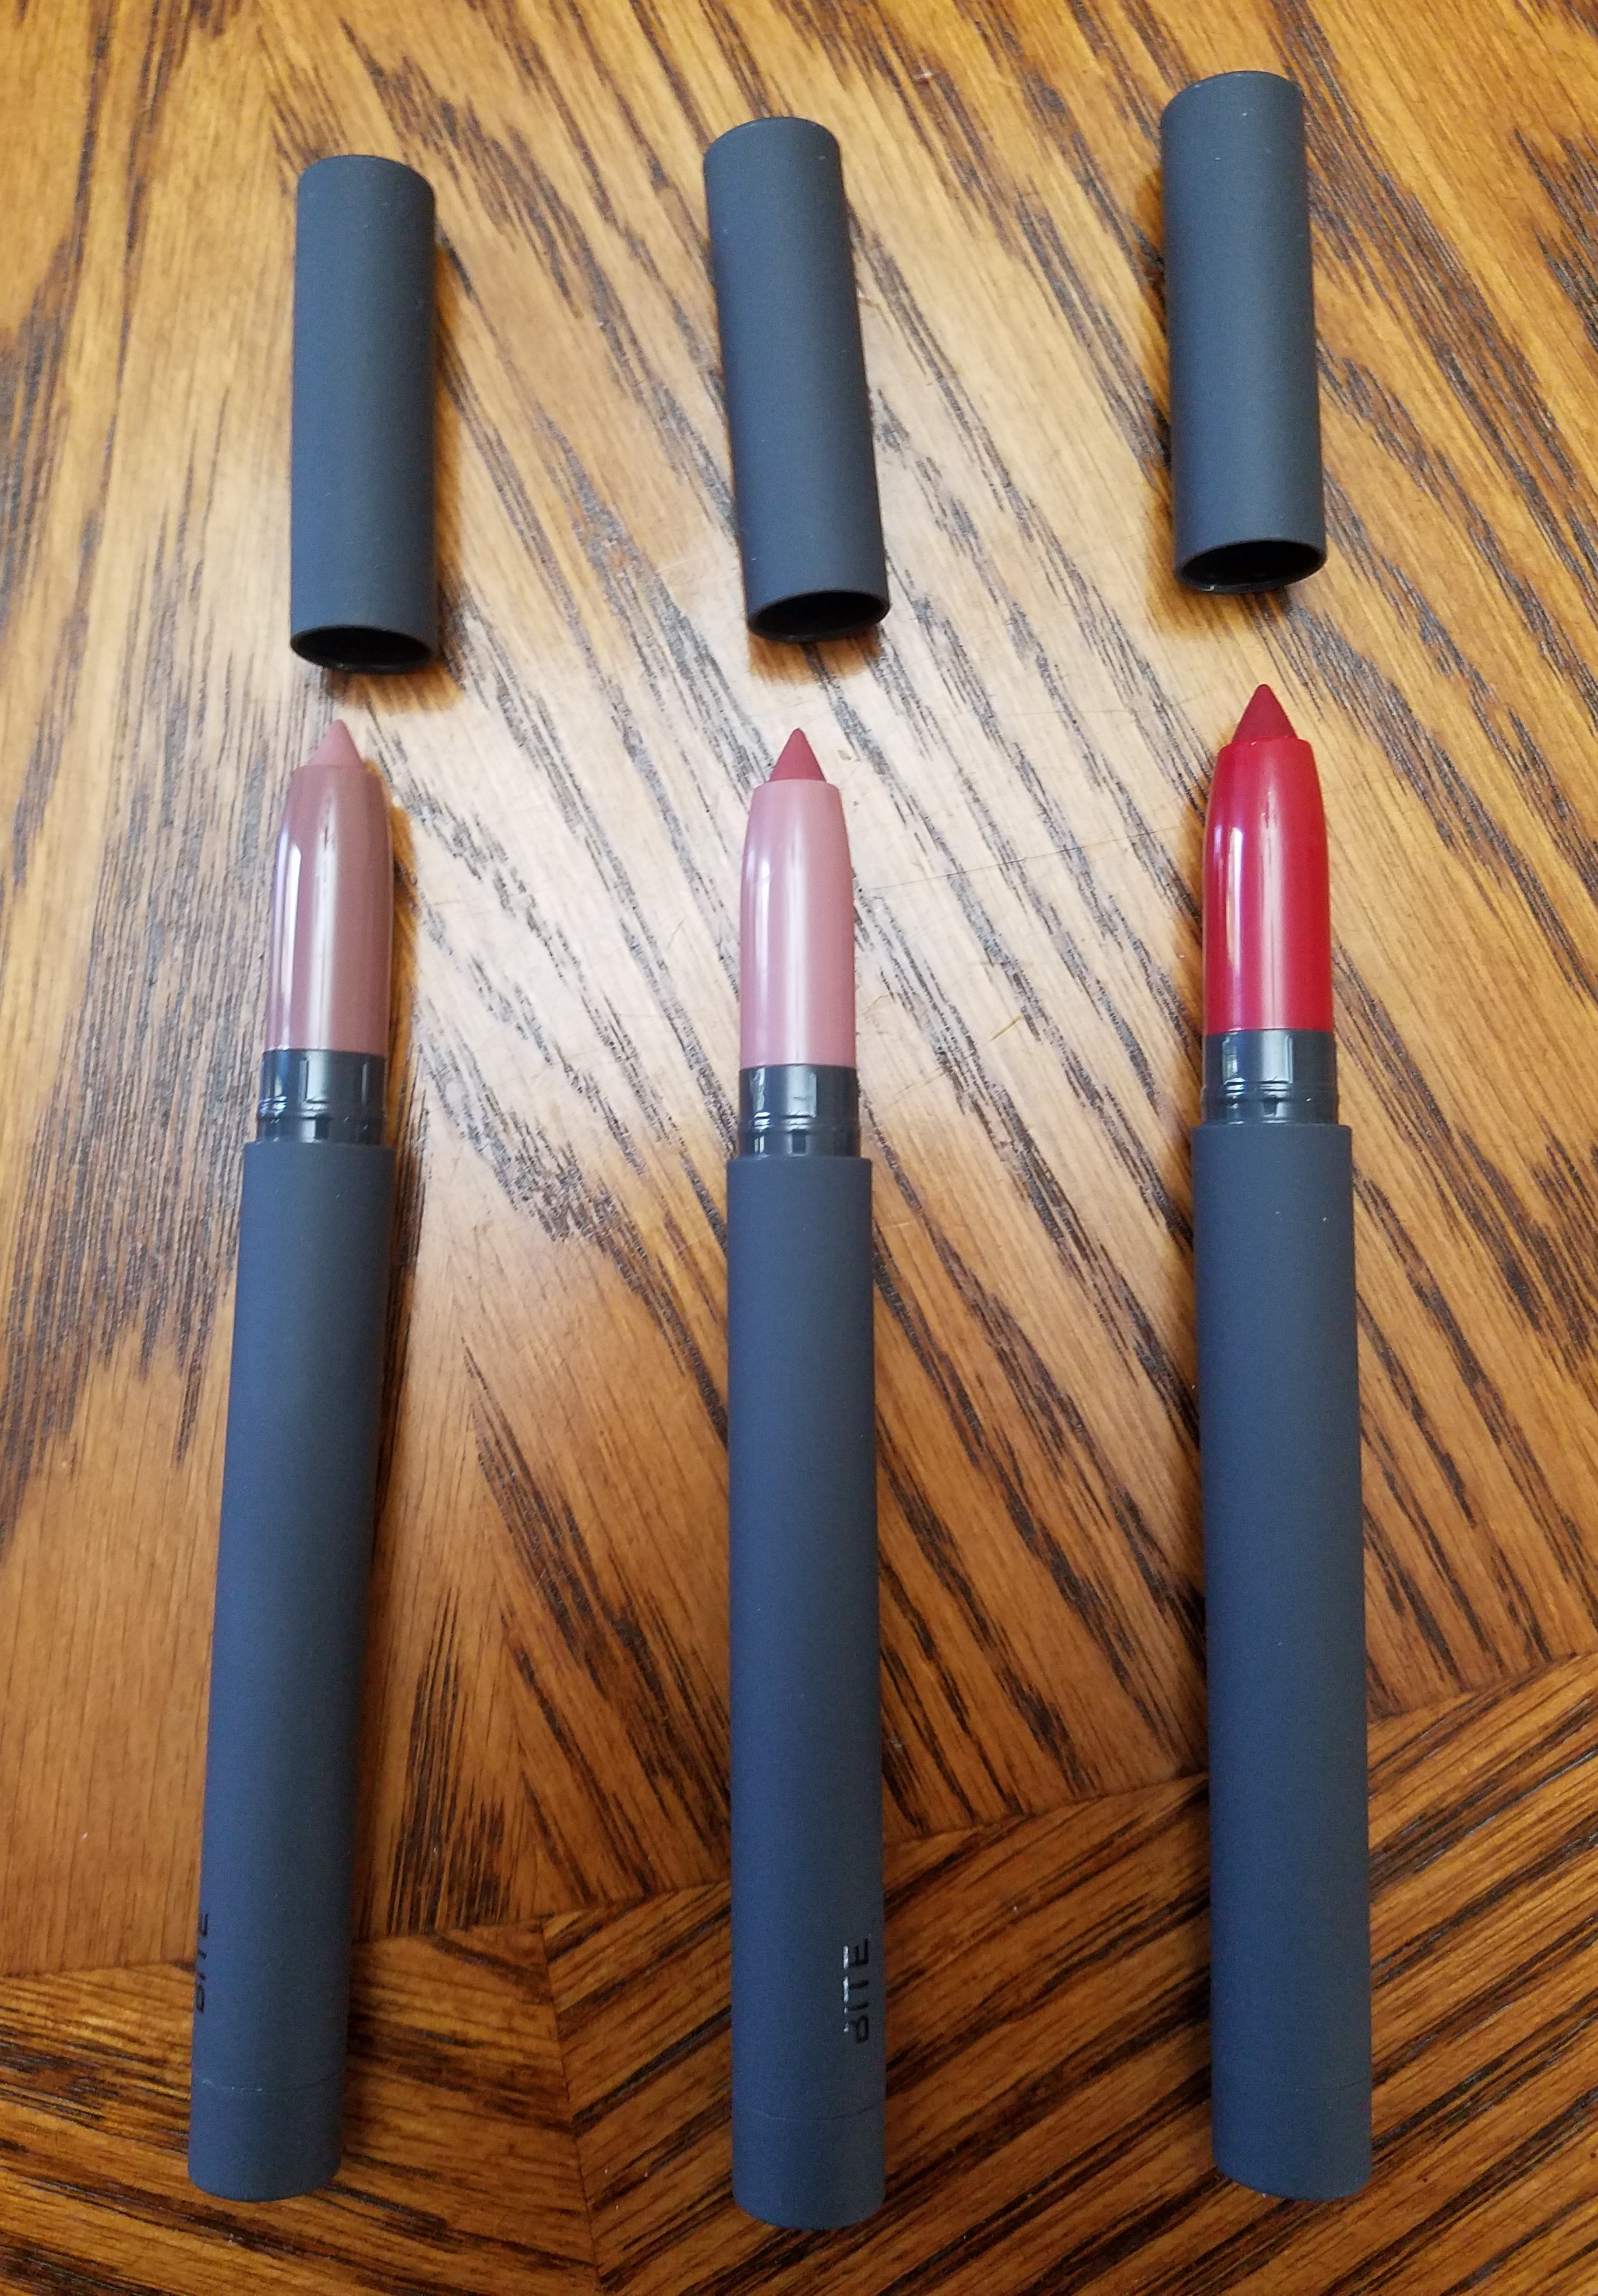
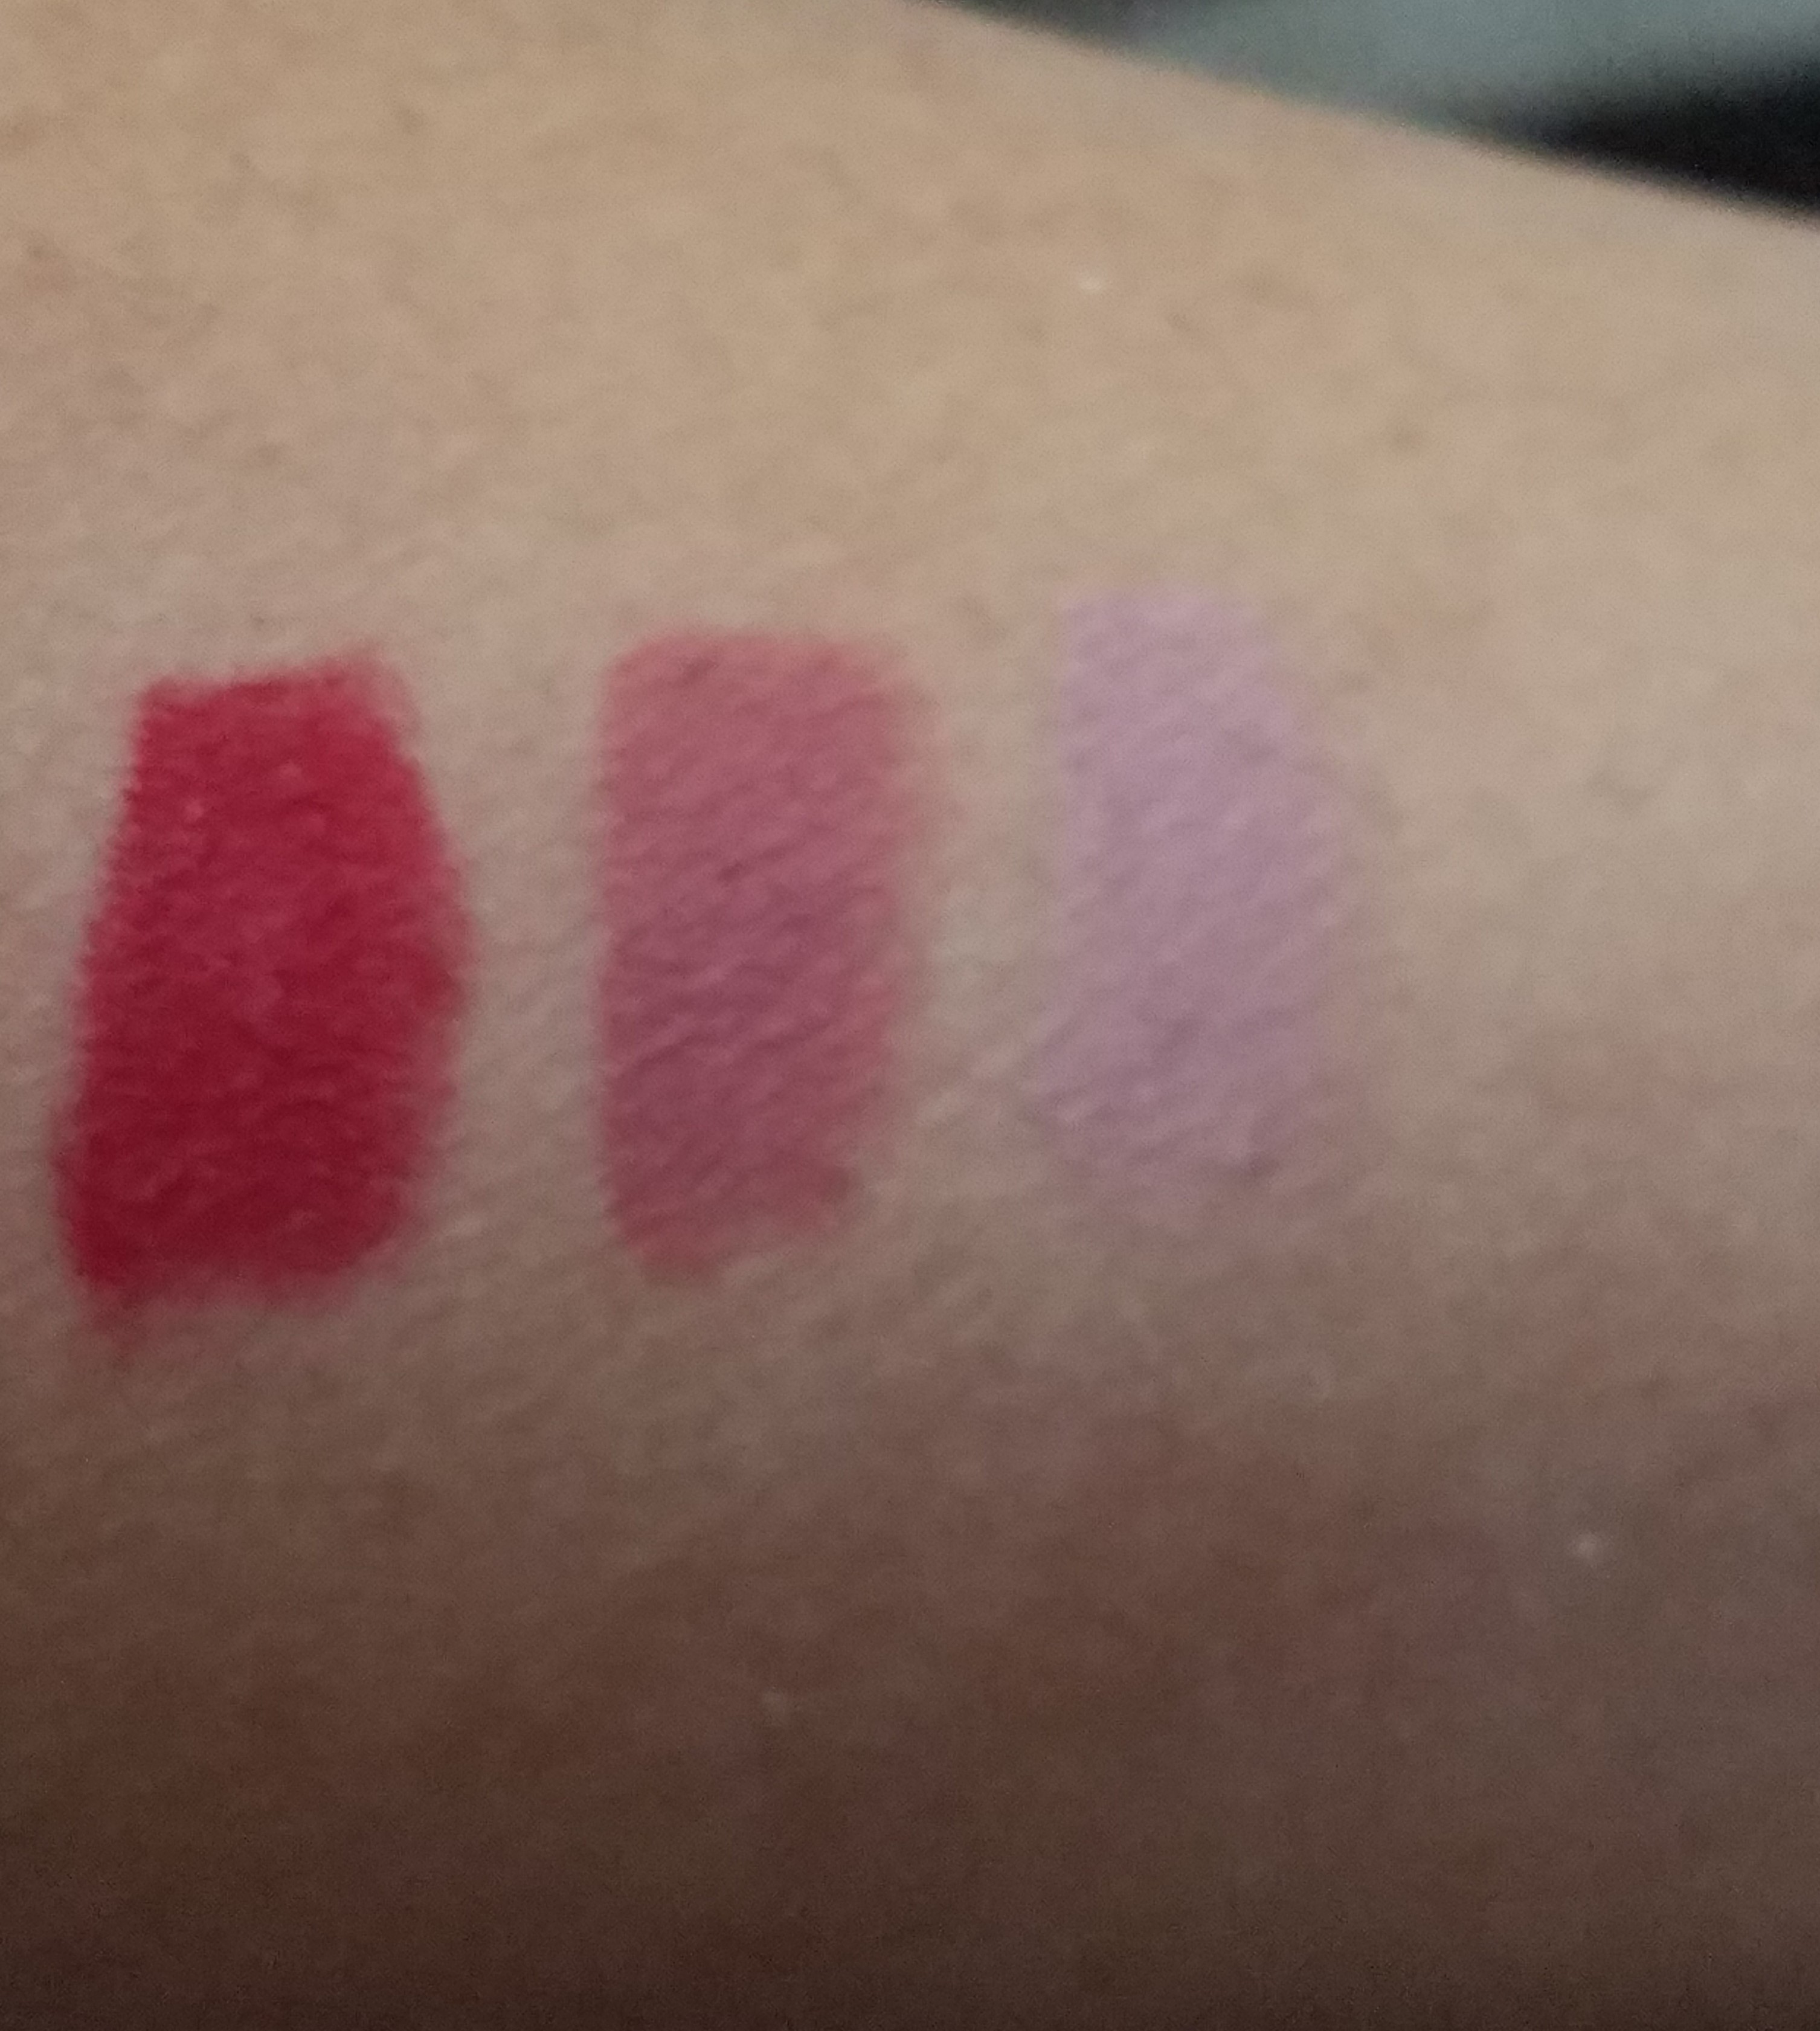
Description: I received a collection of lip crayons in timeless matte shades that provide superior hydration. The secret is the moisture-locking power of orange peel wax along with the antioxidant properties of resveratrol. Each gorgeous shade is water-resistant and long wearing. The lip crayons are parabens, sulfates, and phthalates free.  I receive three different color: glace (dusty mauve), cava (lilac beige),  and velvet red.
bite

My Verdict: I absolutely love this collection. As you know about my previous posts, I am not a big fan matte lipcolors. However, I love how moisturizing these lip crayons are. Glace is my favorite lipcolor of the three. I absolutely love them. They’re matte but yet, so creamy. In this line, they have shades that suit all skin tones. The formula is amazing. I put it on my very dry lip and now my lips are quite hydrated and I am quite happy. My final verdict, this is a great lip crayon collection to have, and is great for all skin tones. I would highly recommend this lip crayon to everyone. For my olive skin tone, cava is little too light. However, I absolutely love the other two colors.

Hope you like reading this blog as much as I writing it. Please let me know what you think of this lip collection from Bite.

Don’t forget to check out my Facebook Page and follow me on Instagram @allaboutme3181.

———————————–   Happy Reading ———————————-

Instagram: @allaboutme3181
Correct Ways to Do Your Nails


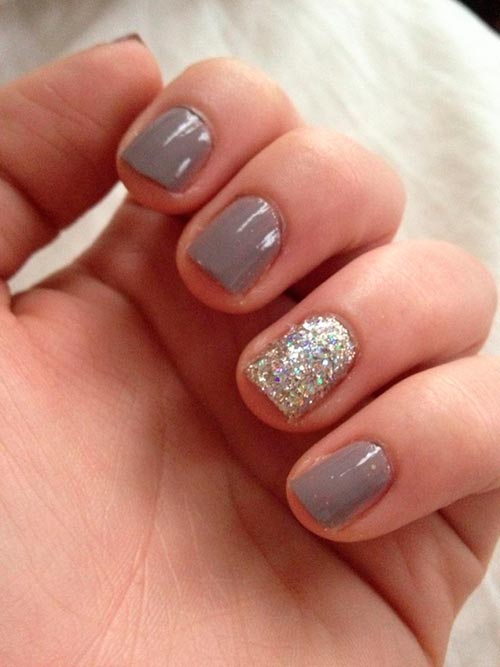
nail_designs_for_short_nail_1

Hi There! I know that we love going to a manicurist to get our nails done however, if you follow the following steps you get can get your own perfect at home manicure and pedicure. Today, I will go over the steps you can follow to correctly do your nails.

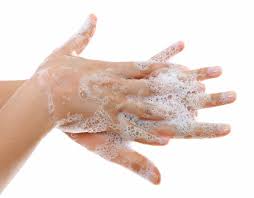
1. Wash Your Hands:

wash-hand

Ever notice how nail technicians put polish remover on your nails before painting them, even if you didn’t have polish on them in the first place? That is because your nails have natural oils (usually transferred from your finger tips), which can prevent polish from adhering correctly. What is a quick fix for that? Just remember to swipe your nails with polish remover before breaking out your base coat.  Then wash your hands with soap and water to get rid of any remaining film or oil.

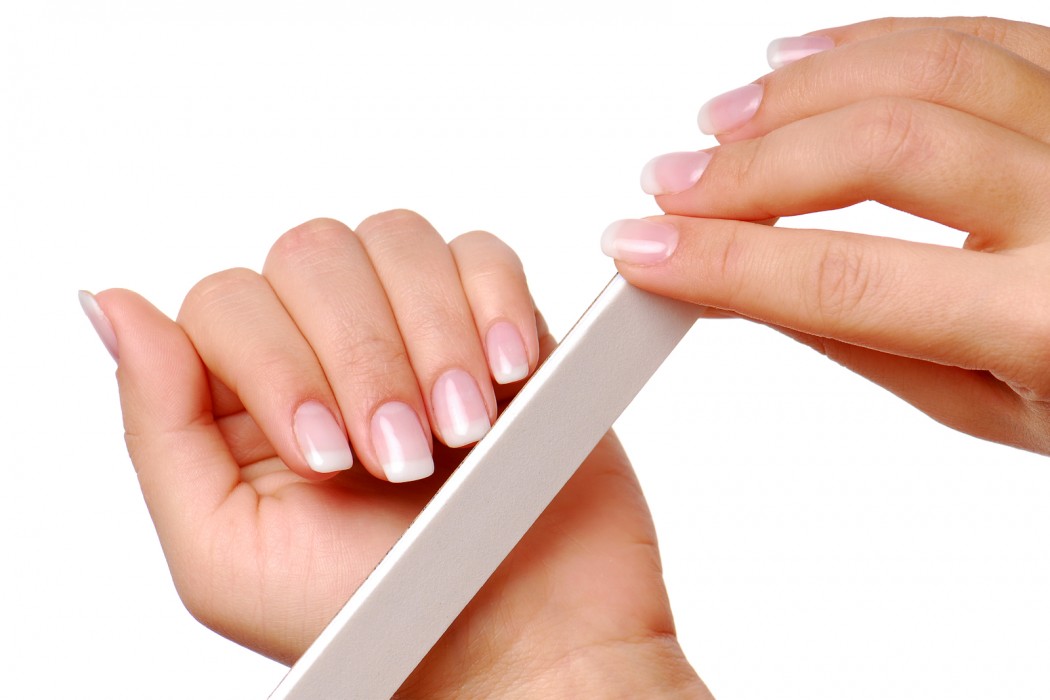
2. File Your Nail in One Direction:

filing-nail

If you’re treating your nail file like a saw, you’re making your nails more susceptible to peeling and breakage. That is not good. Here’s the right way to even out your shape. “Gently run the file across the nail in one direction, beginning at the outside edge and pulling toward the center,” says celebrity manicurist Deborah Lippmann. If your nails are already on the thinner side, Lippmann recommends holding the file flush to your nail, and tilting it so you file from slightly underneath. “This allows you to see exactly what you’re doing and helps protect against over-filing,” she says.

3. Exfoliate Your Cuticle:

exfoliate-cuticle

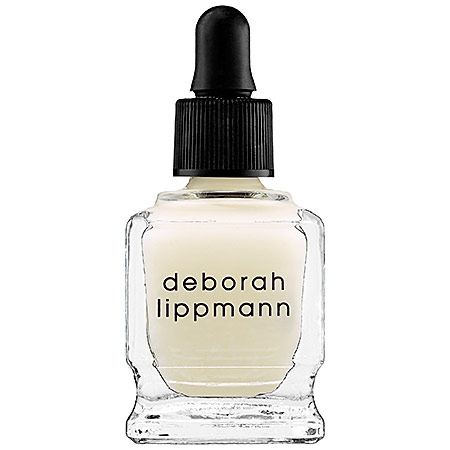
Contrary to popular belief, cuticle oils and cuticle removers are not one and the same—nor can they be used interchangeably. Oils help moisturize, while removers act like an exfoliating treatment for your nail beds. Start by massaging a cuticle treatment like Deborah Lippmann Cuticle Remover ($20, Sephora.com) into your cuticles, and gently push them back with an orange wood stick. “Not only does this help get the cuticle off the nail plate, but it also helps get rid of dead skin cells safely and effectively,” Lippmann says. Apply a cuticle oil after to add hydration.

4. Buff Your Nail:

buff-nail

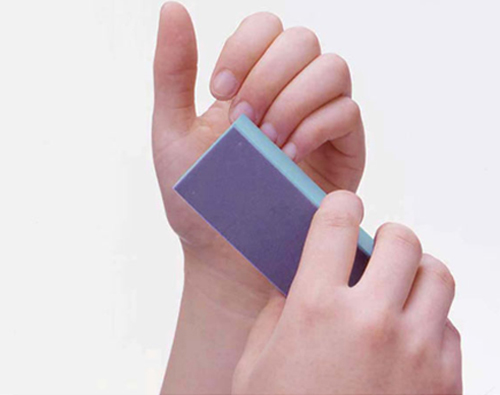
Buffing your nails is kind of like brushing your teeth—it’s brightening, it makes nails look more youthful, and it gets rid of ridges. Use a standard sponge buffing block, such as Sani-Block Fine/Super Fine — it’s soft, smooth, and not too abrasive. You can also use them on the sides of your fingers when they start to get dry and peel.

5. Apply Base Coat:

base-coat

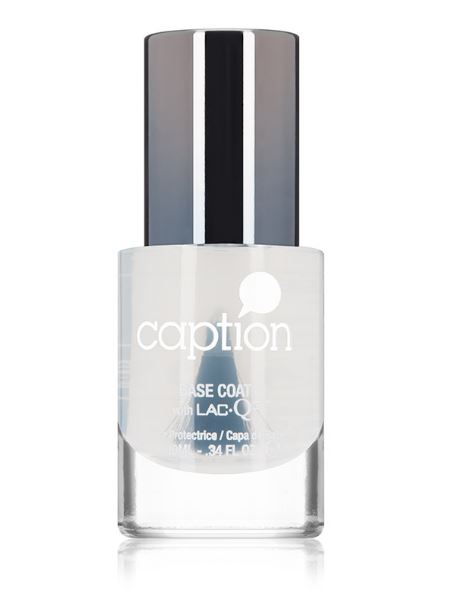
I know it’s a given but don’t forget to apply the base coat. Not only does it protect your nails from stains, it also fills ridges and strengthens nails too. A bonus of all that: It’ll lead to a smoother polish application, meaning your manicure is less likely to chip. We love the Caption Polish Base Coat ($12, dermstore.com).

6. Use a Special Base Coat for Glitter:

glitter-peel-off

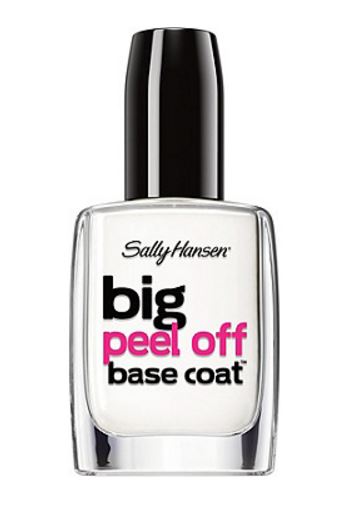
While we are on the topic of base coat, when you use your glitter and textured nail polish there are now peel-off ones that work wonders for removing tough-to-get-off textures like glitter. They’re particularly game-changing if you want a little sparkle on the weekends, but can’t show up to the office on Monday with your nails looking like a Kesha concert. I particularly like the OPI Nail Polish Glitter of Base Coat (Jet.com for $7.90). I also recommend Sally Hansen Big Peel Off Base Coat ($5.99 Ulta.com).

7. Don’t Apply Too Much Polish:

nail-polish

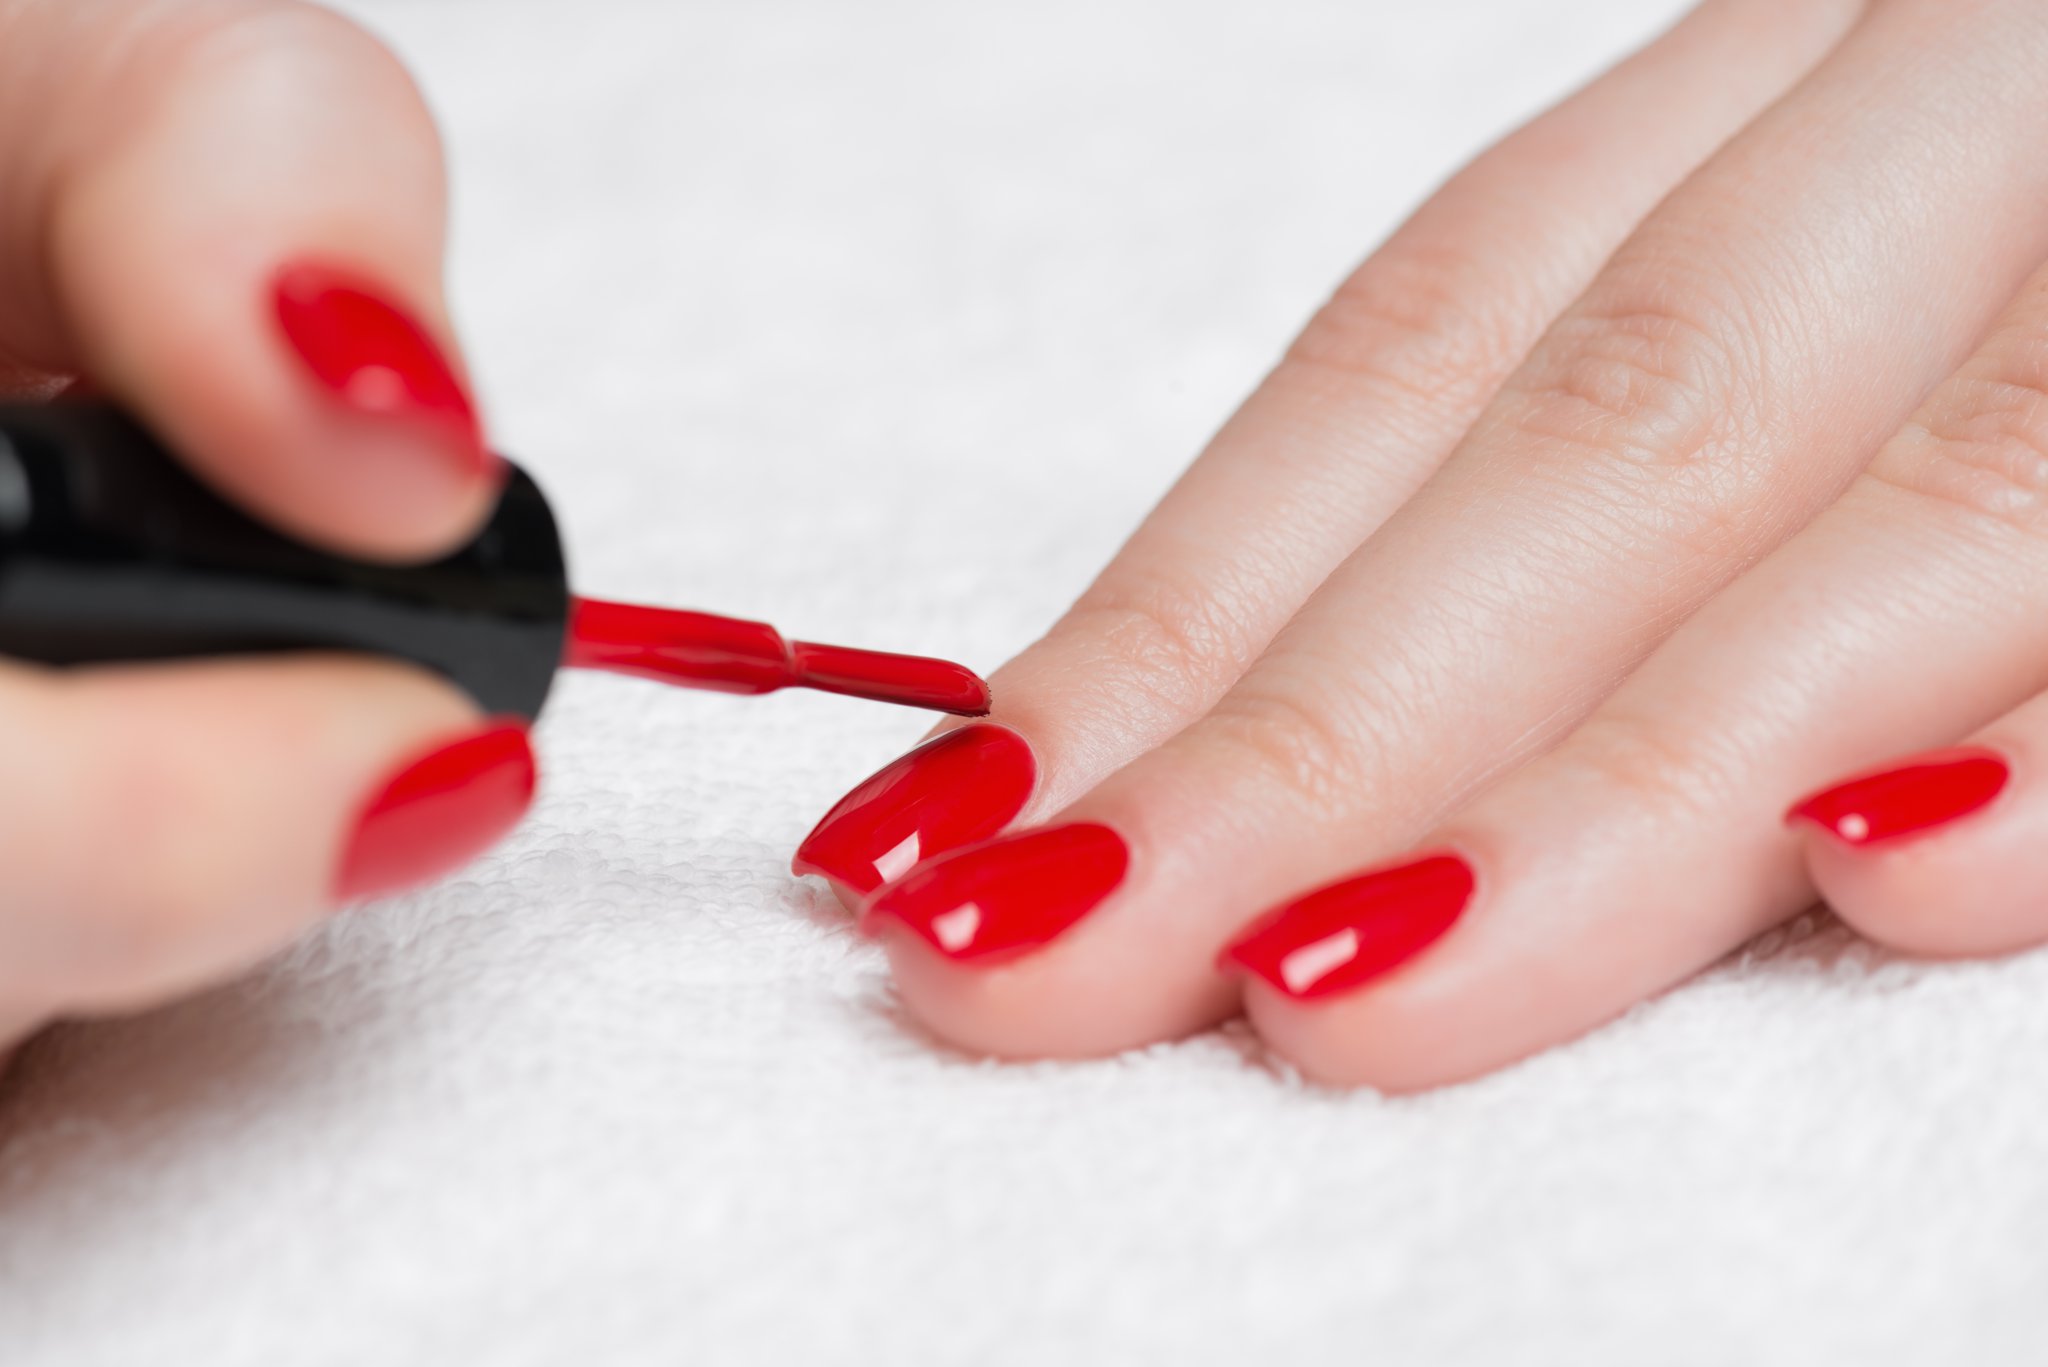
Too much polish takes forever to dry, and you’ll be left with a bumpy finish. Remember to load enough to polish in brush to cover the nail in one coat. Stripe the nail three times: once down the middle, once on each side, and then repeat until you get your desired opacity. Furthermore, if you are not waiting at least one or two minutes before applying another coat of color or a topcoat, you’re not giving the solvents in your polish enough time to evaporate.  The longer you wait between coats, the more it’ll keep your color locked in.

8. Top Coat:

top-coat

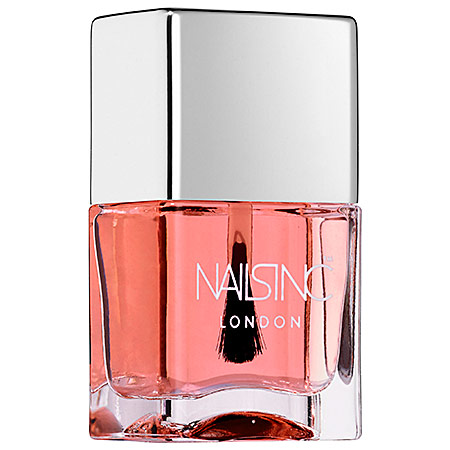
One thing you should not skip on is putting on top coat.  If you don’t use a topcoat, your polish won’t last as long. Glamour recommends Nails Inc. 45-Second Top Coat With Kensington Caviar ($15, sephora.com) for its sleek, shiny finish and quick-dry formula. However, don’t be sloppy with your top coat. You may think top coats are clear and hence, invisible. However, topcoats tighten as they dry, which is what can cause those little ridges if you don’t put it on properly. Another downside: Those areas will also end up chipping faster. Furthermore, nicks and chips tend to happen most at the tip of the nail, and yet, many women neglect to give that part a little extra topcoat love. Take a topcoat like Morgan Taylor Make It Last ($8.50, loxabeauty.com) and run a horizontal swipe of it over the bottom edge of your nail after you do your last coat.  Let it dry, and repeat one more time.

9. Clean Your Cuticle:

pointed-q-tip

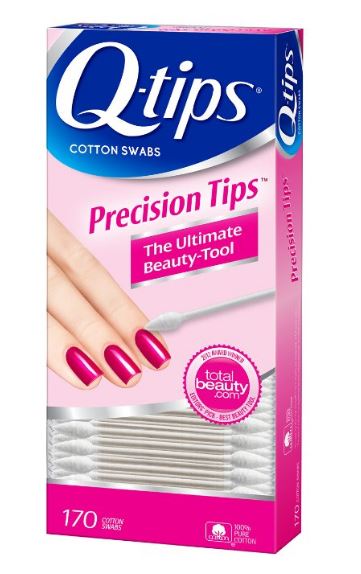
Want to give your manicure a salon finish? When you finish applying your topcoat, dip a thin cleanup brush in nail polish remover and lightly skim around the outer edge of the nail to remove any excess lacquer. This will help make the paint job look sharper and your manicure last longer. If you don’t own a striper brush, you can use a pointed cotton swab. I use nail polish remover on a pointed Q-tip, such as Q-tips Cotton Swabs, Precision Tips 170 ct (Pack of 3) to clean up my edges and make sure there’s never a speck of polish on my cuticles. Don’t dip your hand in cold water or blow on them to dry your polish faster.  Dipping your nail in cold water only changes the consistency of the polish, and  blowing on them does nothing to speed up the process. You also risk tiny drops of saliva getting on your nail, which can create bubbles in the polish. What can you do to dry or polish? I recommend  using a quick-dry spray because it’s designed to make polish oxidize from the inside out. If you smudge, there’s a fix for minor smudges, and it doesn’t require repainting your nails. Enter Kur Instant Smudge Fix by Londontown ($14, londontownusa.com)—or as we like to call it, the Mani Saver. If the smudge is light enough that you can’t see the nail through the polish, just slick one coat of this stuff over your whole nail, and let it dry for 30 seconds. Then reapply your topcoat. Your polish will look good as new.

10. Moisturize Between Polish Changes:

moisturize-hand

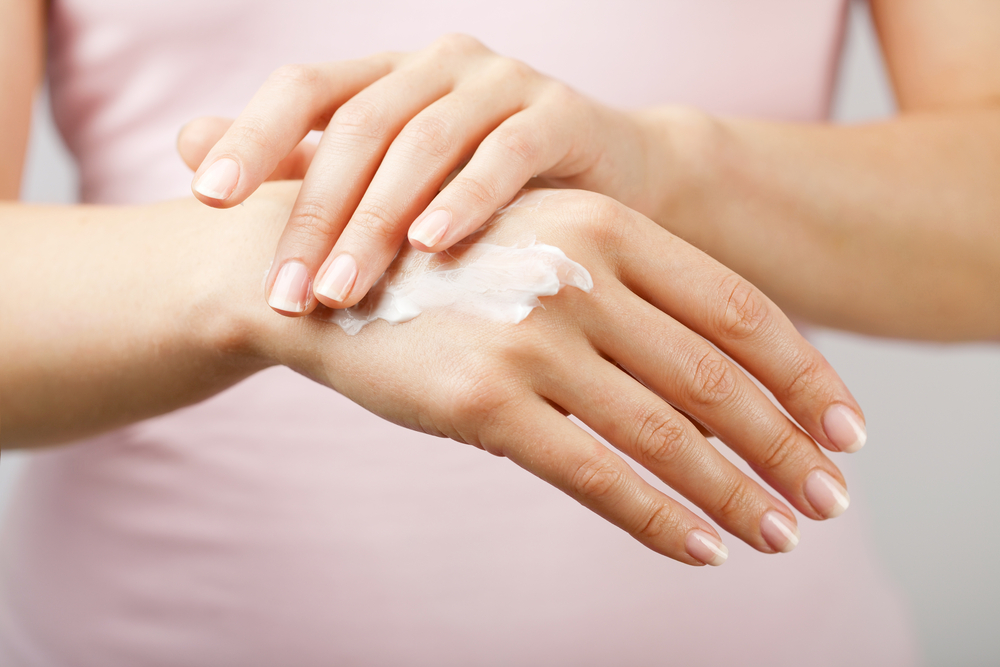
A major part of manicure maintenance is keeping your nails and cuticles hydrated, especially when you are using your hands often (i.e. washing dishes, doing laundry, constantly typing, etc.). Apply cuticle oil to your  nails and cuticles every other day. This will restore moisture and also help prevent chipping and splitting.

Hope this tips will help you give your a salon quality DYI manicure and pedicure. Please let me know what if you find these tips helpful.

Don’t forget to check out my Facebook Page and follow me on Instagram @allaboutme3181.

———————————–   Happy Reading ———————————-

Instagram: @allaboutme3181
 

Stylish Winter Items You Should Get Before They are Gone


Hi There! Winter and the holidays are almost here. However, the cold should not stop you from hitting the season in style. Today, I will bring you some frugal and stylish winter items that you should get before they are gone.

1. Lace Blouse:

worthington-jcpenney

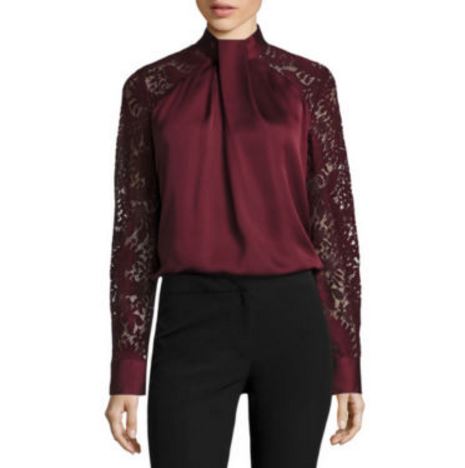
Worthington Long Sleeve Mock Neck Lace Blouse (For Sale at $19.99)

lace_target

Women’s Lace Bow Blouse – Who What Wear ($29.99)

The simple addition of a scarf transforms the Lace Bow Blouse – Who What Wear at Target™ and Worthingon at JC Penney from a utilitarian top into the highlight of an outfit. Wear these tops’ fluid lines over high-waisted pants as an elegant ensemble, and don’t forget rugged, chunky boots to balance out its lacy femininity.

2. Metallic Wallet:


womens-small-wallet-targetTarget Women’s Small Wallet ($10)

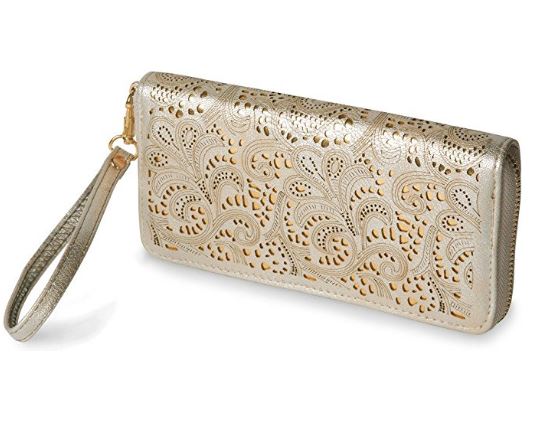
metallic-wristlet-amazonMetallic Floral Laser Cut Wristlet Wallet ($26.99) 

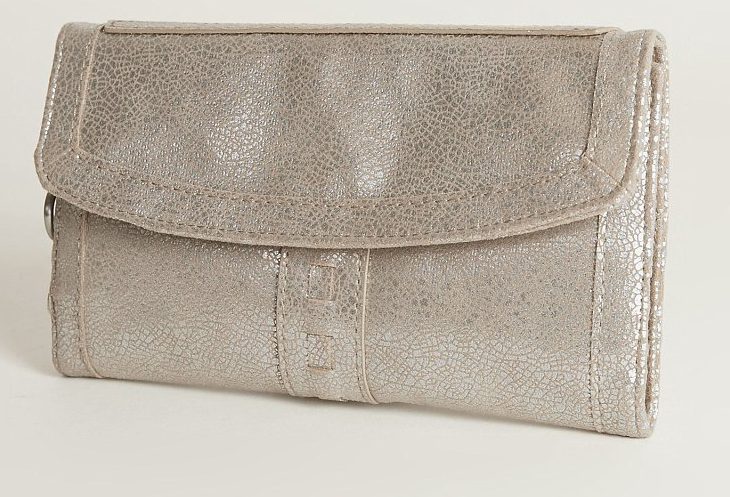
metallic-walletMetallic Wallet ($24.99)

coach-clutch

Coach Boxed Phone Clutch in Metallic Leather ($99)

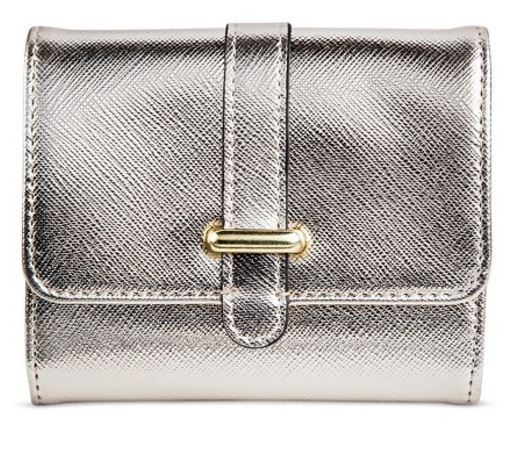
Metallic wallet is another must have this holiday. It gives you the ultra-chic style you need for the holiday. If you want a designer version of the wallet look no further than the Coach Metallic Clutch that can be found at Macy’s.

3. Teddy Bear Bomber Jacket:

plus-bomber

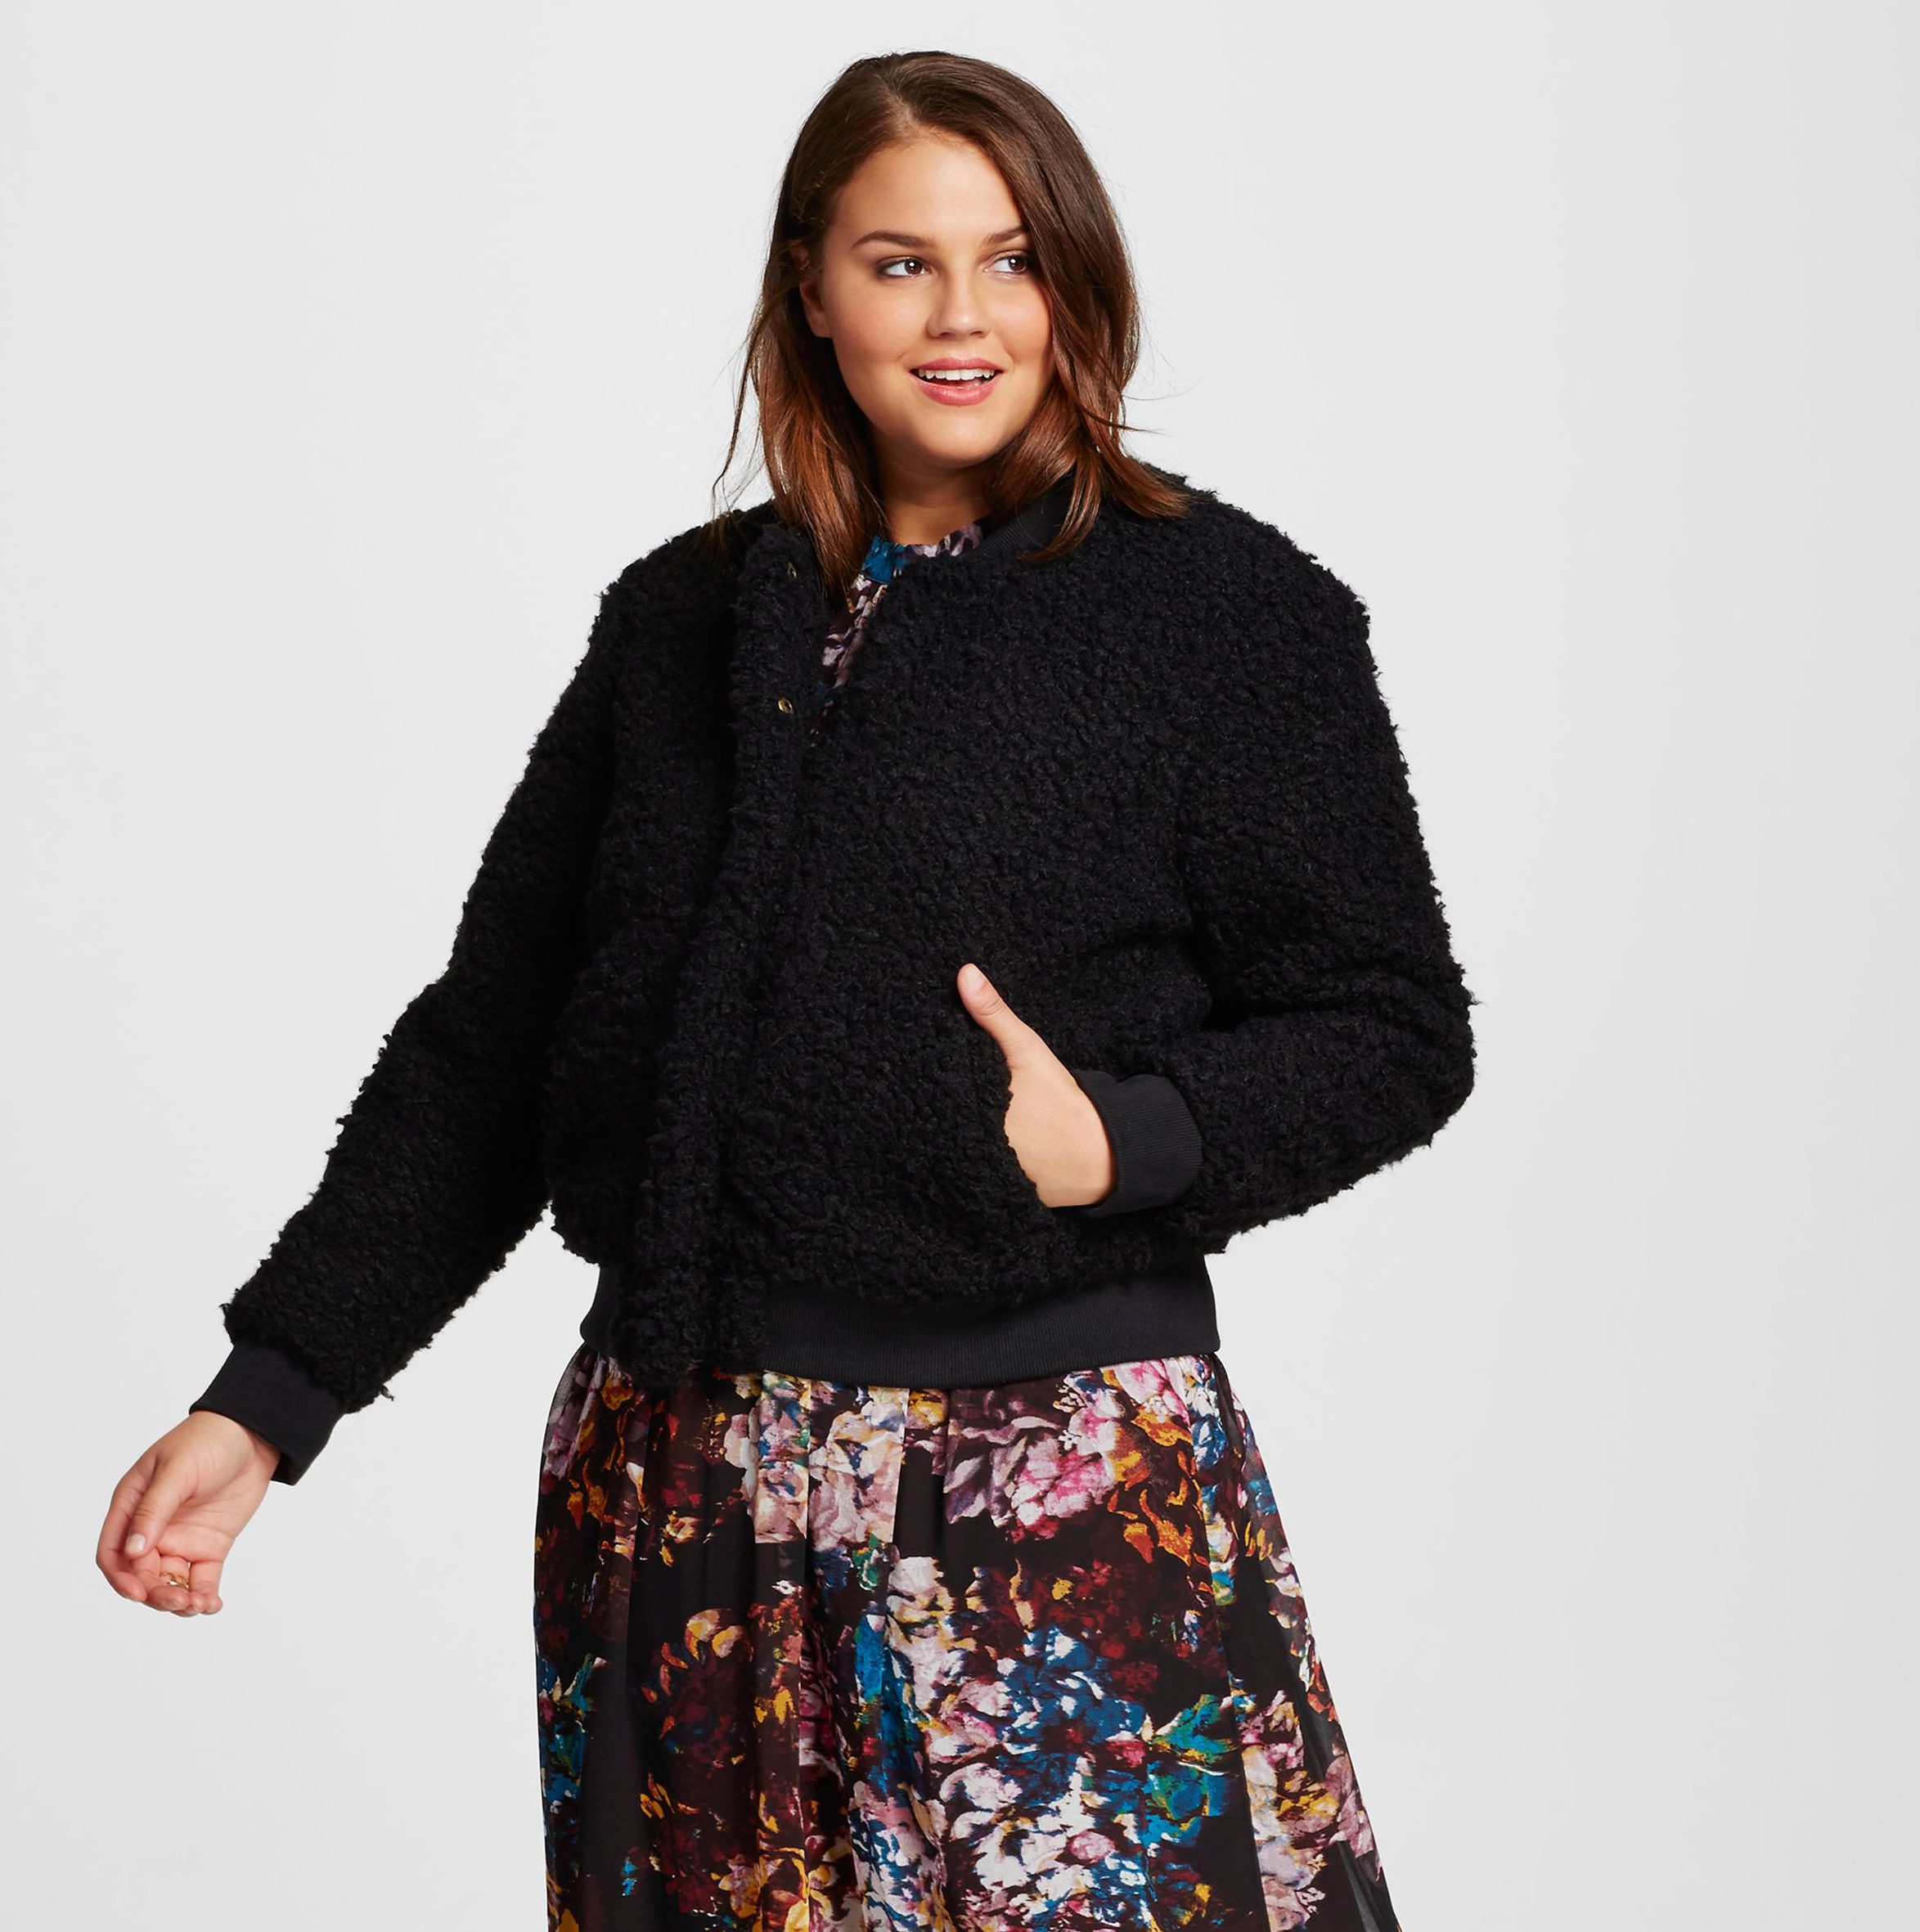
Who What Wear Women’s Plus Size Teddy Bear Bomber Jacket from Target ($54.99)

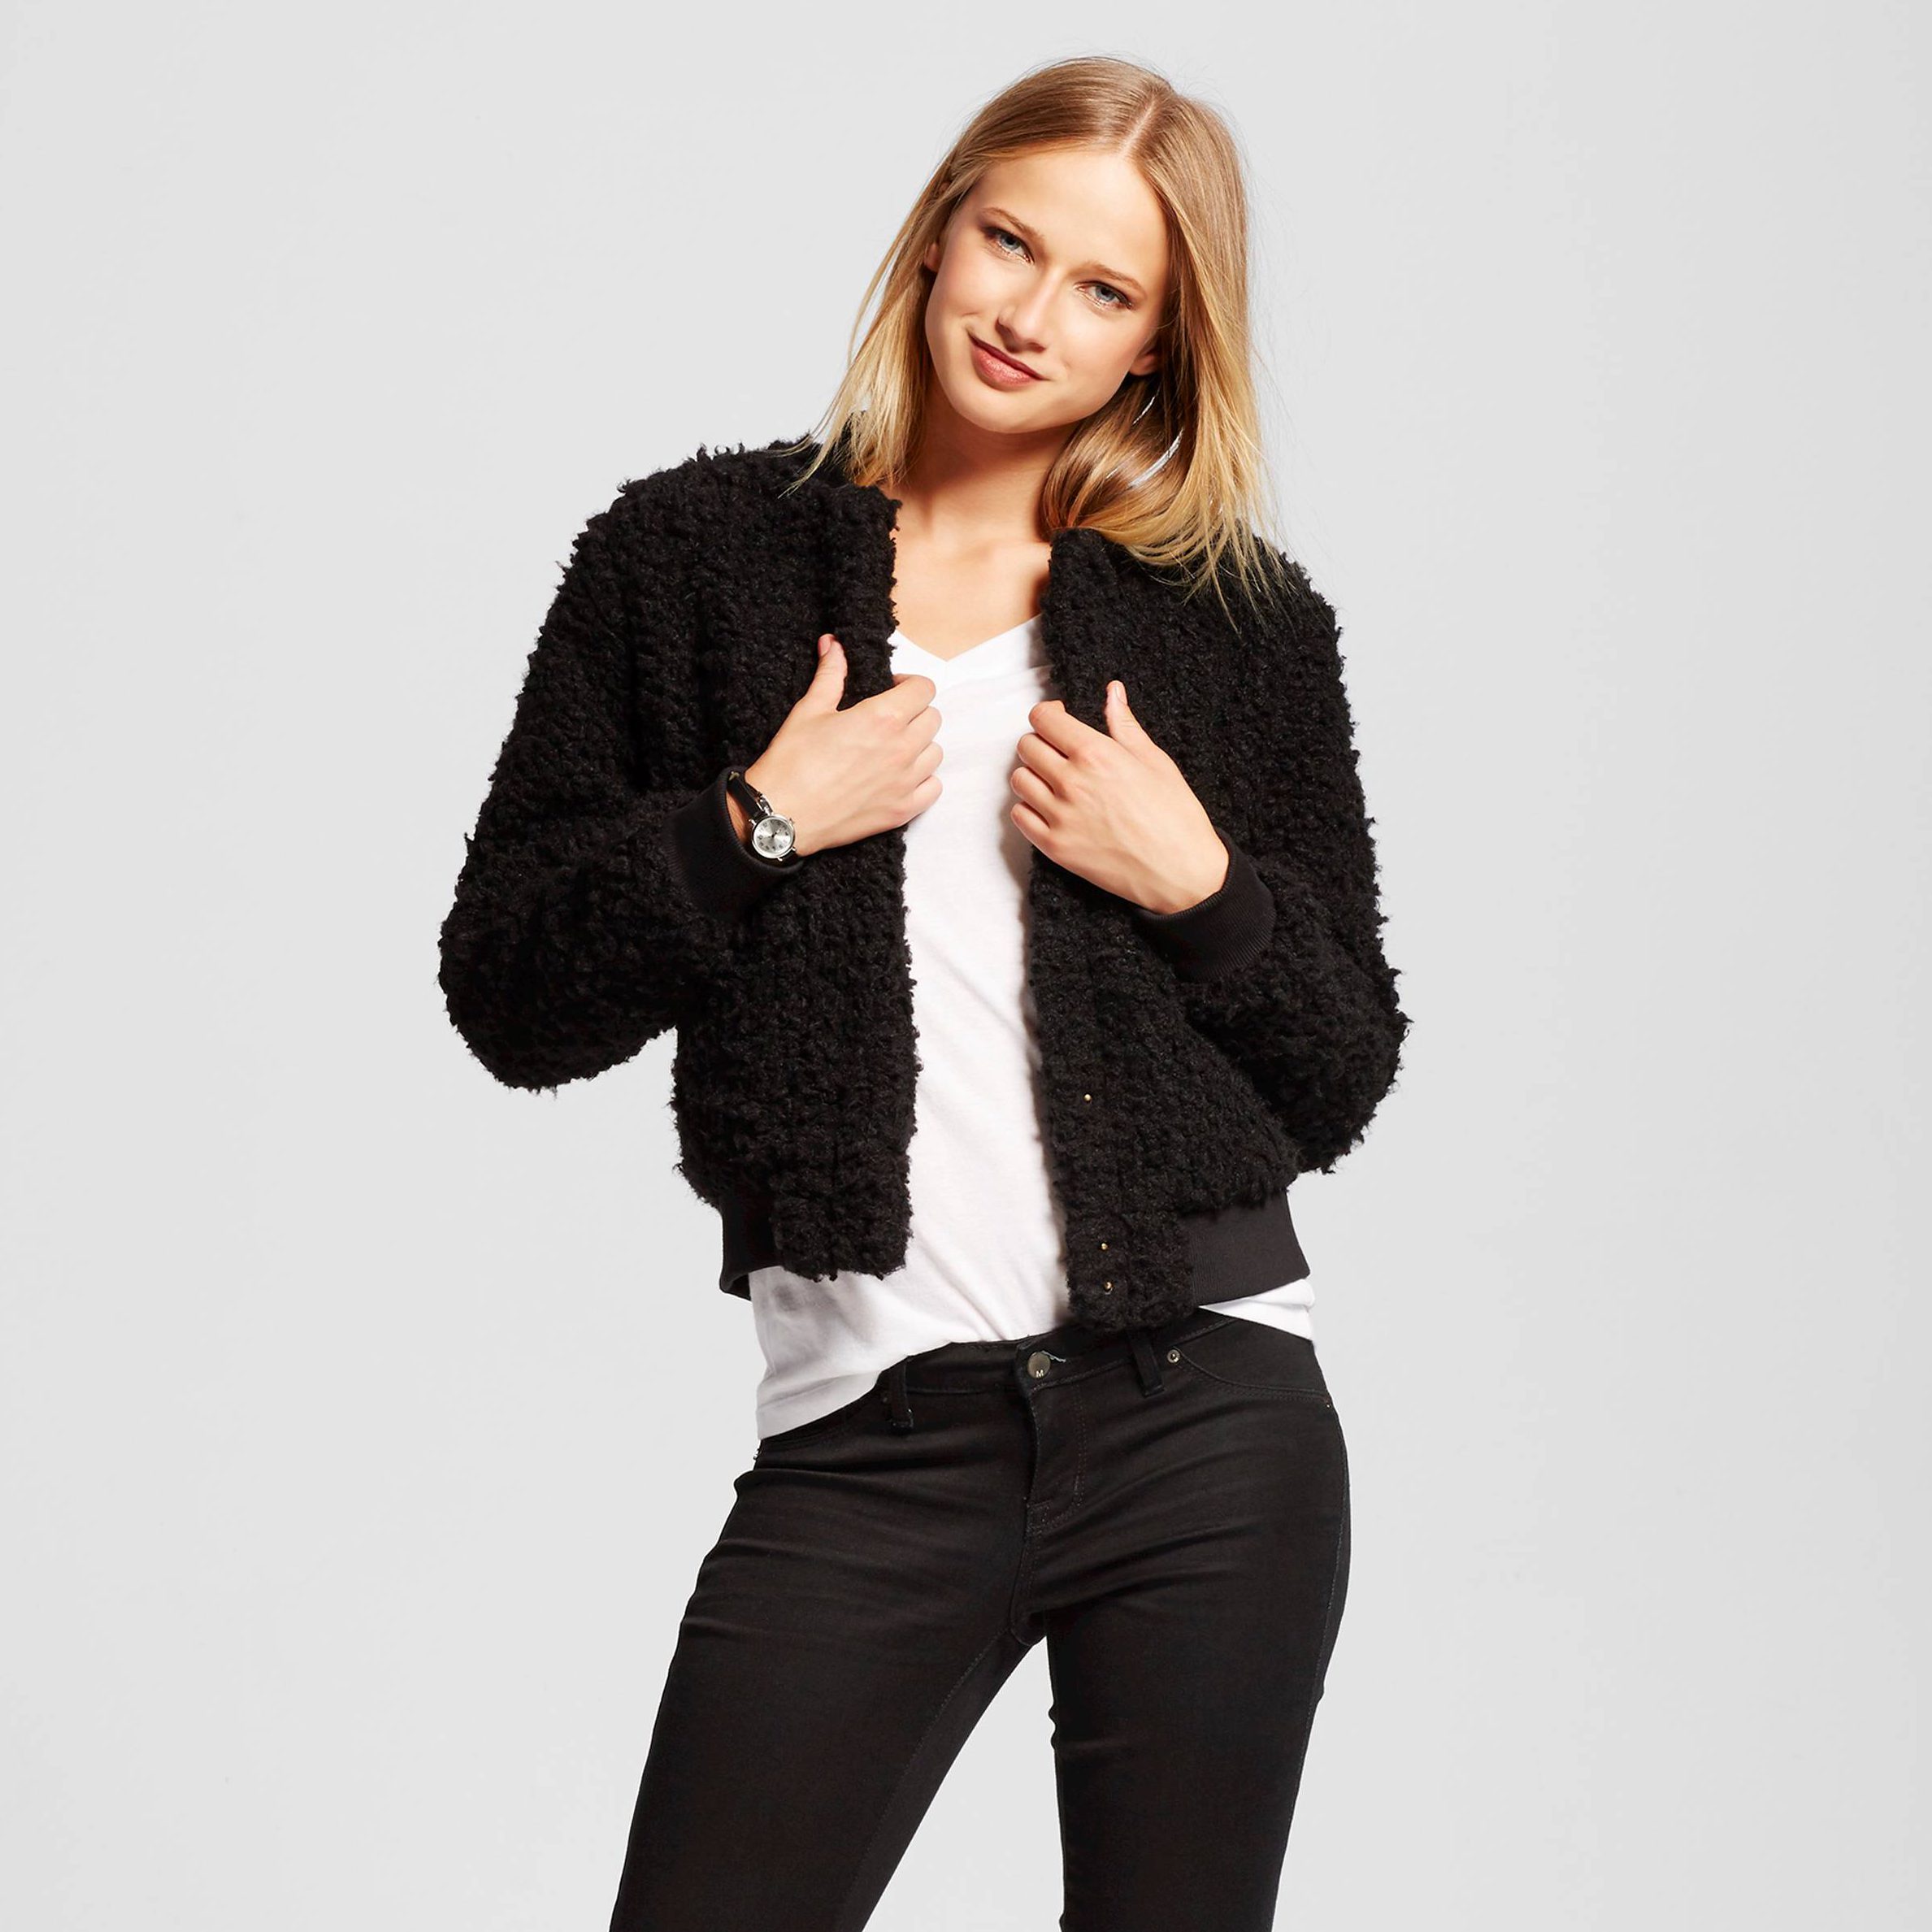
bomberWho What Wear Teddy Bear Bomber Jacket ($49.99)

Described by Glamour as one of the 20 stylish winter buys to shop at Target these bomber jackets are great addition to have for your winter outfit. The fabric is addictive and playful, and surprisingly sophisticated worn with leather-finish jeans or textured leggings. Don’t forget the ankle boots to complete the on-the-go vibe that bombers embody.

4. Printed Dress :

printed-midi-target

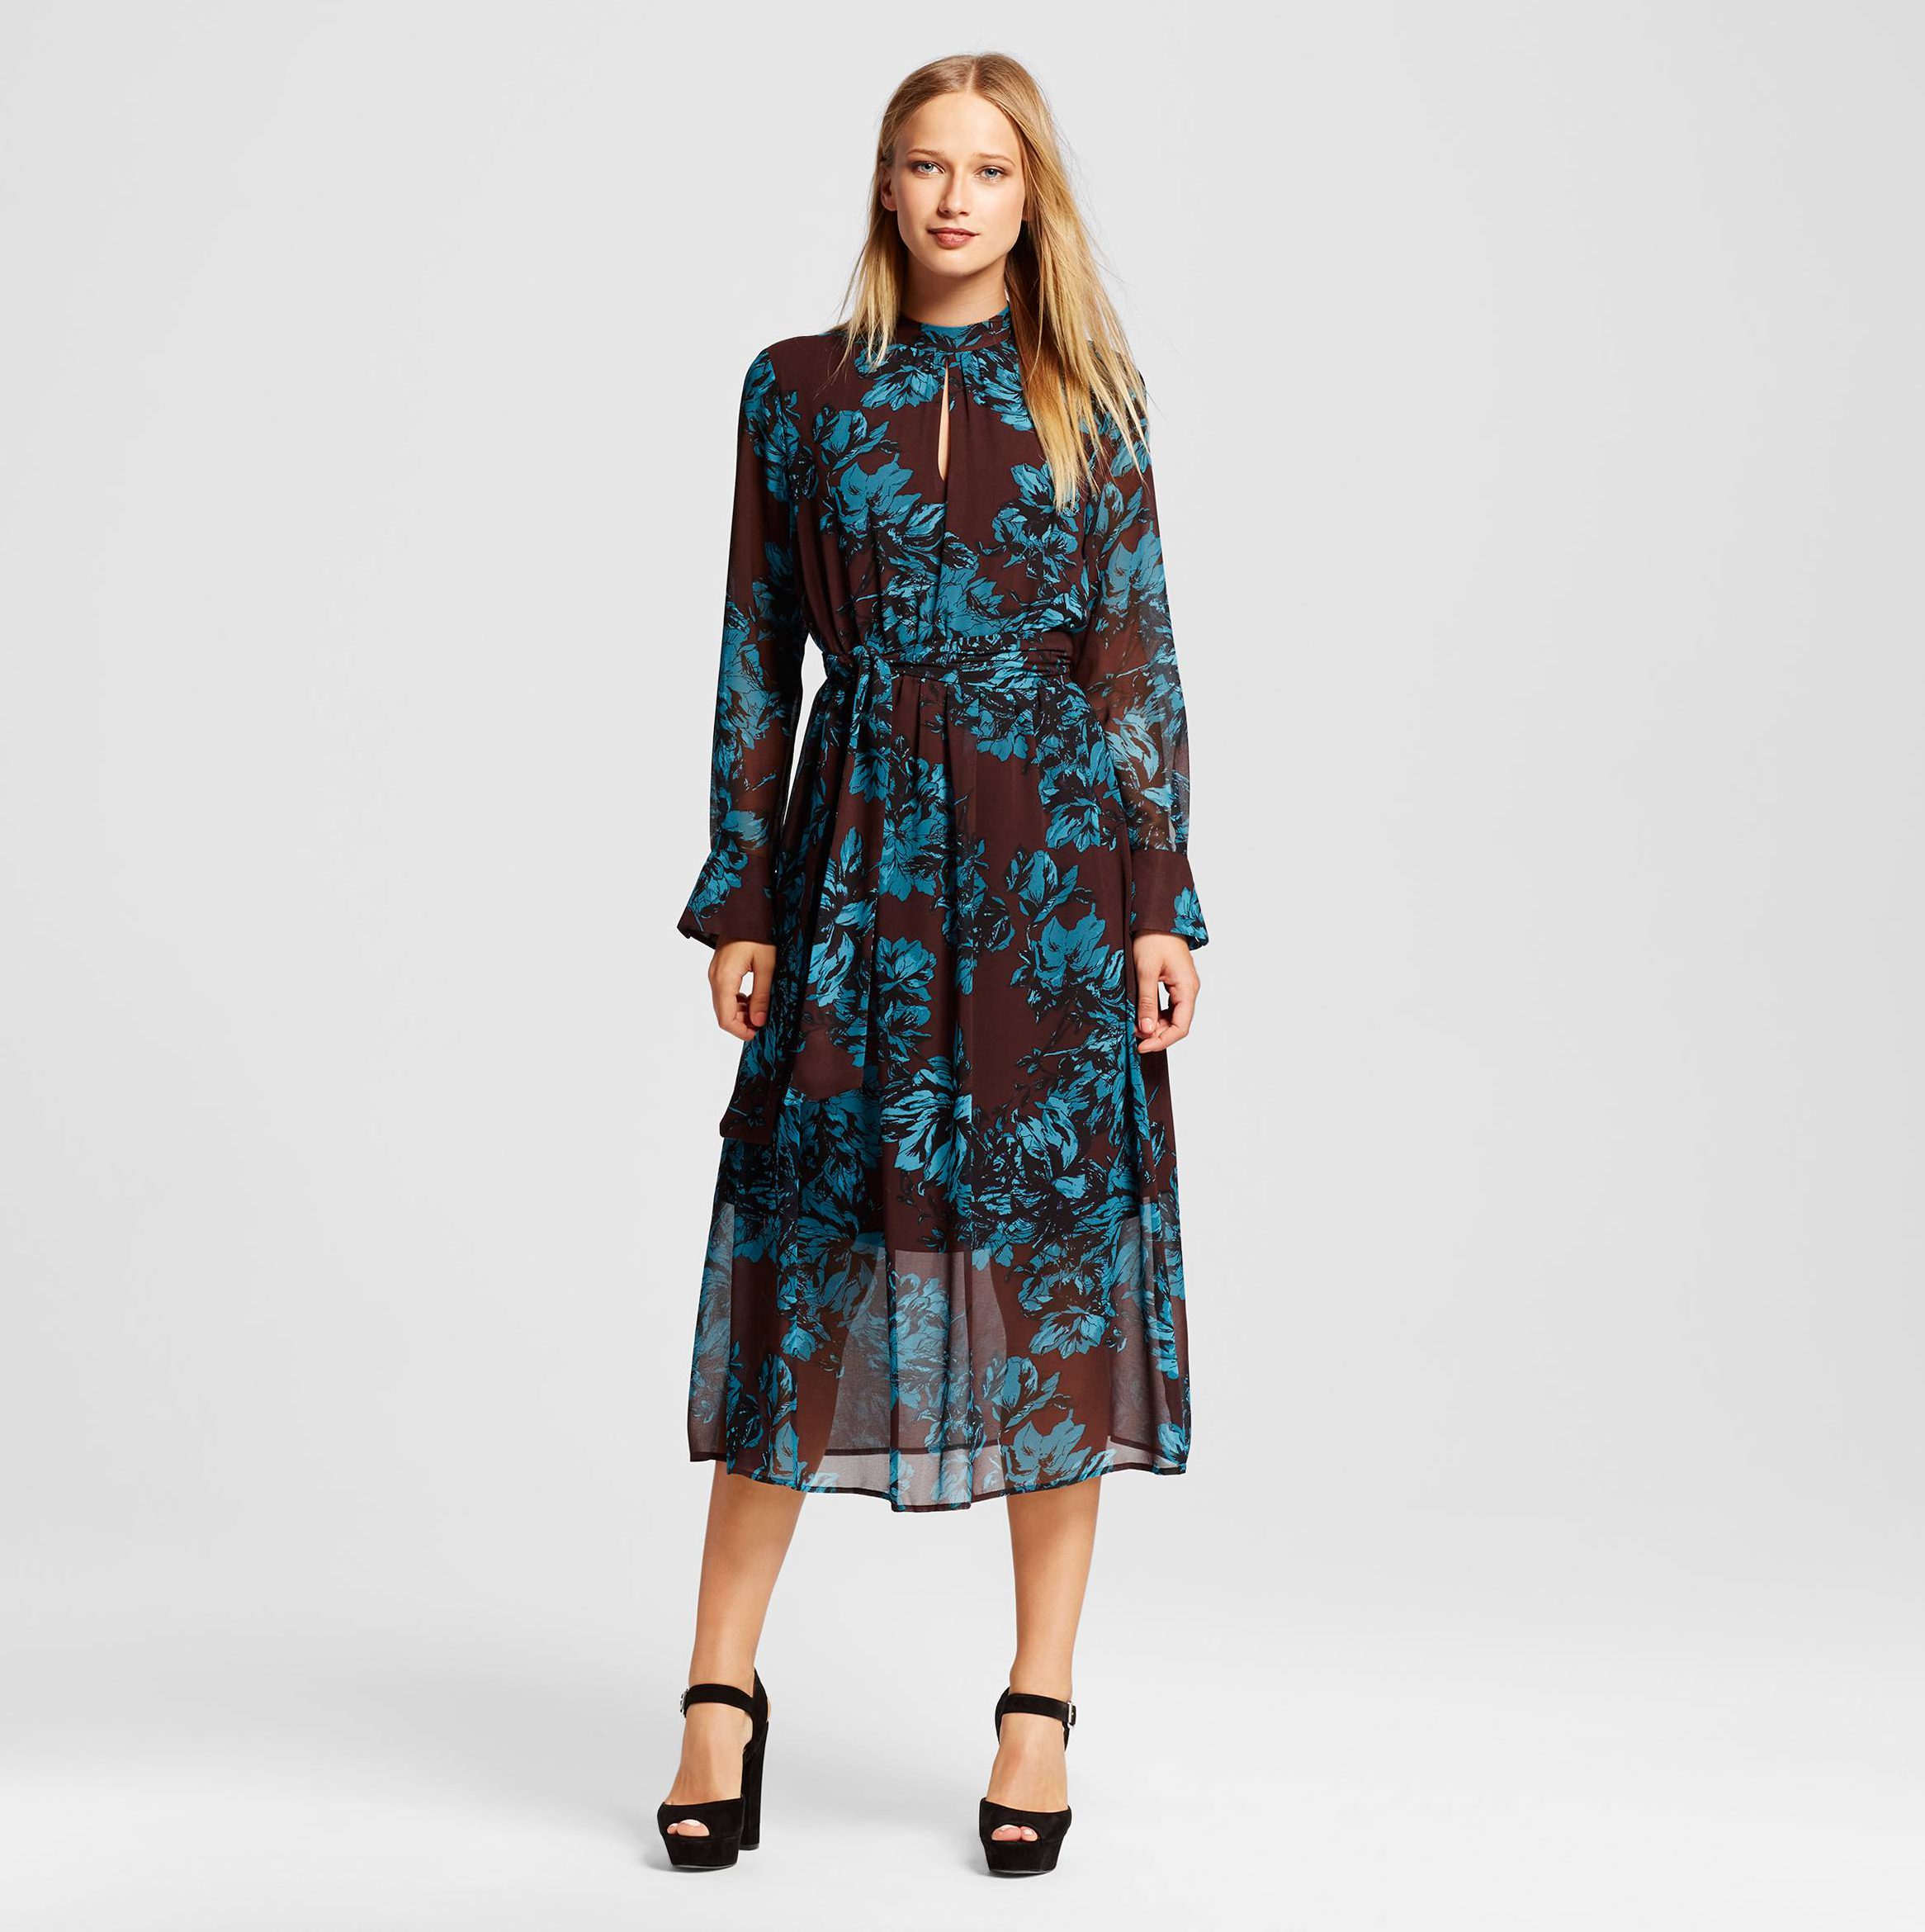
Who What Wear Women’s Printed Midi Dress ($34.99)

printed_limited

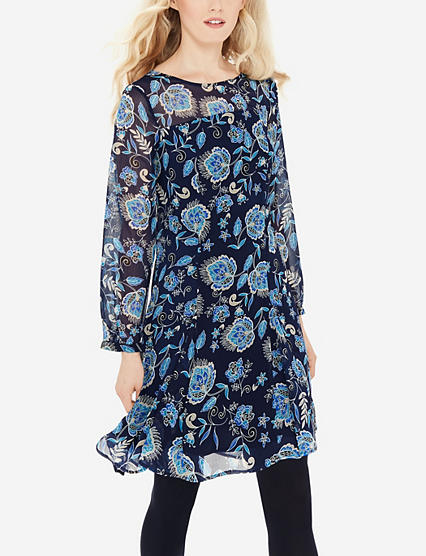
The Limited Printed Sheer Yoke Dress (On Sale $39.98)

Whether midi or just over the knee, sheer printed dresses are great wardrobe addition to have this holiday for chic feminine look. Printed Midi combines the of-the-moment length with a forever-fresh pattern.  You can toughen up this feminine look by layering this long-sleeve dresses under a bold moto, or mix it up by wearing it over ankle boots for a street style vibe. The Limited elegant dress was designed with romantic sheer fabric perfect for a night out. Its A-line silhouette with pleated details add feminine flair and a flattering fit. This dress would go great with long black boot and black moto jacket.

Hope you enjoy this blog as much as I enjoyed writing it. Please let me know about your winter style tips.

Don’t forget to check out my Facebook Page and follow me on Instagram @allaboutme3181.

———————————–   Happy Reading ———————————-

Instagram: @allaboutme3181
Buxom Frozen Assets 8-piece Mini Big & Sexy Bold Gel Lipstick Collection


buxom6

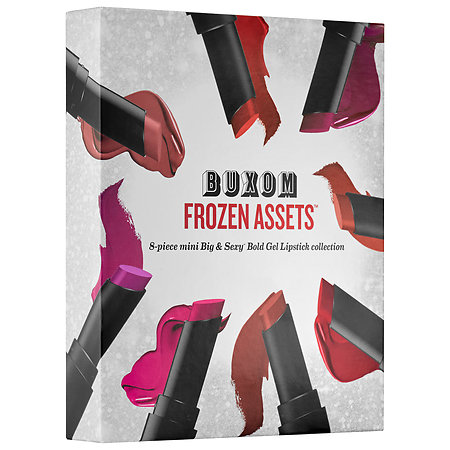
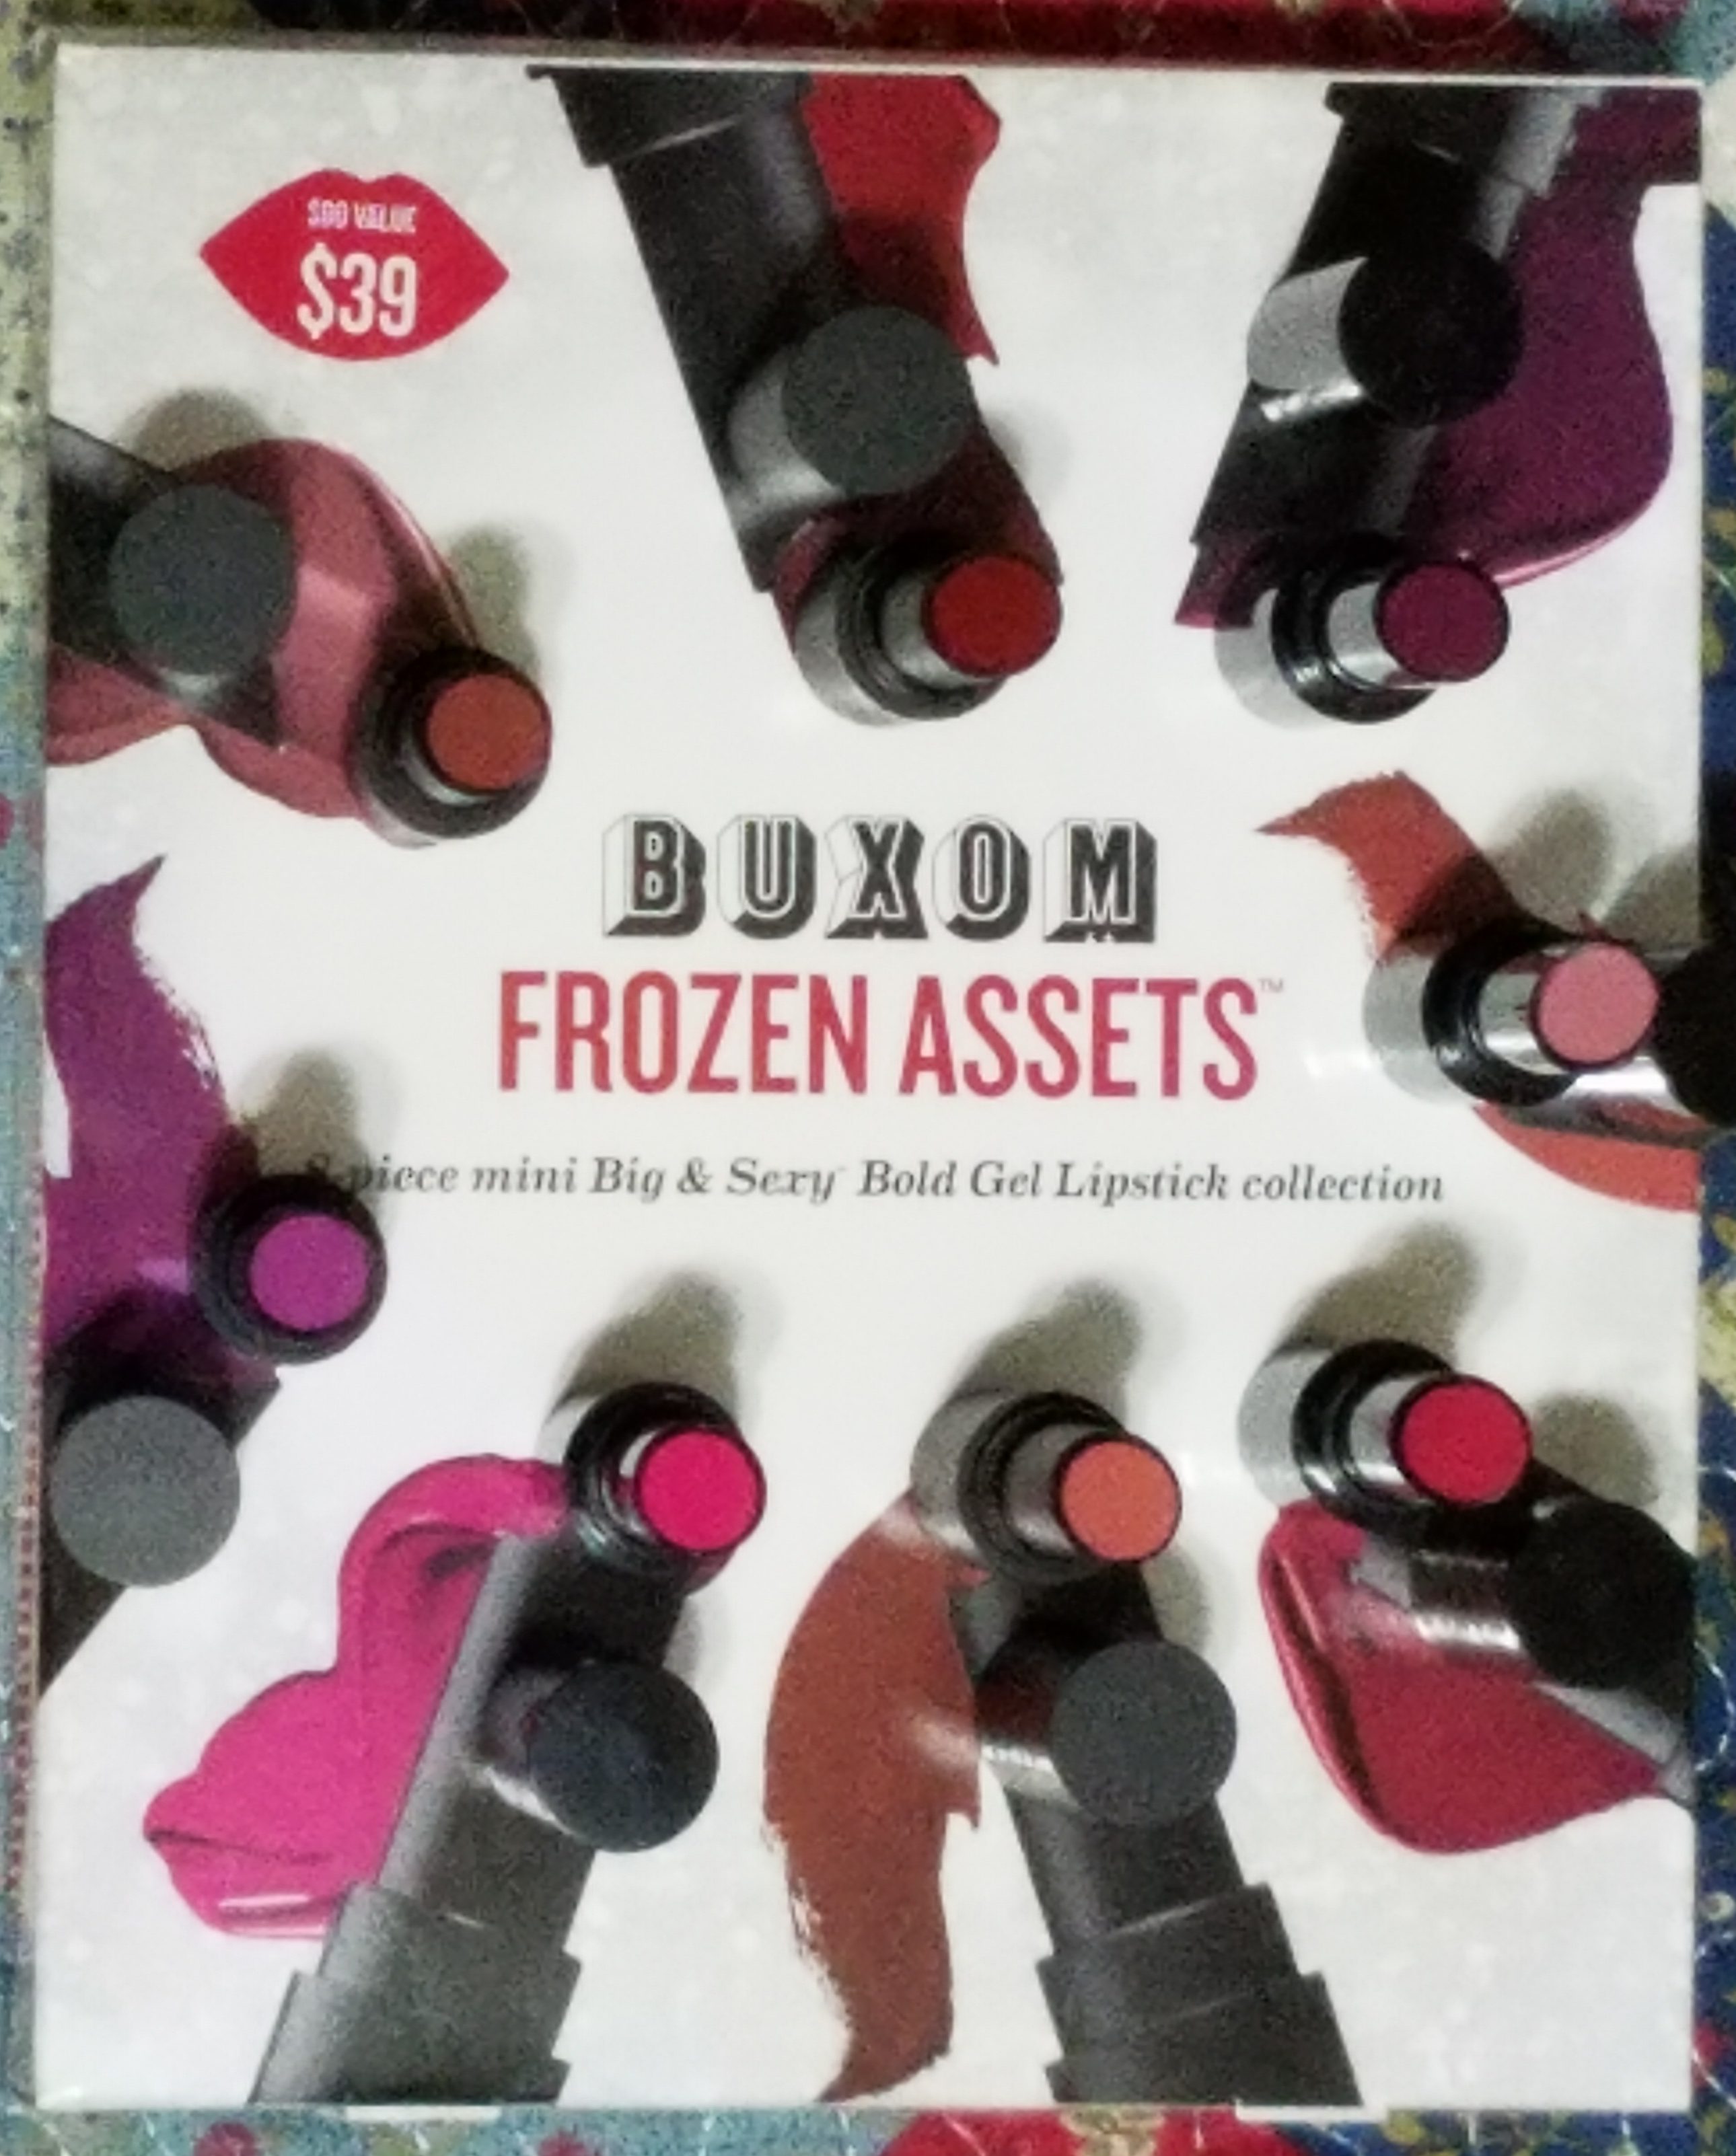
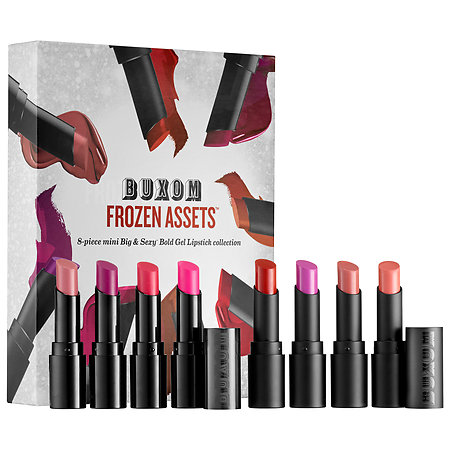
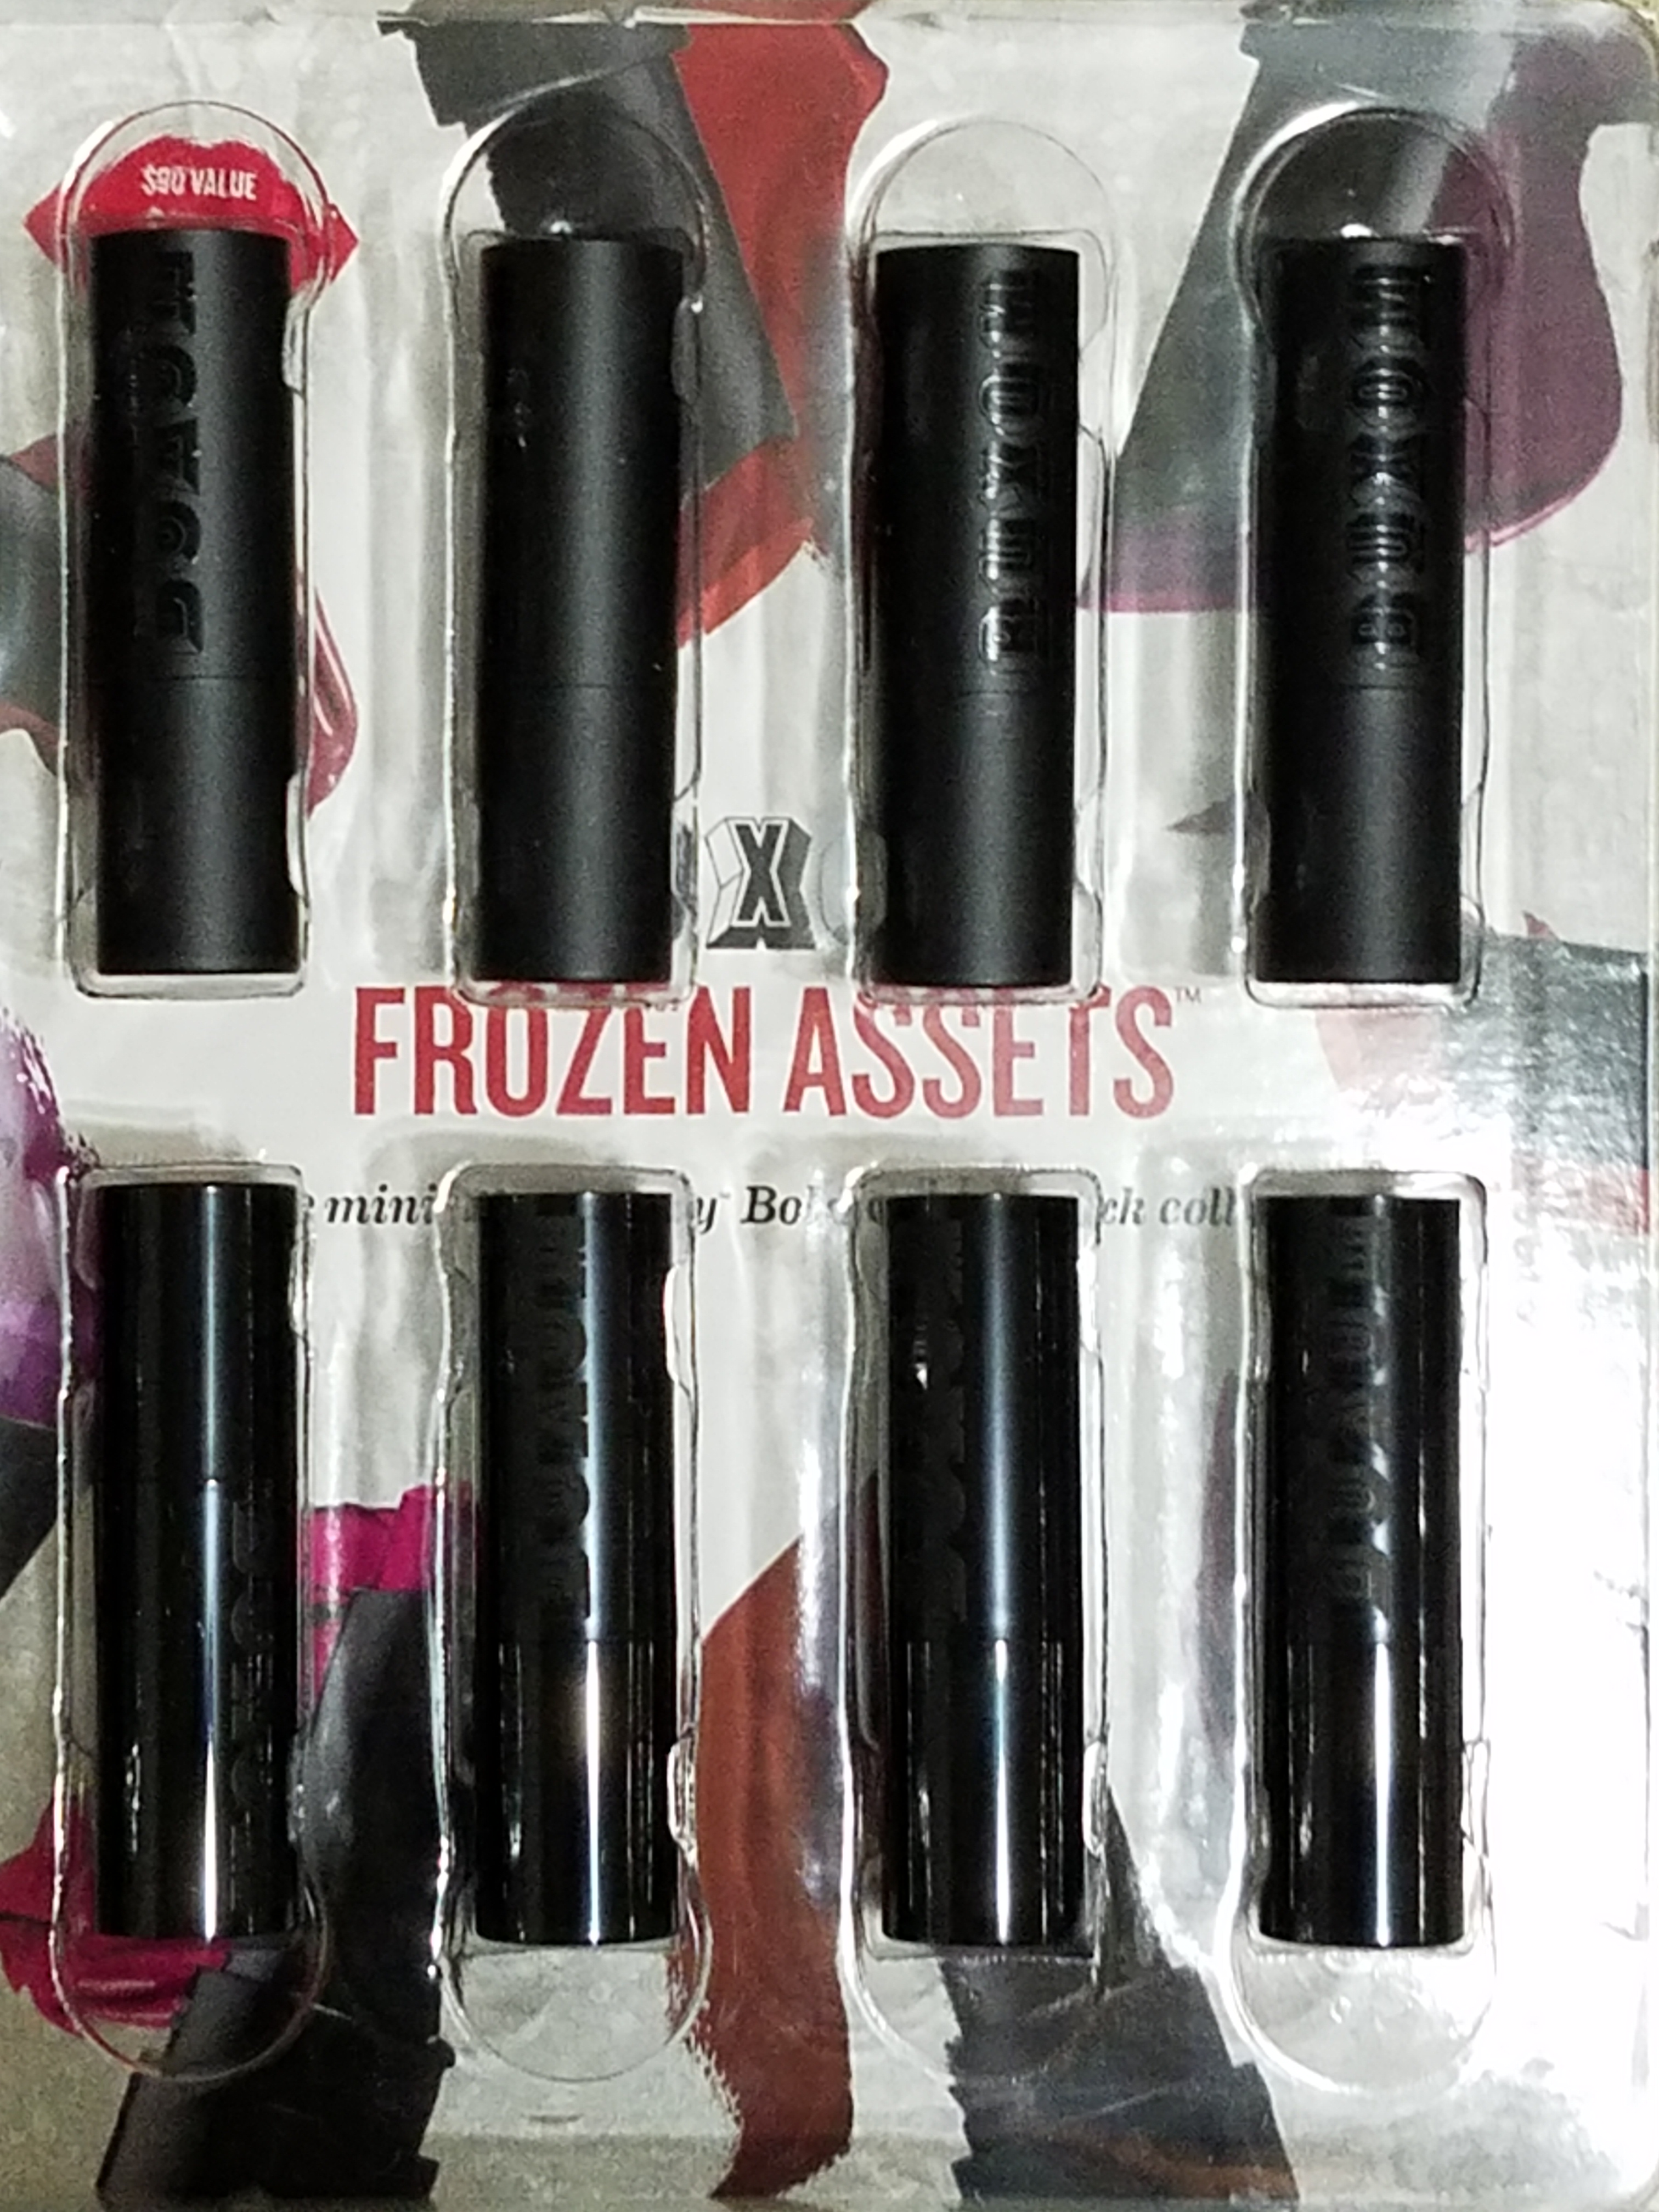
Hi There! Today, I will give you my recommendation for another Christmas gift idea for your favorite gal out there. It’s the Buxom Frozen Asset Mini Big & Sexy Bold Gel Lipstick Collection from Sephora. It costs $39.

buxom

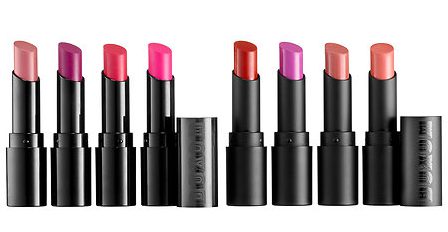
Description: This a Sephora-exclusive, limited-edition, 8-piece collection of Buxom’s bestselling Mini Big & Sexy Bold Lipsticks in satin and matte finishes. The collection include  includes a range of nude to red shades in moisturizing matte and satin finishes in a lightweight, gel formula. Each shade delivers piercingly vivid, one-stroke color to shamelessly stand out. The collection contain 4 satin and 4 moisturizing matte lipsticks. The four satin lipsticks include: Mini Big & Sexy Bold Gel Lipstick in Rebel Rose (satin rosy pink), Graphic Grape (satin deep purple), Forbidden Berry (satin deep pink), Fuchsia Fetish (satin hot pink). The four matte lipstick collections include: Mini Big & Sexy Bold Gel Matte Lipstick in Racy Reveal (matte warm light pink), Sinful Cinnamon (matte cinnamon brown), Ultraviolet (matte bright violet), Ruby Temptress (matte brick red).

buxom7

Verdict: This collection is  super hydrating and doesn’t dry my lips out at all. The matte collection  are not  complete matte, but more like a semi matte. It feels creamy on the lips, but it doesn’t look or feel thick. It feels more like a light/thin formula and it’s very pigmented. It’s also long lasting. Sinful Cinnamon is  my perfect everyday go-to shade. I wear it with anything and it looks gorgeous. The only thing I don’t like is that they’re a bit drying once you’ve had them on for a while but that’s not unexpected from matte collection. My final verdict, I will give this collection 4 stars. The collection has beautiful colors. In order to counteract the drying effect I use a lip primer that moisturize my lips. I often use a very thin layer of Bite Beauty Agave Lip Mask that completely counteracts any drying affects and is my go to lip moisturizer.  It’s available at Sephora for $26. You can also use your favorite lip primer or thin layer of chapstick as a base.

buxom4 buxom8

Don’t forget to check out my Facebook Page and follow me on Instagram @allaboutme3181and Twitter @allaboutme3181

———————————–   Happy Reading ———————————-

Instagram: @allaboutme3181

CLINIQUE Pop and Matte Lip Colour + Primer Collection


clinique

Hi There! If you love lip colors as much as I do, you will love this post. I want to share with few of my favorite Clinique Lip Colour + Primer Collection. I have both their pop and matte lip color. As I have mentioned in my earlier post I am not a big fan of matte lip colors but if the right color is available I am willing to take a chance and Clinique and successfully met my challenge.

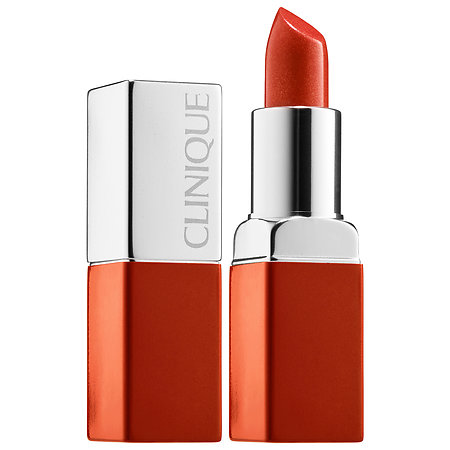
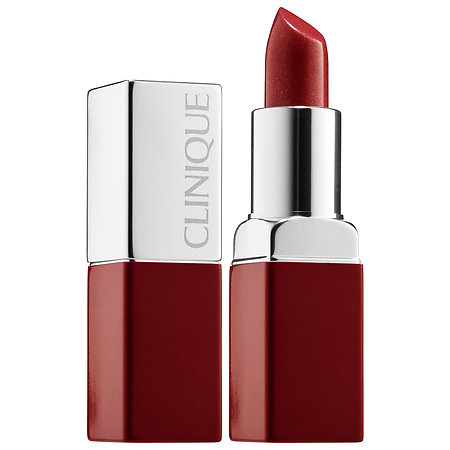
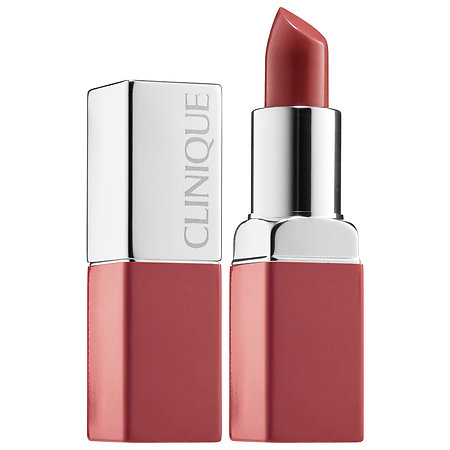
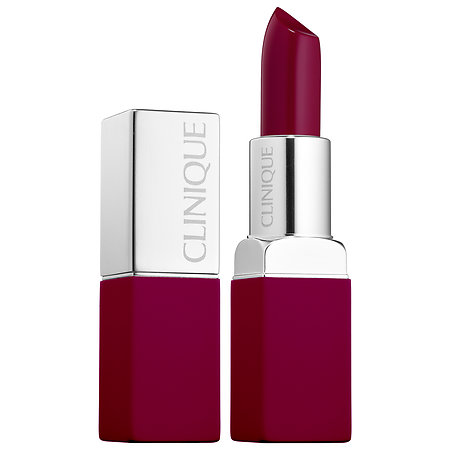
poppy-pop passion-pop plum-pop bold-pop

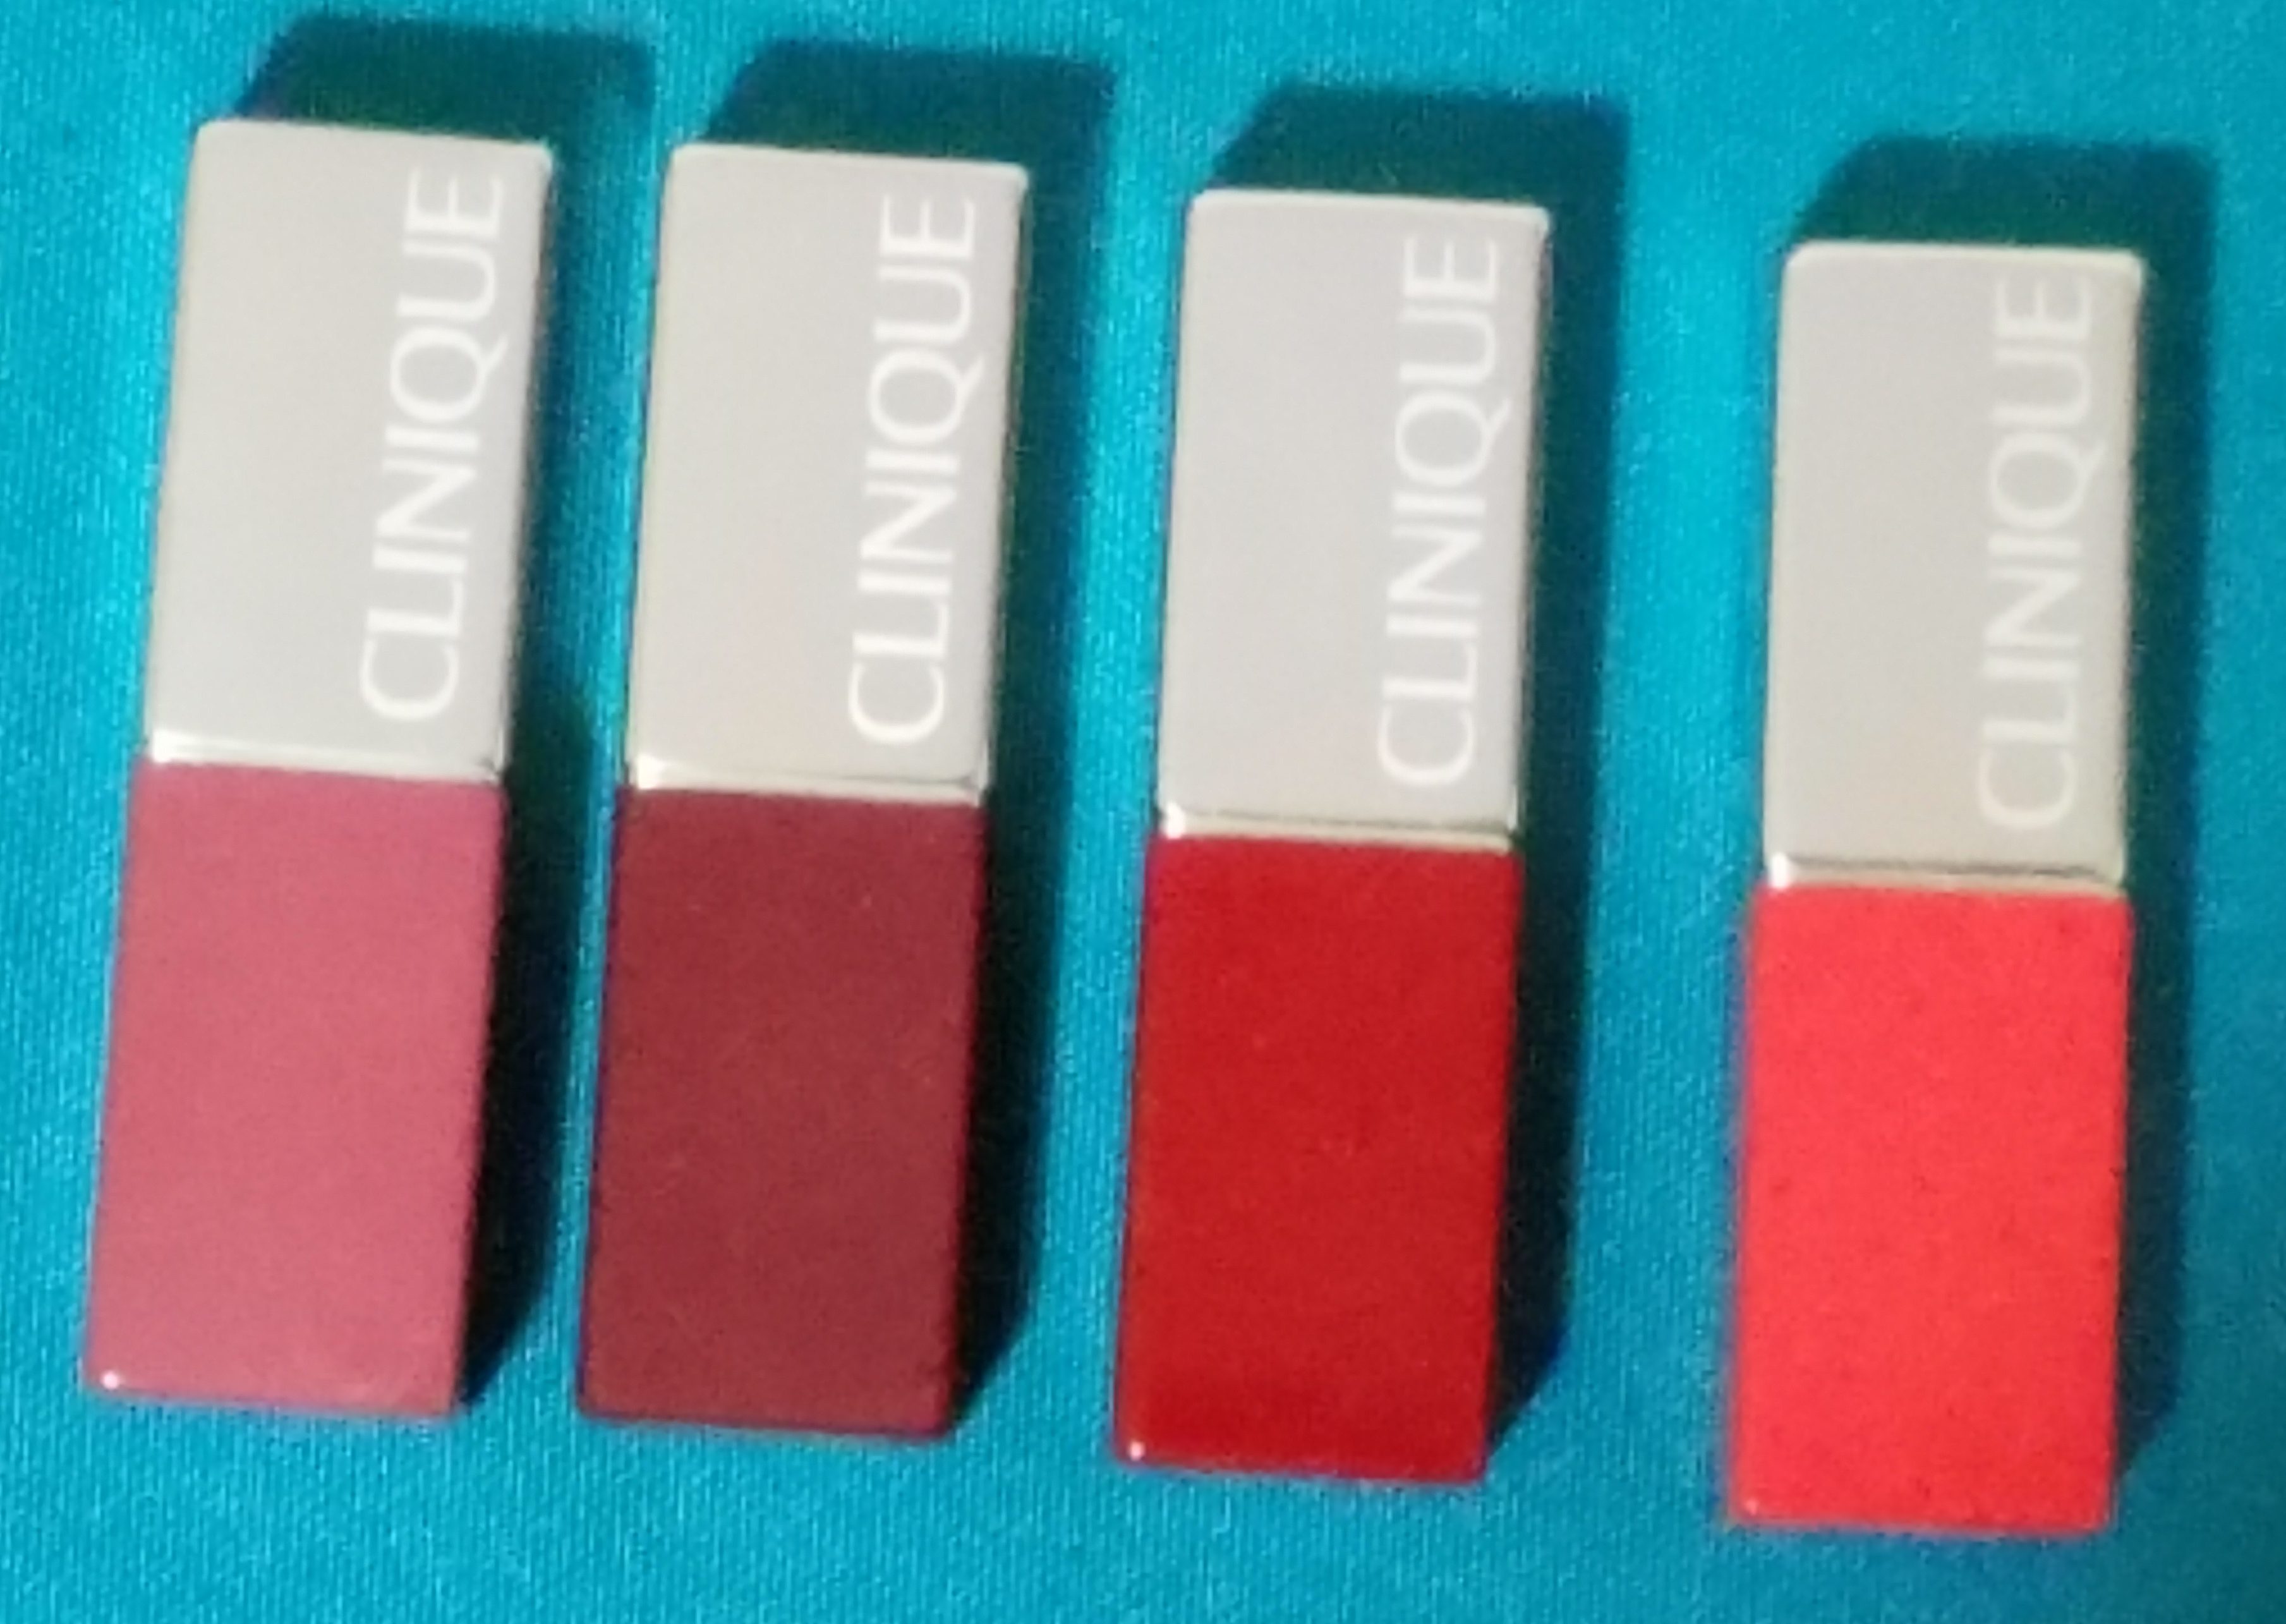
Description: The pop lip colour + primer include rich, weightless formulas that fuses bold, saturated color with a smoothing primer. These lip colors deliver a lightweight formula that lasts long, glide on effortlessly, creating a modern-velvet finish that keeps lips comfortable while color stays true. These products are allergy tested and are 100 percent fragrance-free. From the pop lip color collection, I have Poppy Pop – a mid-tone orange creme, Passion Pop – a rich classic red creme, and Plum Pop – a soft, neutral plum creme. Both Passion Pop and Plum Pop have satin finish, while Poppy Pop has a more shimmer finish. The matte collection include a dramatic pop of matte color and primer in one with a full-coverage coat. This formula is also  allergy-tested, and free of fragrance, formaidehyde, formaidehyde resin, toluene, DBP (dibutyl Phthlate), and camphor. From the the matte collection I have Bold Pop – dark berry. 

Verdict: Passion pop is more of the darker red than I like but still is a good collection of have. It’s amazing and creamy. The application is lovely and it stays on for hours without drying or losing color.  I love the pigmentation of the color. My favorite color by far has to be Bold Pop. I love the bold cherry color. In my olive skin tone I have to be careful about the nude lip colors I choose, but Plum Pop goes well with my skin tone.As I mentioned I am not a big fan of matte lip color but I was pleasantly surprised how moisturizing the matte colors are. The color range is great. Its moisturizing while still matte. If you are looking for bold colors you are more likely to get them in the matte version.  My final verdict, if you’re looking for a lot of depth to your lip shades, you’re unlikely to find much here. However, if you want bold colors you the Pop Matte Lip Color + Primer will give you that. For $18.50 these lip colors are great choice to have but I would rather go with matte version for a change.

Don’t forget to check out my Facebook Page and follow me on Instagram @allaboutme3181and Twitter @allaboutme3181

———————————–   Happy Reading ———————————-

Instagram: @allaboutme3181

No-Bake, Healthy Chocolate “Bird Nests”


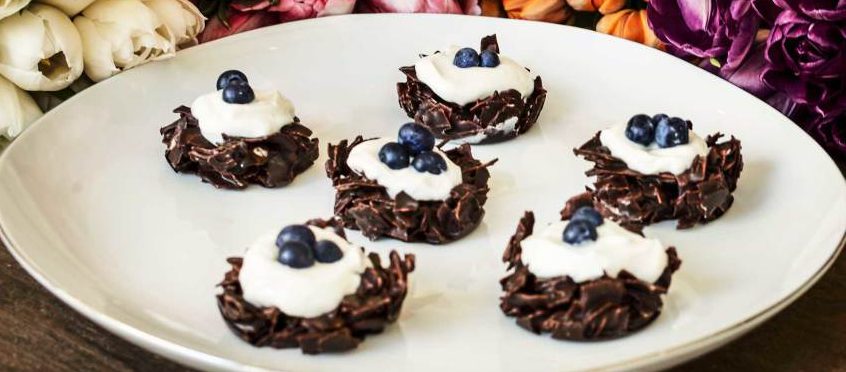
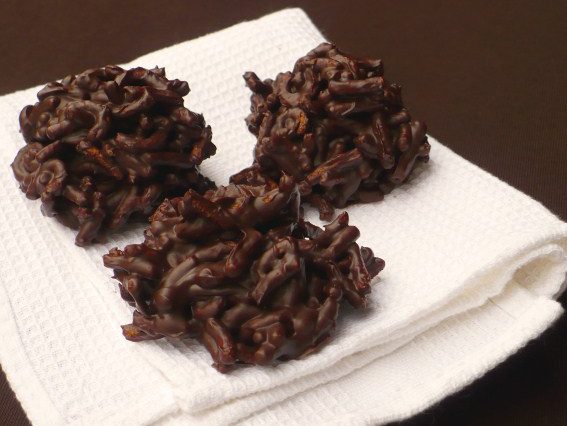
Hi There! Today, I want to share with a delicious, healthy chocolate recipe that I have come across online.

nobackchocolate

chocolatenest


Ingredients

Nests

  1. 1 bar Superfood Chocolate
  2. 1/4 cup cocoa powder
  3. 2 tablespoons coconut oil
  4. 1 1/4 cups coconut flakes
  5. 1 tablespoon honey, maple syrup, or brown rice syrup

Protein Filling

  1. 1/4 cup plain yogurt or vanilla yogurt of choice
  2. 1/4 cup blueberries
  3. 1/2 serving Vanilla Protein
  4. Optional: 1/2 tablespoon sweetener of choice

Direction:

  1. Lightly oil a muffin tin (you’ll only need about six to seven of the cups).
  2. Break up the chocolate bar into smaller pieces, and then heat it the coconut oil, cocoa powder, and honey either in a small saucepan on the stove (on low) or in a microwave safe bowl in 20-second intervals in the microwave, stirring often.
  3. Once everything is melted and mixed in together, add the coconut flakes and stir until evenly coated. Scoop the mixture out and divide evenly among the muffin cups. Press down gently, allowing for a dip in the middle to make a nest shape.
  4. Freeze for at least 15 minutes, and then pop the chocolate nests out of the tin.
  5. Combine yogurt and vanilla protein. Then place a dollop of the mixture in the center of your nests and decorate with two to three blueberries. Store in the fridge.

I hope you enjoy making it as much as I loved writing about it.

Don’t forget to check out my Facebook Page and follow me on Instagram @allaboutme3181.

———————————–   Happy Reading ———————————-

Instagram: @allaboutme3181
Amazing and Cheap Stocking Stuffers Ideas for Children and Tweens


holidaytoys

Shop Amazon’s Holiday Toy List – STEM Picks

Hi There! Today, I am going to recommend some great and cheep stocking stuffer ideas for children that I found online. Please let me know if you find them helpful or your ideas for great stocking stuffers for children.

Rockee Toothbrush:

vrt-2t

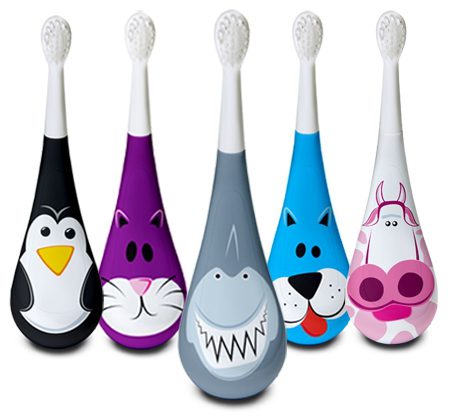
These toothbrushes rock, wobble, spin, but won’t fall down. They comes in various designs, such as shark, penguin, and comes with replaceable brush heads with soft bristles for safe brushing. The ergonomic handle fits easily in small hands. As for the price, it cost $12.99 at Amazon

Flying Gliders 7.87 in. Party Bag stuffers:

511jalh0qil

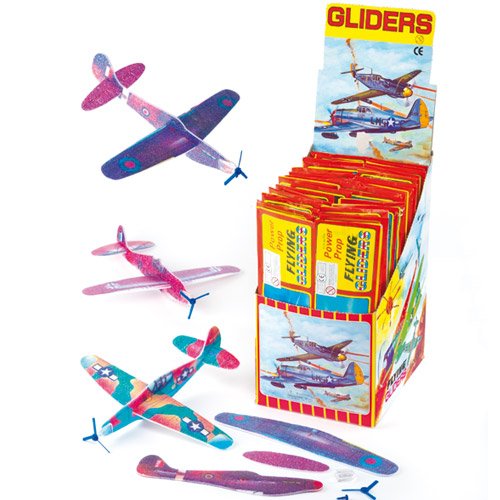
Designed in the United Kingdom, these gliders are great stocking stuffers for your little ones. They can put them together and start their own flying adventure. They come in in assorted design and great for ages 3 and older. The price is cheap, costing only $3.71 at Amazon. However, in order to receive them before Christmas you need to order them now.

Winter Instant Snow:

ccwint-01__80327-1477496592-1280-1280

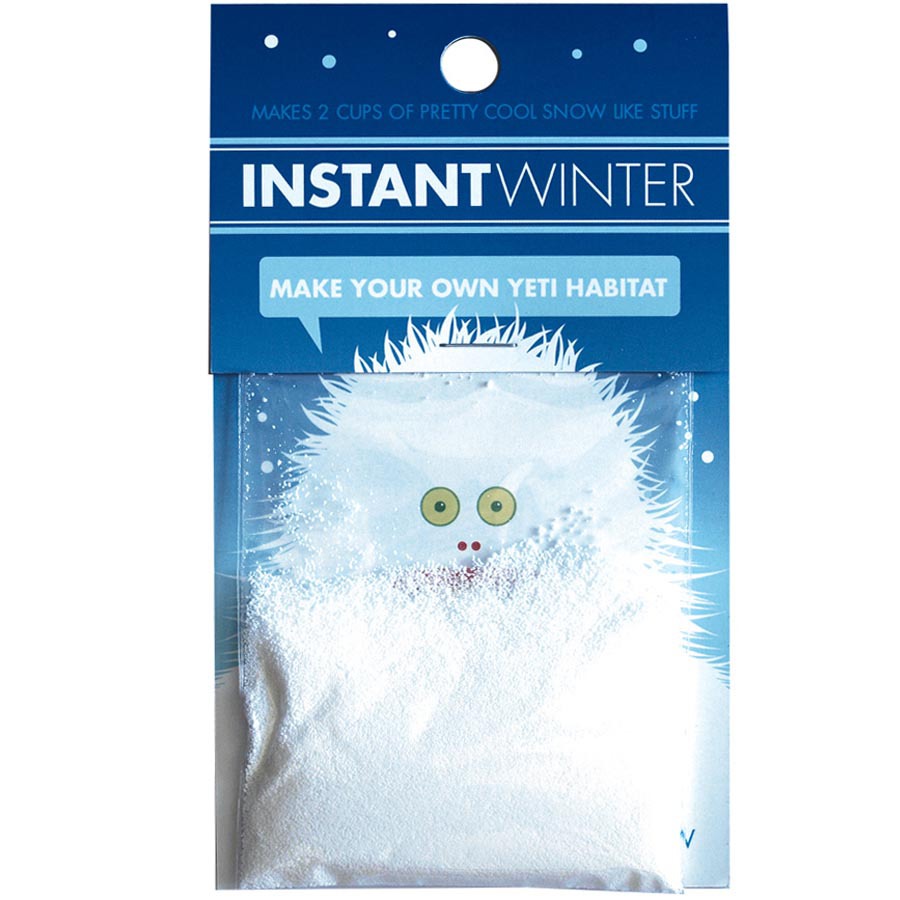
Who doesn’t like white Christmas. Now you can have the power to give that your little one with the Instant Winter Snow. Just add water to this mixture and you’ll instantly create your own yeti habitat. It makes two cups of cool snow-like stuff with interesting water absorbing properties. It is made in the USA, but does not come with enough snow to cancel school. The price is only $3.99 at Perpetual Kid.

Tube Toys:

tube%20toys_updated

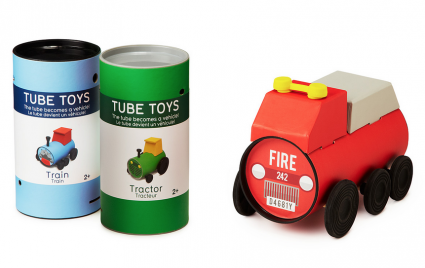
The imagination-driven push-along toys’ eco-friendly packaging transforms into the toy itself. Kids will love assembling and decorating these mini mobiles applying the included stickers, and can play with them as-is or add their own decorative flair. The smartly designed car, fire truck, tractor and train engine are made from recyclable and earth-friendly materials. Their convertible packaging transforms into the toy itself, reducing waste to a single piece of recyclable paper. These toys are available at Uncommongoods.

Dr. Seuss’s Amazing Alphabet Book:

51rfg8xkvxl-_sx367_bo1204203200_

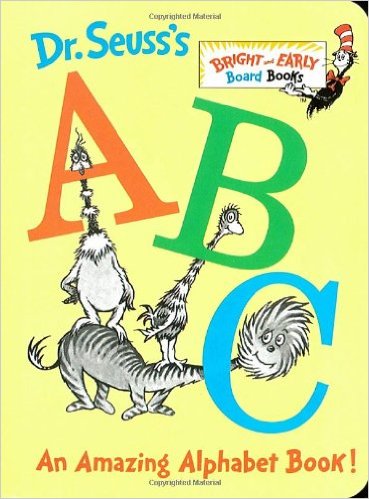
Arguably the most important subject of all time (the ABCs) meets arguably the most important children’s book author of all time (The Seuss Himself) for a little board book your kid will want to read over and over. Seuss’ zany writing style makes the letters come to life, from Aunt Annie’s Alligator to Zizzer-Zazzer-Zuzz and everything between. With Dr. Seuss as your guide, learning the alphabet is as easy as A, B, C.  The board book is available at Amazon for $3.34.

Piggy Paint Nail Polish Sets:

pop-of-pixie

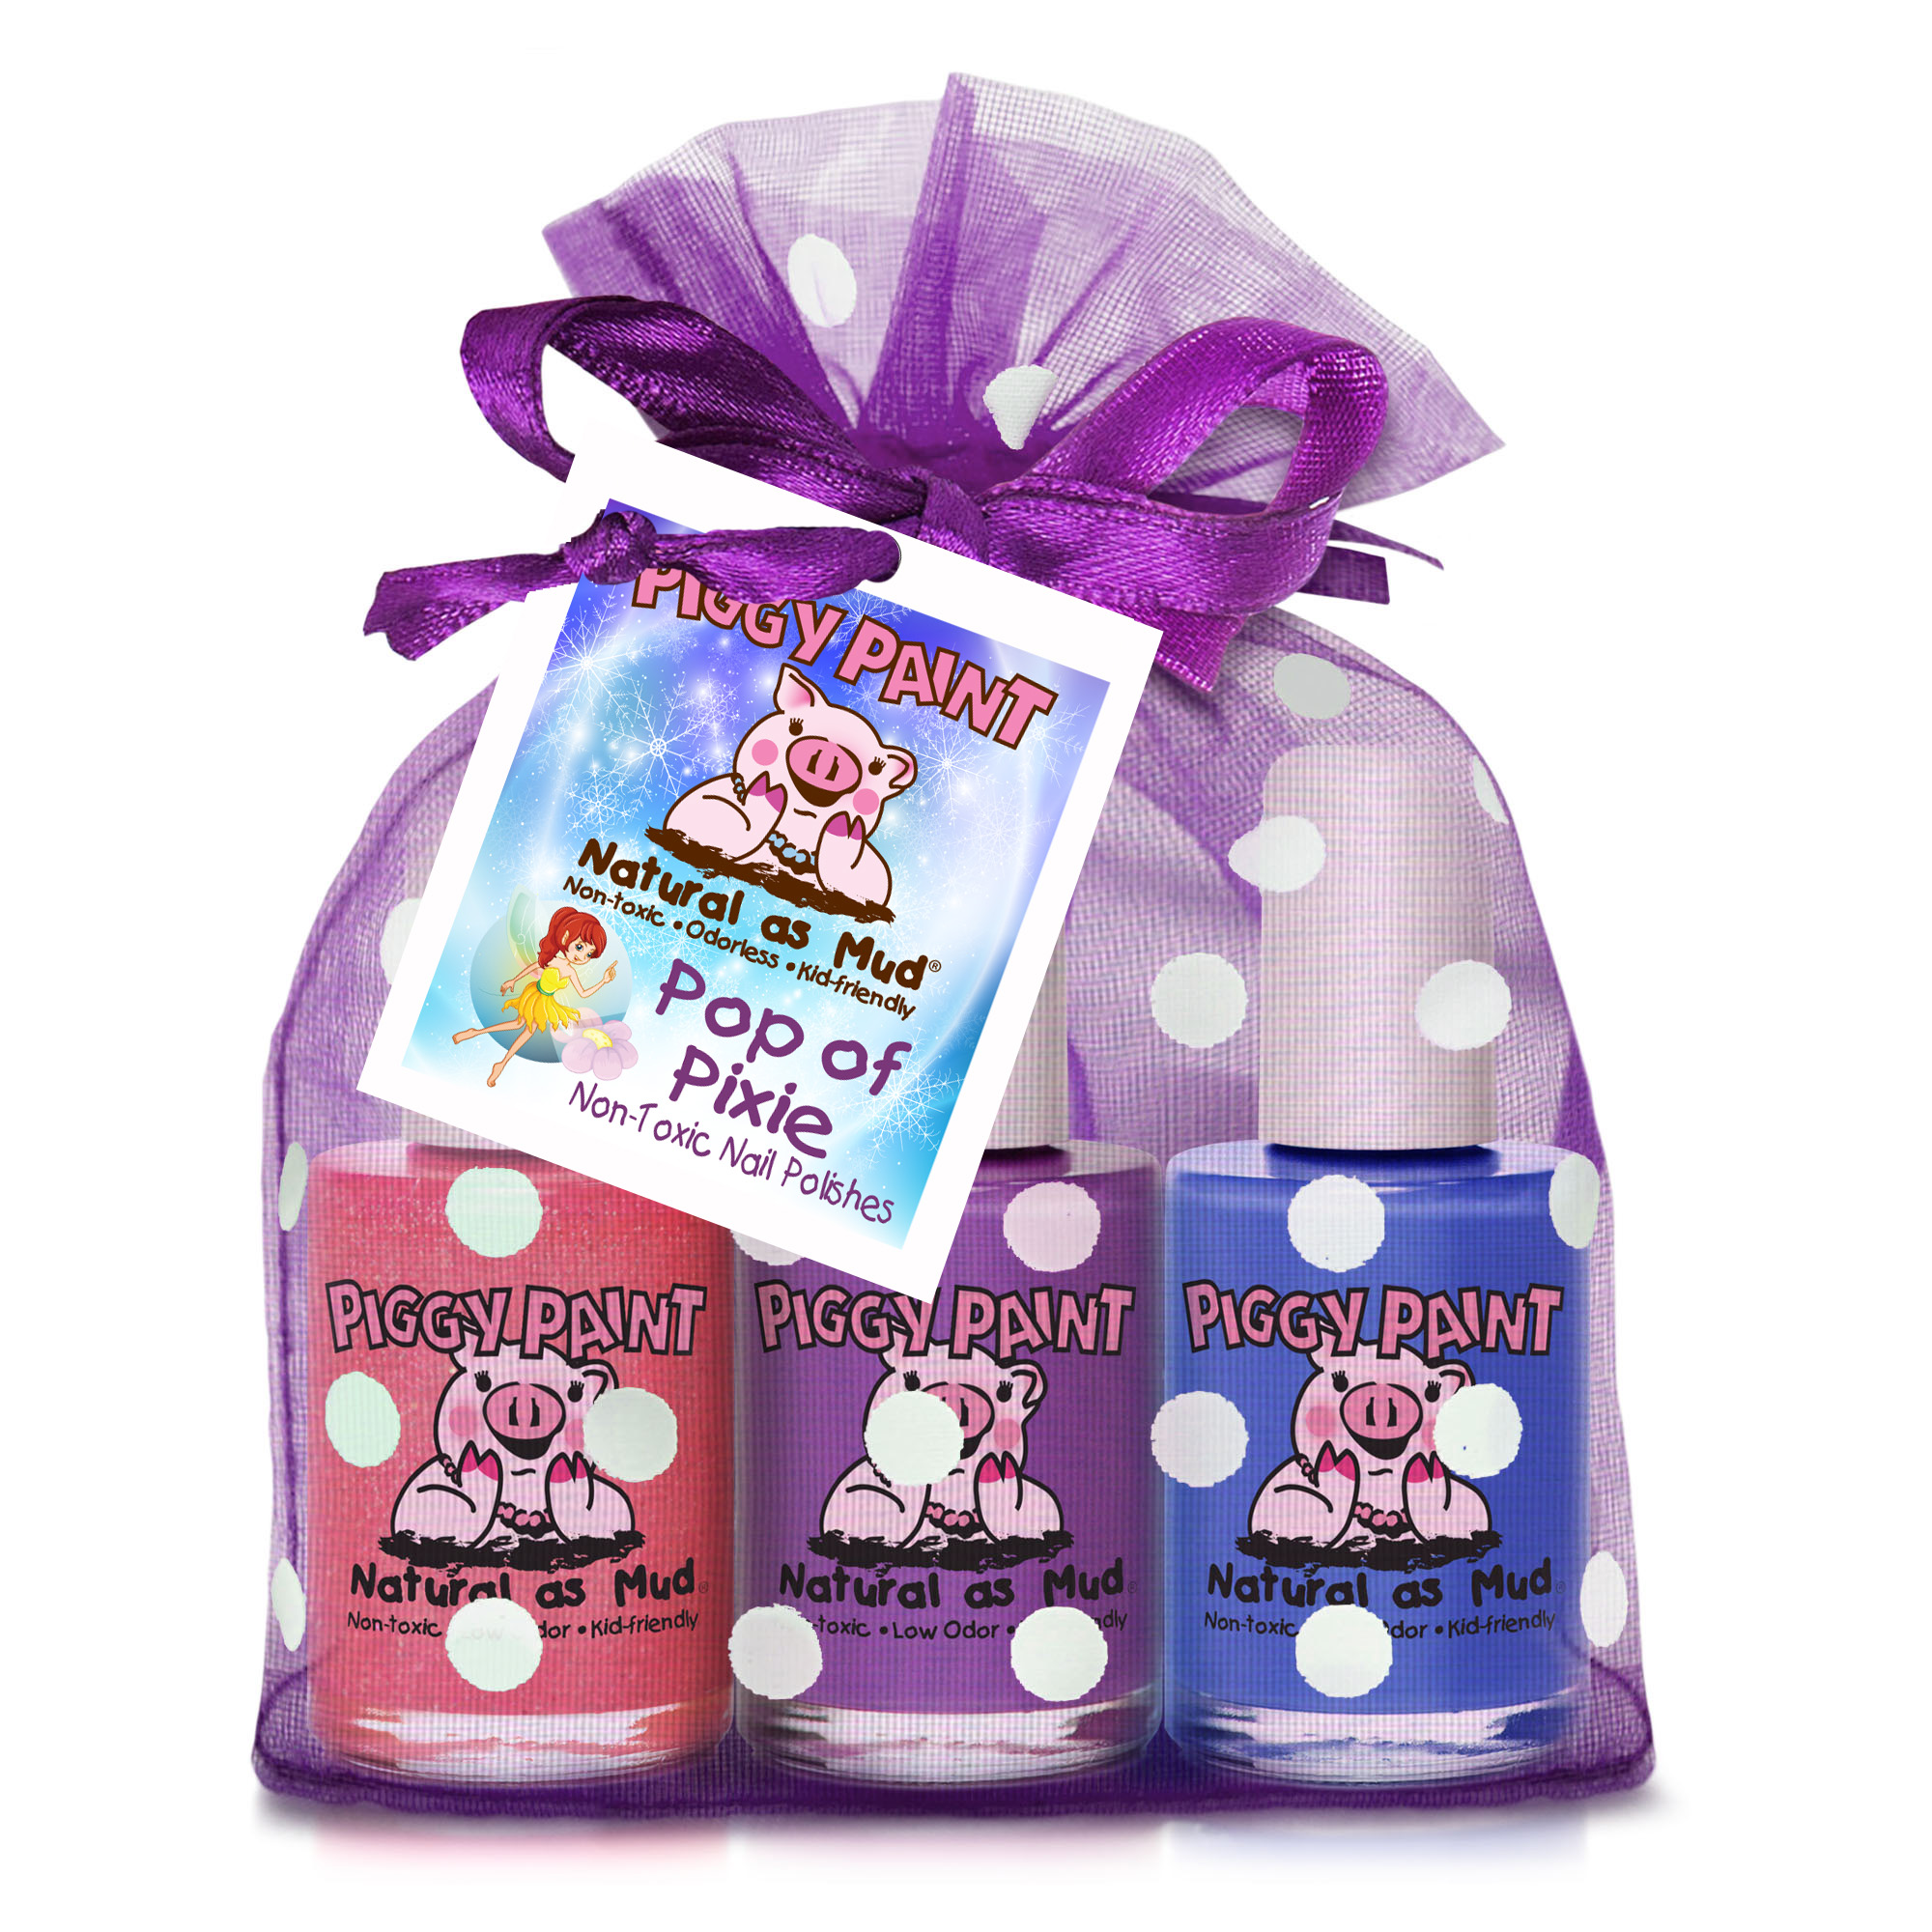
These festive and fem hypo-allergenic polishes are non toxic, odorless and sure to please any little diva. The above set contains Shimmy Shimmy POP ( pink glitter ), Tutu Cool (bright purple) and Blueberry Patch (bright blue). The set is available at Piggy Paint for $22.50.

Touch Screen Gloves:

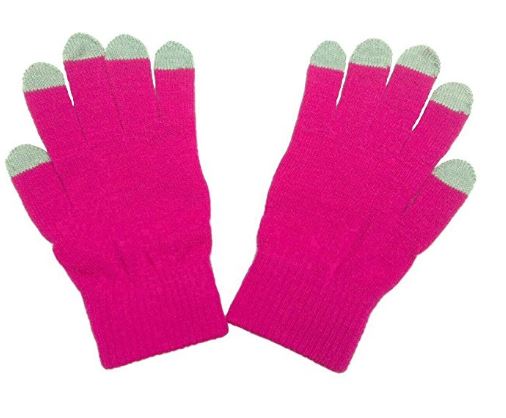
gloves

With with winter lurking around, your older kids, teens, and tweens will thank you for this. I know I myself hate taking off my gloves in the winder just to use my smartphone. These gloves work with iPhone, iPad, androids and all touch screen phones and GPS.  They are available at Amazon for $8.95. You can also get colorful ones for $7.99 at Amazon.

Fuzzy Socks:

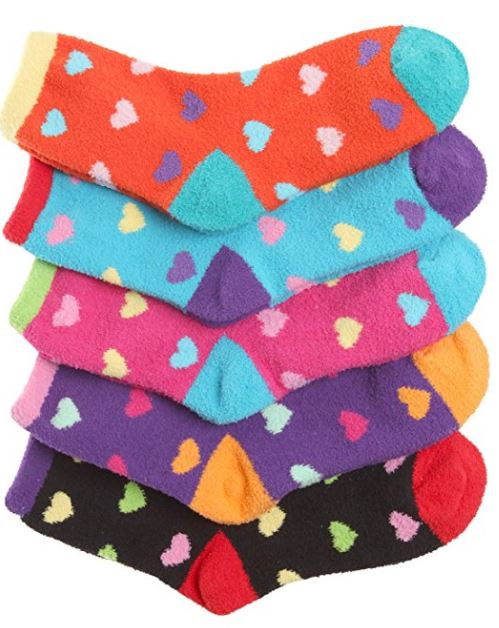
fuzzy-socks

You older kids will love these wonderful socks. Well, even your adult family members will love them as well. These very soft and plush socks made of premium Microfiber provide maximum coziness for your feet keeping them warm, soft and sweat-free. These socks are great for women’s shoe size 6-10 are available at Amazon for $18.99. You can get the little girl’s version for $13.99 at Amazon.

Phone Charger Keychain:

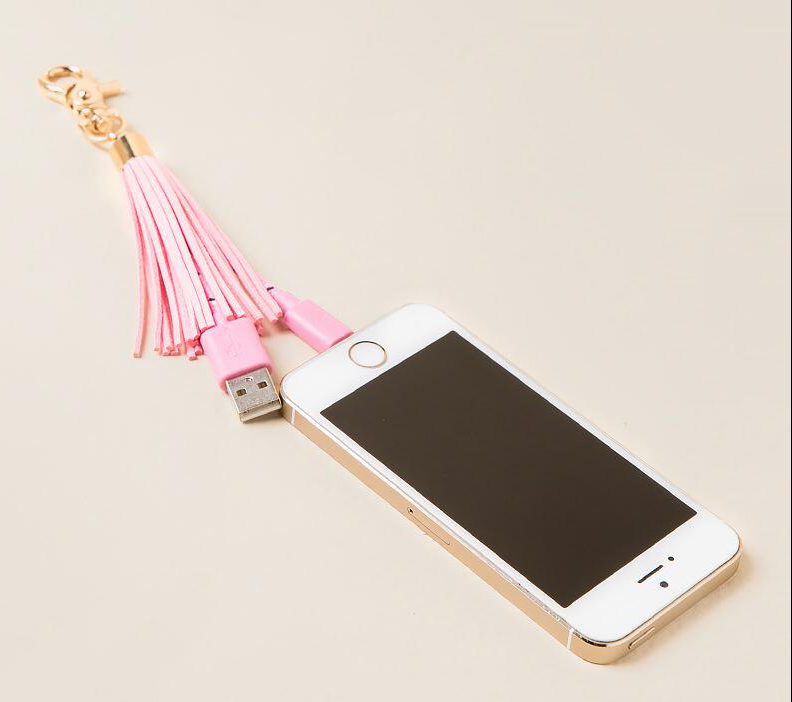
keychain

These phone charger keychains are great stocking stuffers for your teen and tweens. The entire keychain measures only 6.25 inches, and only cost $10 at Francescas.

Micro charging bracelets:

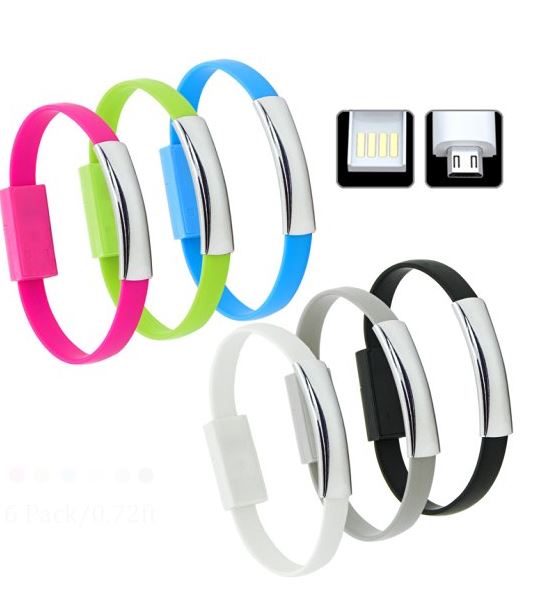
usb-bracelet

Teens love power, literally, especially when it comes to their devices. This is the gift that keeps on giving and by letting them power their phones with these USB so they never get the dreaded dead battery. Unhook the bracelet and plug into phone or device and the other end into a laptop, desktop, power bank, or USB wall charger. You can get a pack of 6 for $8.09 at Amazon.

Gift Cards:

With all the great gift ideas why am I bringing gift cards? Actually, this is for the tweens and teens in your life. They would love to get gift cards from store such as Amazon, Starbucks, iTunes, GameStop). Nothing says I love you to a tween or teen than a gift card to their favorite places.

Let me know if you find these ideas helpful. Also, please share your creative stocking stuffer ideas. Don’t forget to check out my Facebook Page and follow me on Instagram @allaboutme3181and Twitter @allaboutme3181

———————————–   Happy Reading ———————————-

Instagram: @allaboutme3181

Marc Jacobs – Up All Night Five-Piece Petites Le Marc Lip Crème Collection


s1838127-main-zoom

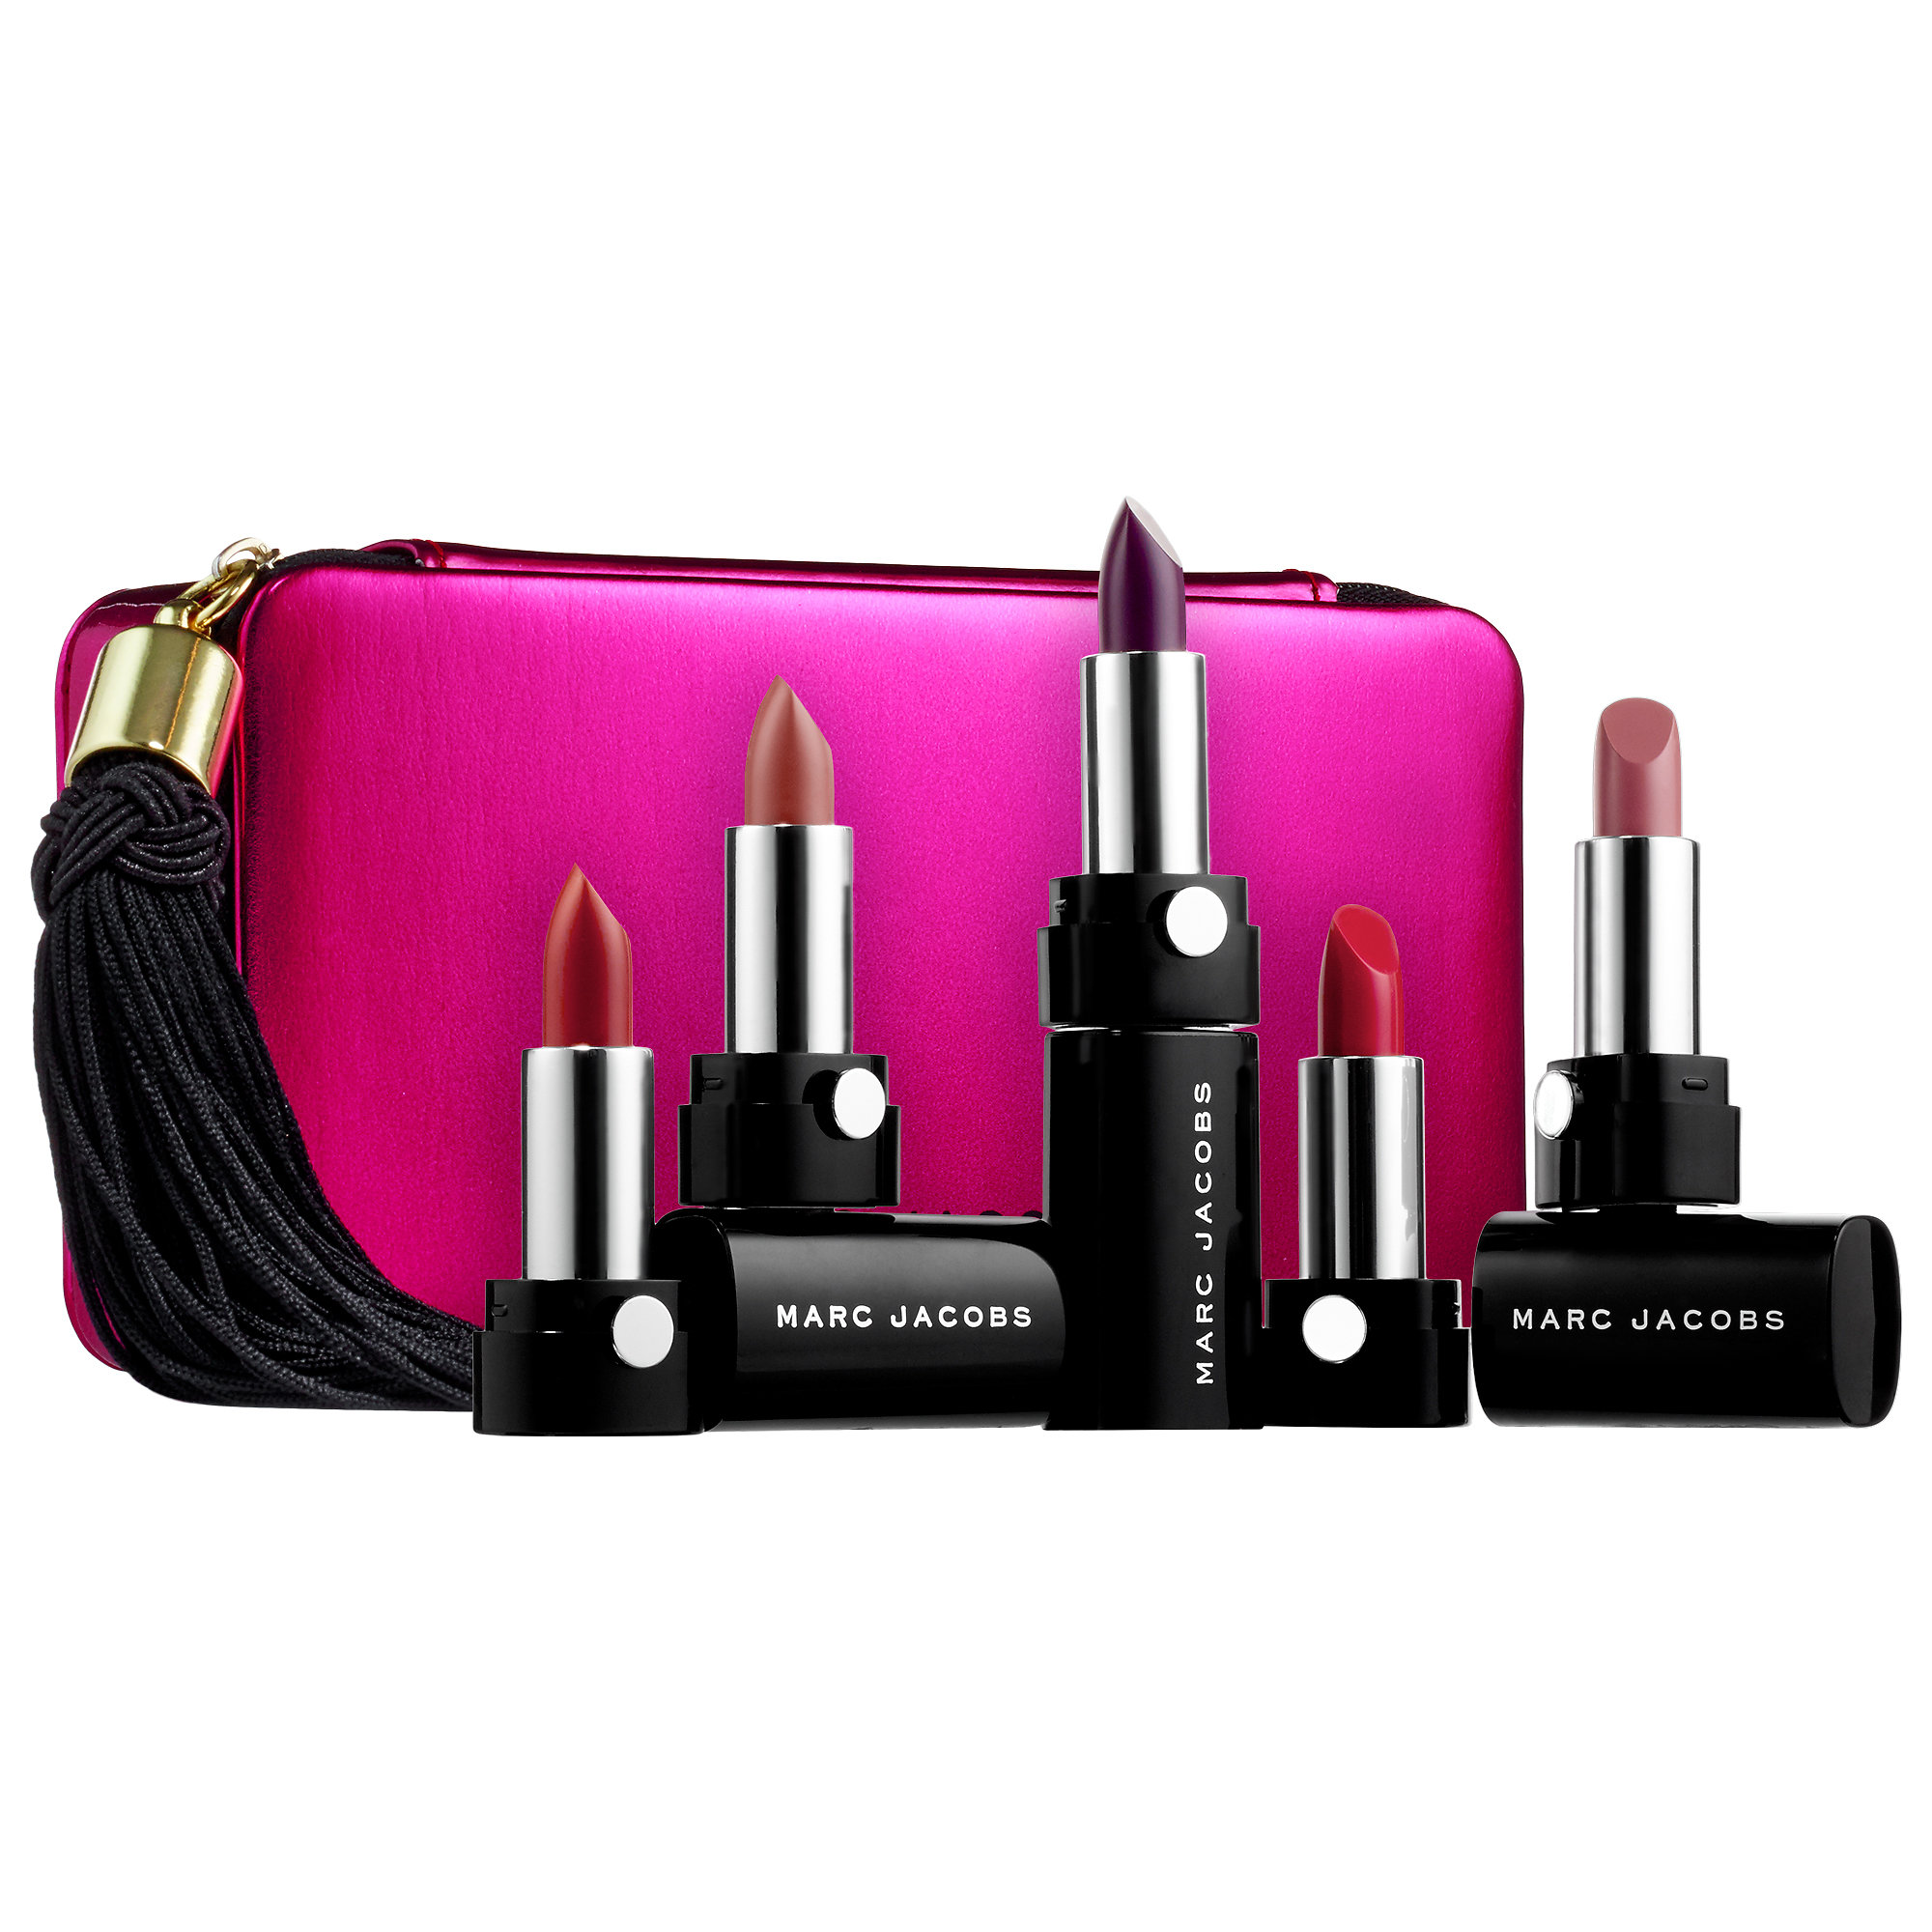
Hi There! Now that Christmas is starting to slowly lurk behind us I am going to recommend some Christmas gift ideas in the next several weeks. Today, I am going to recommend another great item for Christmas gift. It is the limited edition Up All Night Five-Piece Petites Le Marc Lip Crème Collection ($49) from Marc Jacobs and can be found at Sephora. Let’s break down this small but powerful gift set.

p411245-av-03-zoom

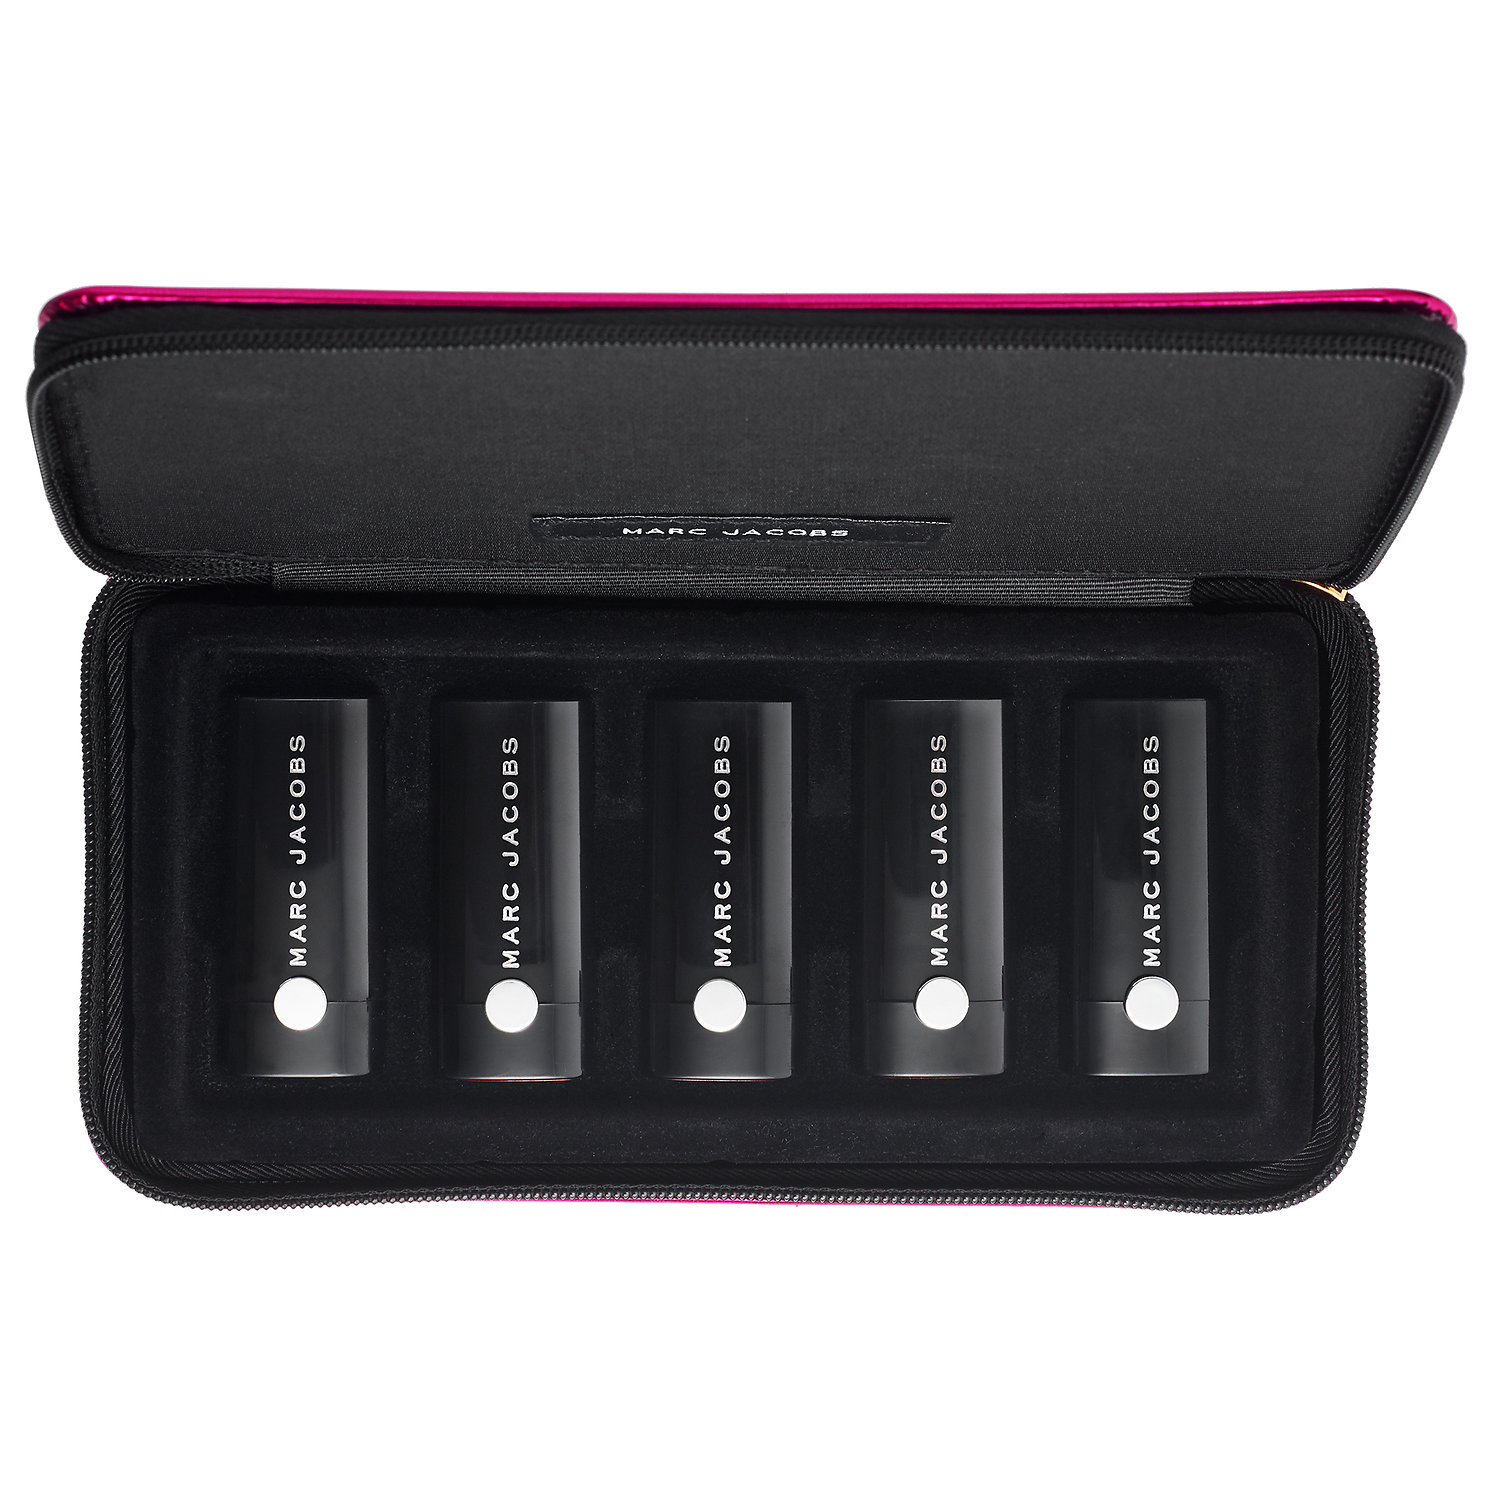
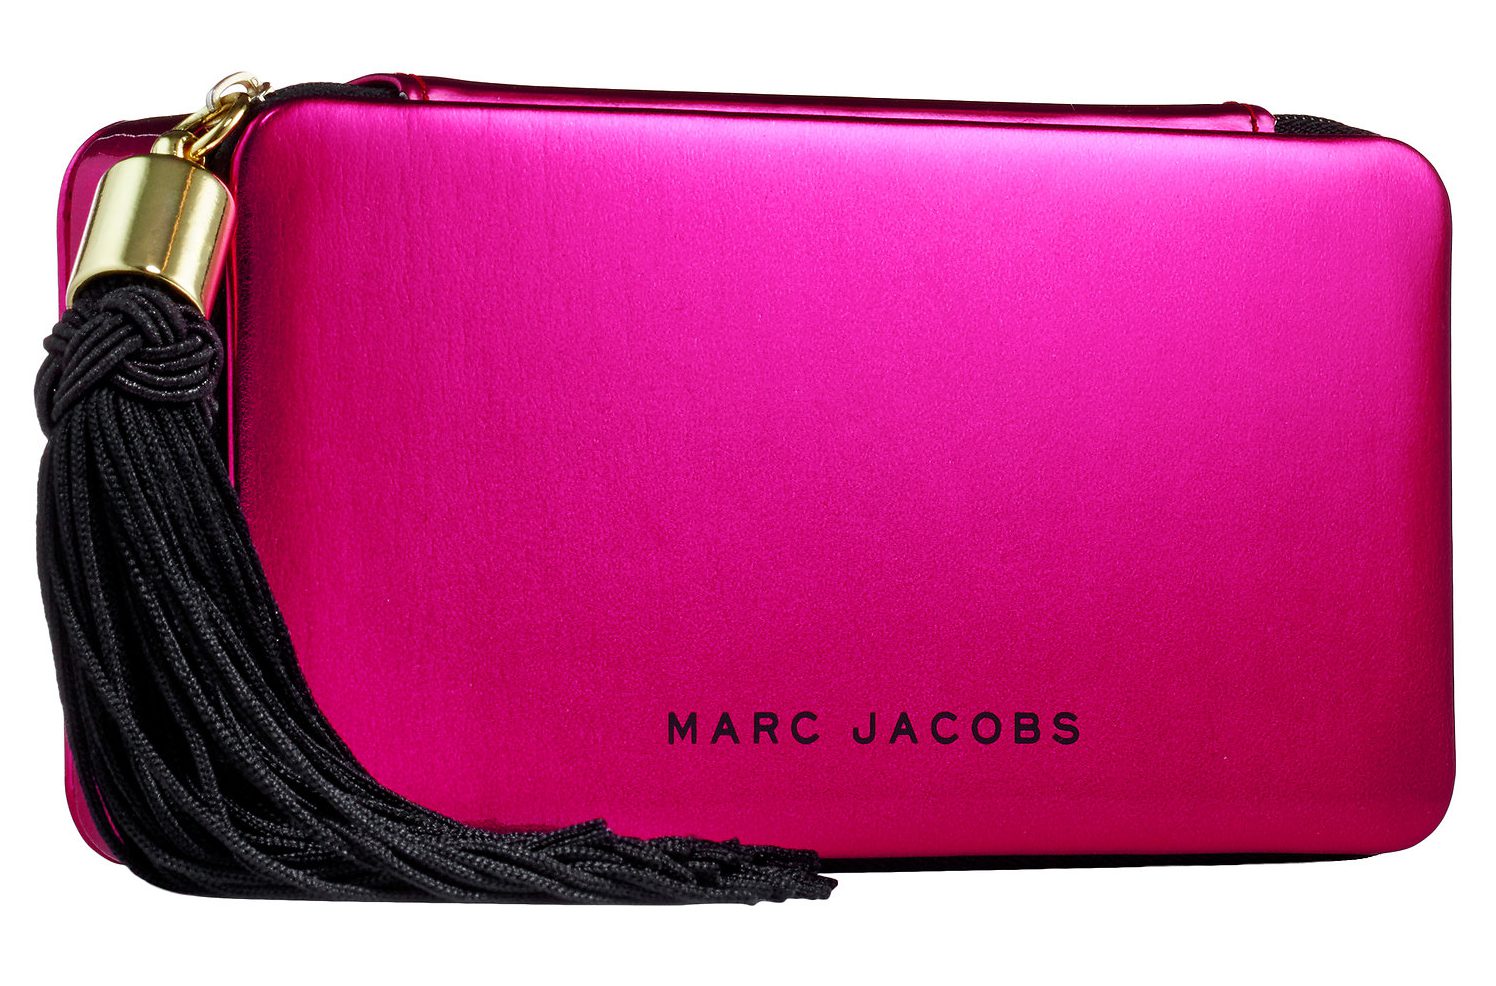
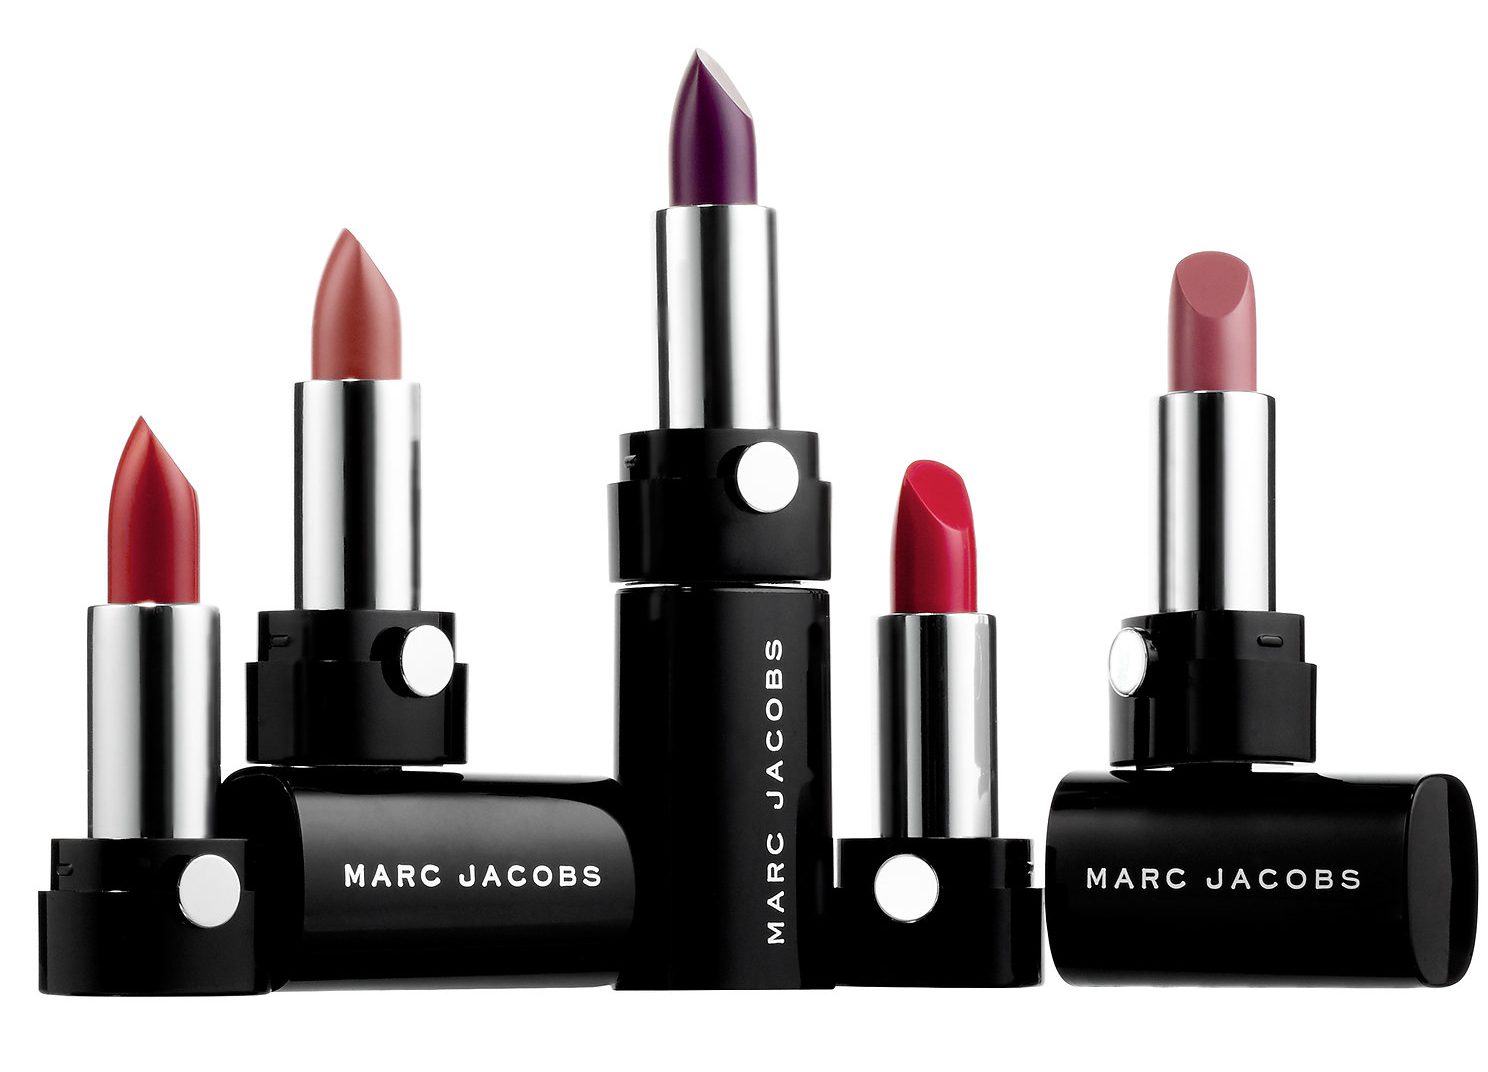
Description: This is a Marc Jacobs Holiday collection and is all about last night, containing Marc Jacobs’ revolutionary 10-hour wear lipstick that covers your lips in buttery, creamy vibrant pigment in one sensual swipe. Experience unprecedented color payoff from their concentrated color-boost pigments that are triple-milled and steeped in hydrating ingredients, to give your lips ultimate long-lasting color and moisture for a plumped appearance that lasts. These five, rich Le Marc Lip Crème shades are tucked away into a Marc Jacobs metallic, hot pink vegan patent leather pouch. Zipped with a black swinging tassel, this pouch is so elegant, it could double as an evening bag. The collection contains bestselling nudes, reds, and a plum. The lipsticks are formulated without parabens, sulfates, and phthalates.

p411245-av-02-zoom

Verdict: These lipsticks are very moisturizing and long wearing. I already have the full size of Slow Burn which I have officially deemed as my perfect nude.  I like Oh Miley because of classic reds. Miss Scarlet is a deep vampy red, really nice for a bold lip. Scandal is a bit darker than I wanted but still a nice purple color. The case is cute, and the inner liner can be pulled out so you can use the clutch for something else. Really happy with this purchase. It is perfect for my make up bag and the colors are spot on for the fall/winter season. I am not a big fan of  matte lipsticks. These lipsticks are quite buttery. long lasting, and hydrating – the best alternative there is to matte. I also have last year’s Marc Jacobs lipstick set in the black patent leather bag. I will continue to buy his mini lipstick sets as long as he continues to make them. My final verdict, this is a great gift for Christmas or just to indulge yourself.

p411245-av-01-zoom

Don’t forget to check out my Facebook Page and follow me on Instagram @allaboutme3181and Twitter @allaboutme3181

———————————–   Happy Reading ———————————-

Instagram: @allaboutme3181

Great DIY Halloween Costume Ideas


Happy Halloween everyone! Hope your Halloween is as scary and spooky as ever. Today I wanted to share with you some last minute Halloween costume ideas that I found online. Hope you enjoy it I much as I did writing about it.

Ice Cream Costume: 

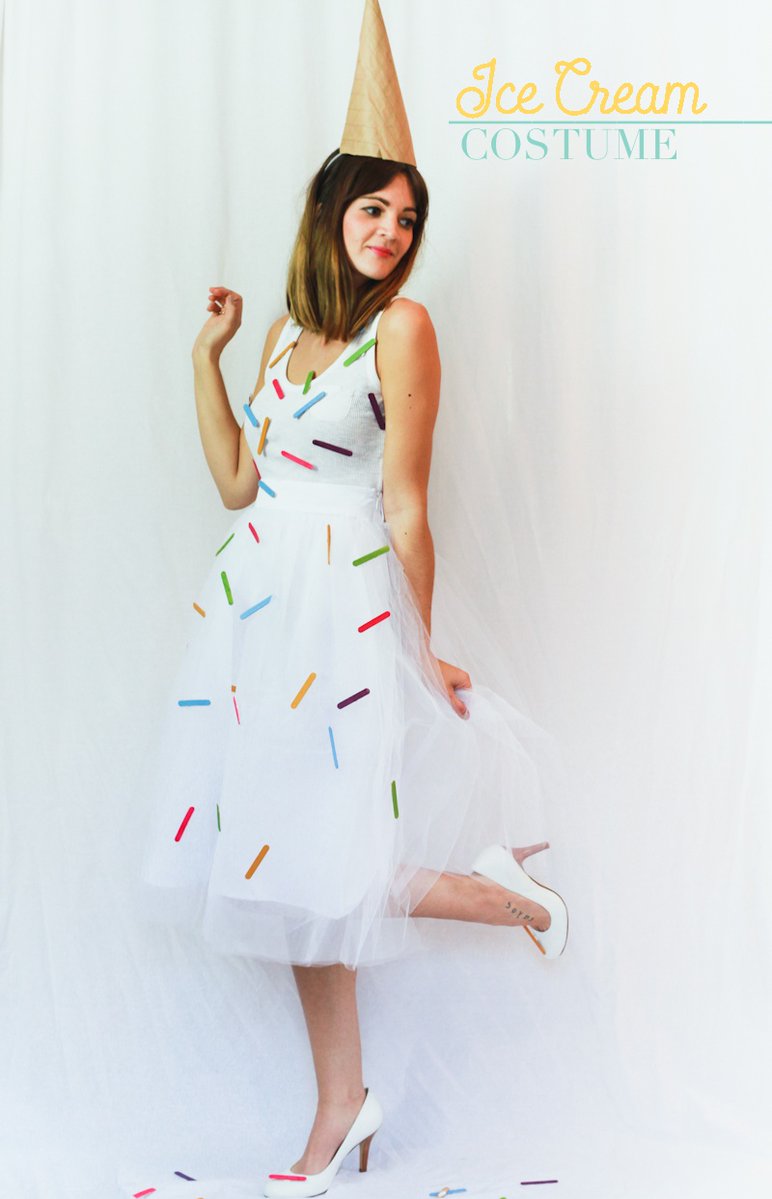
ice-cream

Treasures and Travels came up with this wonderful costume idea that that colorful and easy to put together.

To recreate this upside down Ice Cream Cone Costume you will need:

  1. White Tulle Bloom Skirt
  2. Mini Popsicle Sticks
  3. White Tee or Tank
  4. White Shoes
  5. Brown Paper
  6. Bobby Pins
  7. Colored Paints
  8. Safety Pins
  9. Hot Glue Gun

Cone: Cut a sheet of brown paper in half diagonally and roll into the shape of cone, secure with tape. Attach the cone to your hair using bobby pins, poking a hole threw each side of the paper cone and securing to your hair – or – use hot glue to glue the cone to a headband.

Sprinkles: Paint the mini popsicle sticks an assortment of bring colors and use hot glue to secure a safety pin to the back of each sprinkle. Attach the sprinkles to your outfit using the safety pins.

Spider Web Costume:

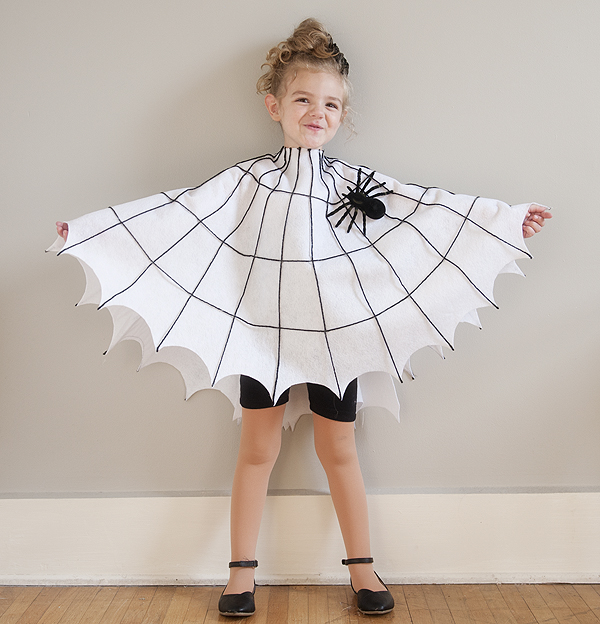
diy_spider_web_costume

Pretty Plain Janes came up with this wonderful costume idea. This costume doesn’t require any sewing skill and is very easy to put together.

  1. 1 1/2 yards of 72″ felt (Used white here but black would work too – just make sure you purchase opposite yarn color)
  2. black yarn
  3. plastic spiders
  4. You will also need black shoes, something for you child to wear under costume, safety pin and a bobby pin or clip to attach spider for hair to.

Instructions

  1. Fold your felt in half length wise.
  2. Take a pen and tie a piece of yarn measuring 24″ long around it. (This measurement is for a 5T size – adjust by a few inches for smaller or larger.) Place end of yarn not attached to pen in the center middle on folded side of felt. Stretch the pen the length of the yarn and mark a half circle on your felt holding onto the yarn end in the center middle the whole time.
  3. Take a large bowl and trace half circle sections on the rounded line that you marked with the yarn and pen.
  4. Take the same large bowl and place on middle of fold about 2 1/2″ in and trace that half circle (this will be the neck hole).
  5. Now cut following the guide of all the half circles you traced (including the neck).
  6. Unfold the felt and cut a slit up middle of one side only. (This side will be the back.)
  7. Grab your yarn and place one end on point of scallop and run the other all the way up to the neck – cut to length. Do this for every point around the “poncho”. You can space out the neck ends more evenly once you have them all cut to size. Once everything is spaced evenly hot glue each end.
  8. Now take the yarn and start at one open end of cape and run it lengthwise all the way around to the other open end, hot gluing when it intersects each yarn piece from step 7. I did this 3 times, which means I eyeballed the cape being divided by 4 as I was running the yarn around.
  9. Attach a spider to the cape using hot glue. Also attach one to a bobby pin or clip for the hair (if using).
  10. Dress your spider! You can hold the back closed with a bobby pin or hot glue some ribbon on each side and tie shut.

You can make the “web” with puffy paint as well. I am not a huge puffy paint fan so yarn it was for me. You could also get fancy with gems or sparkly embellishments of any sort. A fly would be fun too (I couldn’t find one unfortunately.)

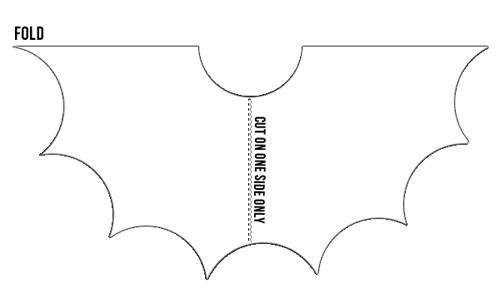
Here is a helpful guide for the spider web poncho:

diy_spider_costume_3a

Spooky Spider Costume: 

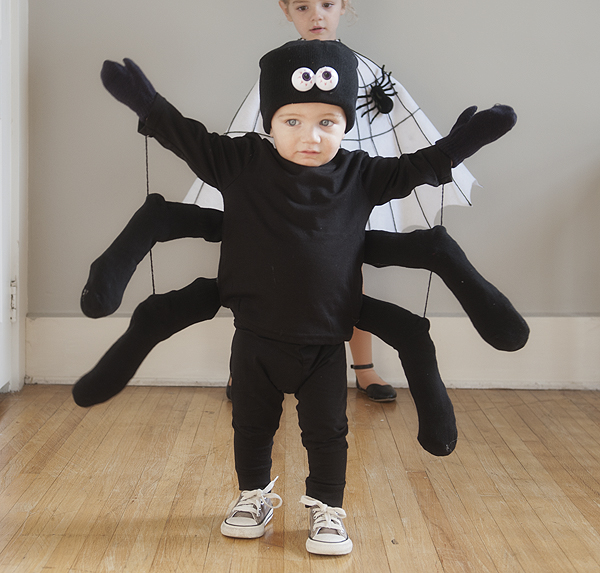
diy_spider_costume_1

Pretty Plain Janes again came up with this wonderful costume idea. To create this costume you will need.

  1. black long sleeve shirt
  2. black stocking cap (found mine at a dollar store)
  3. black women’s socks (the kind that have the “L” shape)
  4. 2 eyeballs (found mine at a dollar store
  5. black mittens (dollar store again)
  6. gift tissue, plastic bags or newspaper for stuffing
  7. a little bit of black ribbon or yarn
  8. You will also need dark pants (black works best but dark denim could work too), shoes, hot glue gun and glue for it.

Instructions

  1. Stuff each sock with tissue, plastic bags, paper or whatever you have that will stuff a sock. I used one tissue paper for the foot of the sock and another for the part that goes up the leg.
  2. Hot glue (or sew) each sock to back of shirt making 4 “legs”.
  3. Attach each “leg”, starting with the arm of the shirt (because that’s a leg too), by taking ribbon or yarn and hot glueing it to the back of every limb. I left about 4″ of space between each leg.
  4. Take 2 eyeballs and attach to front of the hat with hot glue.
  5. Dress your spider (don’t forget the mittens)!
  6. To make this costume extra sturdy you could sew instead of hot glue. Would be a good idea especially if you have a little one who might tug at the legs.

DIY Queen Bee Costume:

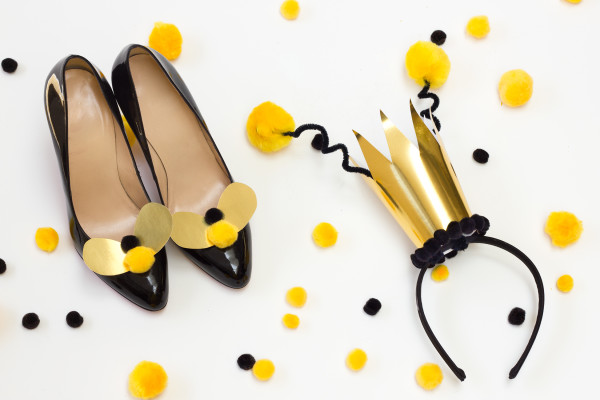
diy-queen-bee-halloween-costumediy-queen-bee-halloween-costume3

  1. This costume you can you actually put together in the last minute, courtesy of Studio DIY. The detail picture instruction can be found at ehow.
  2. To create this imaginative great costume you will need:
  3. Gold metallic scrapbook paper or card stock
  4. Yellow and black pom poms
  5. Black pipe cleaners
  6. Shoe clips
  7. Headband
  8. Hot glue
  9. Scissors

Instructions:

  1. To make the crown, print out the crown template and cut it out. Trace the template on the back of gold paper and cut. Glue together to form a crown, using hot glue.
  2. Put a dot of hot glue on a large yellow pom pom and attach it to a black pipe cleaner, pinching the pom pom around the pipe cleaner to cover the end. Repeat to create a second antennae.
  3. Twist another pipe cleaner onto the bottom of the antennae to extend the length if necessary.
  4. Wrap the pipe cleaners and around the headband to secure the crown. You can add a dot of hot glue, if desired, for extra security.
  5. Glue small black pom poms around the base of the crown.
  6. To make the shoe clips, fold over a small piece of gold paper and draw a wing shape along the fold. Cut out.
  7. Hot glue the wings to the shoe clips, leaving the wings creased in the center.
  8. Add a large yellow pom and a small black pom along the center fold of the wings, securing with hot glue.
  9. Pair your crown and your bee-dazzled shoes with black and white stripes and a yellow skirt, and you have a buzz-worthy costume for all your Halloween festivities!

Mary Poppins Costume:

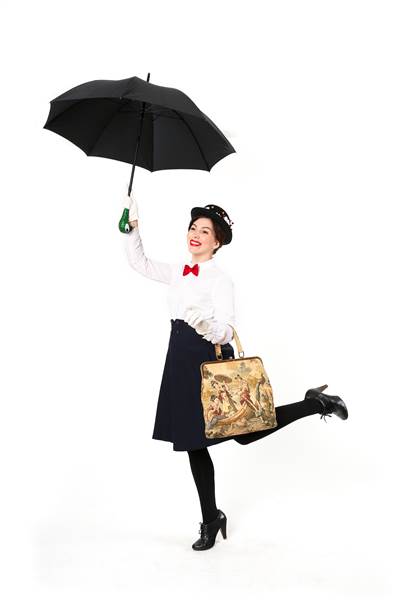
mary-poppin

Just a spoonful of sugar … Ok, you might need a little than that. To recreate this DIY Mary Poppins costume, you only have to find some items from your closet and a few key accessories.

You will need:

  1. White blouse
  2. High-waisted black skirt
  3. Black tights
  4. Black pair of heels
  5. Red ribbon
  6. Large purse
  7. Umbrella
  8. Black hat
  9. Few flowers

Instructions:

  1. Tuck a white blouse into a high-waisted skirt with a full or a-line silhouette; wear both over tights and a pair of heels.
  2. Tie a red ribbon in a bow around the collar of your blouse.
  3. For accessories, carry a large purse and an umbrella, and stick a few flowers in a black hat with a round brim.

Wicket Witch Costume:

wicket-witch

This costume is actually courtesy of me that I put together at the last minute last year with things in my closet. The only thing that I bought was the witch hat. This what I used to create the costume:

  1. Lace maxi dress. (I got mine from Forever 21 a while ago for $20+. You can get something similar at forever 21 for less then $25 or less than $28)
  2. Witch hat (I got mine at target for $6. You can get similar ones)
  3. Statement necklace (I wore my favorite Amrita Singh’s Reversible Bib statement necklace).

Instructions

  1. Wear your lace dress
  2. Put on your witch hat
  3. Put on your statement necklace

You are now a stylish witch to party like crazy.

Hope your Halloween is fun and spooky at the same time.  Don’t forget to check out my Facebook Page and follow me on Instagram @allaboutme3181.

———————————–   Happy Reading ———————————-

Instagram: @allaboutme3181
Halloween Treats


heathyhalloweenparty

It’s almost Halloween time! When you think that the election  could not get scary enough,  the spooky day that can lead to tooth decay is lurking behind us. Why not make Halloween fun and healthy all the inner kids in us. I found some great recipes and wanted to share them with you,

Octodogs:

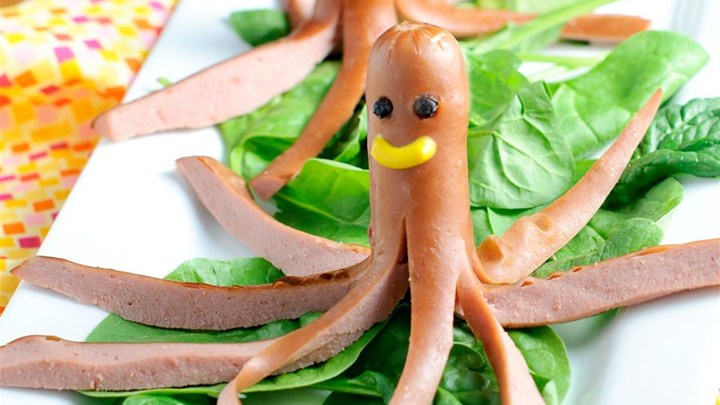
octadog

This is a fun little project that can be done with kids. It only takes few minutes to make.

Ingredients:

  1. 6 hotdogs (I use Applegate Farm’s the Great Uncut Beef Hotdogs – 110 cal,  Trader Joe’s Uncured Chicken Hot Dogs – 60 cal, Applegate organic turkey frank – 60 calories, Lightlife Foods’ fat-free Smart Veggie Dogs – 45 cal).
  2. Romaine Lettuce leaves.

Instructions:

  1. Bring a pot of water to a boil.
  2. Cut hot dogs in half. To make the ‘legs’ of the octodog, make 3 cuts on 1 side of each hot dog, leaving about 1/3 the rounded top of the hot dog for the ‘head’. Turn hot dog over and make 3 more cuts, so you have 8 ‘legs’.
  3. Place the octodogs in the boiling water until cooked through and the ‘legs’ curl up, about 1 minute.
  4. You can use sesame seeds or bits of nori (dried seaweed) to create little faces on the octodogs if you wish. Use different sizes of hot dogs to create different sized octodogs! I also add relishes and diced tomatoes to add

Silly Apple Bites

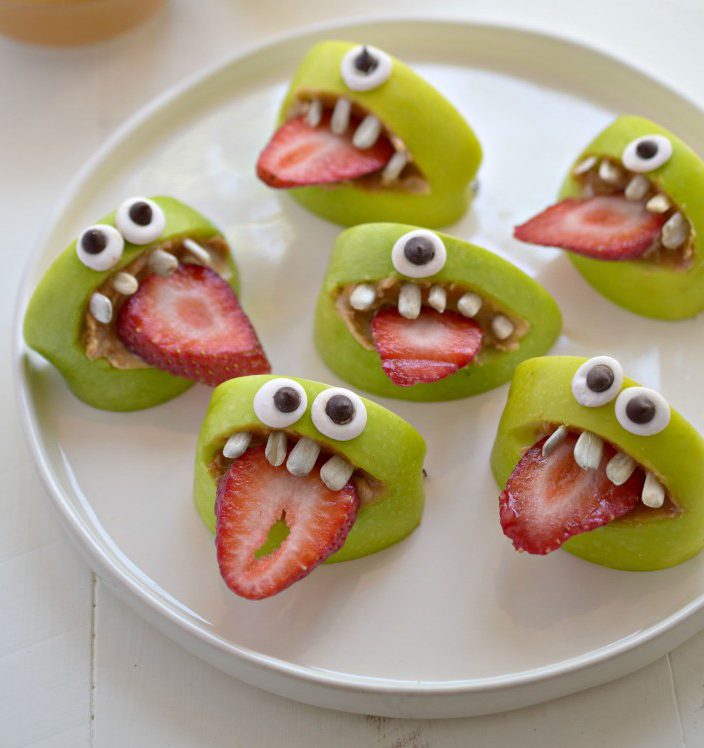
silly-apple-bites

This is another fun little project to do that is healthy and is delicious.

Ingredients for Googly Eyes:

  1. 1 c. powdered sugar
  2. 1 tsp. cornstarch
  3. 1 Tbsp. corn syrup
  4. 2 tsp. nondairy milk
  5. ¼ tsp. almond extract (or vanilla extract)
  6. mini nondairy chocolate chips

Instructions for Googly Eyes:

  1. Whisk together the powdered sugar and cornstarch. Add the remainder ingredients except for the chocolate chips and mix until combined. It should be a thick paste at this point.
  2. Place into either a piping bag or Ziploc baggie and pipe dots into one row onto a baking sheet lined with wax paper. Gently top each dot with the mini chocolate chip–you don’t want to wait too long to place the chocolate chip in the middle or it will set.
  3. Repeat until all the paste is gone.
  4. Allow the googly eyes to set for at least 24 hours on your counter.

Ingredients for Apple Bytes:

  1. 2 green apples, each quartered
  2. sunflower butter
  3. 32 sunflower seeds
  4. 2-3 strawberries, sliced
  5. 1-2 homemade vegan googly eyes per apple bite

Instructions for Apple Bytes:

  1. Cut the middles out of each quarter of the apple to create a mouth. Don’t worry about perfection, you are filling this gap with sunbutter anyway so if you cut too deep, you can always just cover it up and no one will know.
  2. Coat the inside of the cut gap with a filling of sunflower butter.
  3. Place 4 sunflower seeds on the top of the “mouth” for the teeth.
  4. Place 1 sliced strawberry inside the mouth for the tongue.
  5. “Glue” each eye above the mouth with a dab of sunbutter to stick.
  6. Serve and enjoy.

Witches’ Broomsticks

broomstick

Ingredients:

  1. Reduced-fat mozzarella cheese sticks (I use fat free version)
  2. Pretzel sticks
  3. Chives

Instructions:

  1. To make the broom, slice the mozzarella stick across in thirds.
  2. Use a knife or scissors to cut a fringe pattern on the lower half of the cheese.
  3. Insert a pretzel stick into the cheese, making the broomstick.
  4. Tie a chive around the top.

Hope you enjoy the recipe as much I have enjoyed making it. Have a wonderful Halloween.

Don’t forget to check out my Facebook Page and follow me on Instagram @allaboutme3181.

———————————–   Happy Reading ———————————-

Instagram: @allaboutme3181